How to perform Localization with Portable Object (PO) files in an ASP.NET Core

Portable Object files also known commonly as PO files are text based files containing the entry holding the relation between an original untranslated string and its corresponding translation. They are a substitute for resource files to perform localization of a website built in asp.net core.
Some advantages of using PO files over resource files are:
- PO files support pluralisation. I will explain it at the latter half of the tutorial.
- PO files aren’t compiled like .resx files.
- PO files work well with collaborative online editing tools.
This tutorial is a part of Globalization and Localization in ASP.NET Core. There are 3 tutorials to master it:
- 1. How to use Globalization and localization in ASP.NET Core
- 2. Globalization and Localization with Resource Files in ASP.NET Core
- 3. How to perform Localization with Portable Object (PO) files in an ASP.NET Core
Install the package ‘OrchardCore.Localization.Core’
First you need to install the package called OrchardCore.Localization.Core from NuGet.
Configuring the Website to use localization in Program class
Configuration involves adding the required services to the Program.cs. These are shown in highlighted color below:
using Microsoft.AspNetCore.Localization;
using Microsoft.AspNetCore.Mvc.Razor;
using System.Globalization;

var builder = WebApplication.CreateBuilder(args);

builder.Services.AddControllersWithViews().AddViewLocalization(LanguageViewLocationExpanderFormat.Suffix);
builder.Services.AddPortableObjectLocalization();

builder.Services.Configure<RequestLocalizationOptions>(options =>
{
    var supportedCultures = new List<CultureInfo>
        {
            new CultureInfo("en-US"),
            new CultureInfo("fr"),
            new CultureInfo("es")
        };

    options.DefaultRequestCulture = new RequestCulture("en-US");
    options.SupportedCultures = supportedCultures;
    options.SupportedUICultures = supportedCultures;
});

var app = builder.Build();

// Configure the HTTP request pipeline.
if (!app.Environment.IsDevelopment())
{
    app.UseExceptionHandler("/Home/Error");
    // The default HSTS value is 30 days. You may want to change this for production scenarios, see https://aka.ms/aspnetcore-hsts.
    app.UseHsts();
}

app.UseHttpsRedirection();
app.UseStaticFiles();

app.UseRouting();

app.UseRequestLocalization();

app.UseAuthorization();

app.MapControllerRoute(
    name: "default",
    pattern: "{controller=Home}/{action=Index}/{id?}");

app.Run();
In the above code I have specified that my website will support 3 cultures – ‘en-US’, ‘fr’ & ‘es’ i.e English US, French & Spanish, and it will be using PO files. The code services.AddPortableObjectLocalization() does this work for me.
Next, I specified the RequestLocalizationMiddleware to automatically set culture information for requests based on information provided by the client. This is done by adding app.UseRequestLocalization() middleare.
Creating PO files for French and Spanish cultures
As Portable Object files are merely text files which add from in Visual Studio. So create 2 text files on the root of your app, one for French and other for Spanish, and name then as:
- fr.po
- es.po
In the fr.po file add the following:
msgid "Hello world!"
msgstr "Bonjour le monde!"
In the es.po file add the following:
msgid "Hello world!"
msgstr "¡Hola Mundo!"
The PO files stores both the string to translate and the translated string. The syntax is:
- msgid: The untranslated string.
- msgstr: The translated string.
Here the PO files contains the translation of string called ’Hello world!’.
The ‘fr.po’ file is used if the requested culture is fr-FR, fr-CA and so on. Similarly the ‘es.po’ file is used if the requested culture is ‘es-MX’, ‘es-US’ and so on.
Reading translated values from PO files in Views
Whenever you have to localize your contents in the view then you have to make use of IViewLocalizer object. Simply inject it in your view like shown below:
@using Microsoft.AspNetCore.Mvc.Localization
@inject IViewLocalizer Localizer
Now you can simply display the translated string like:
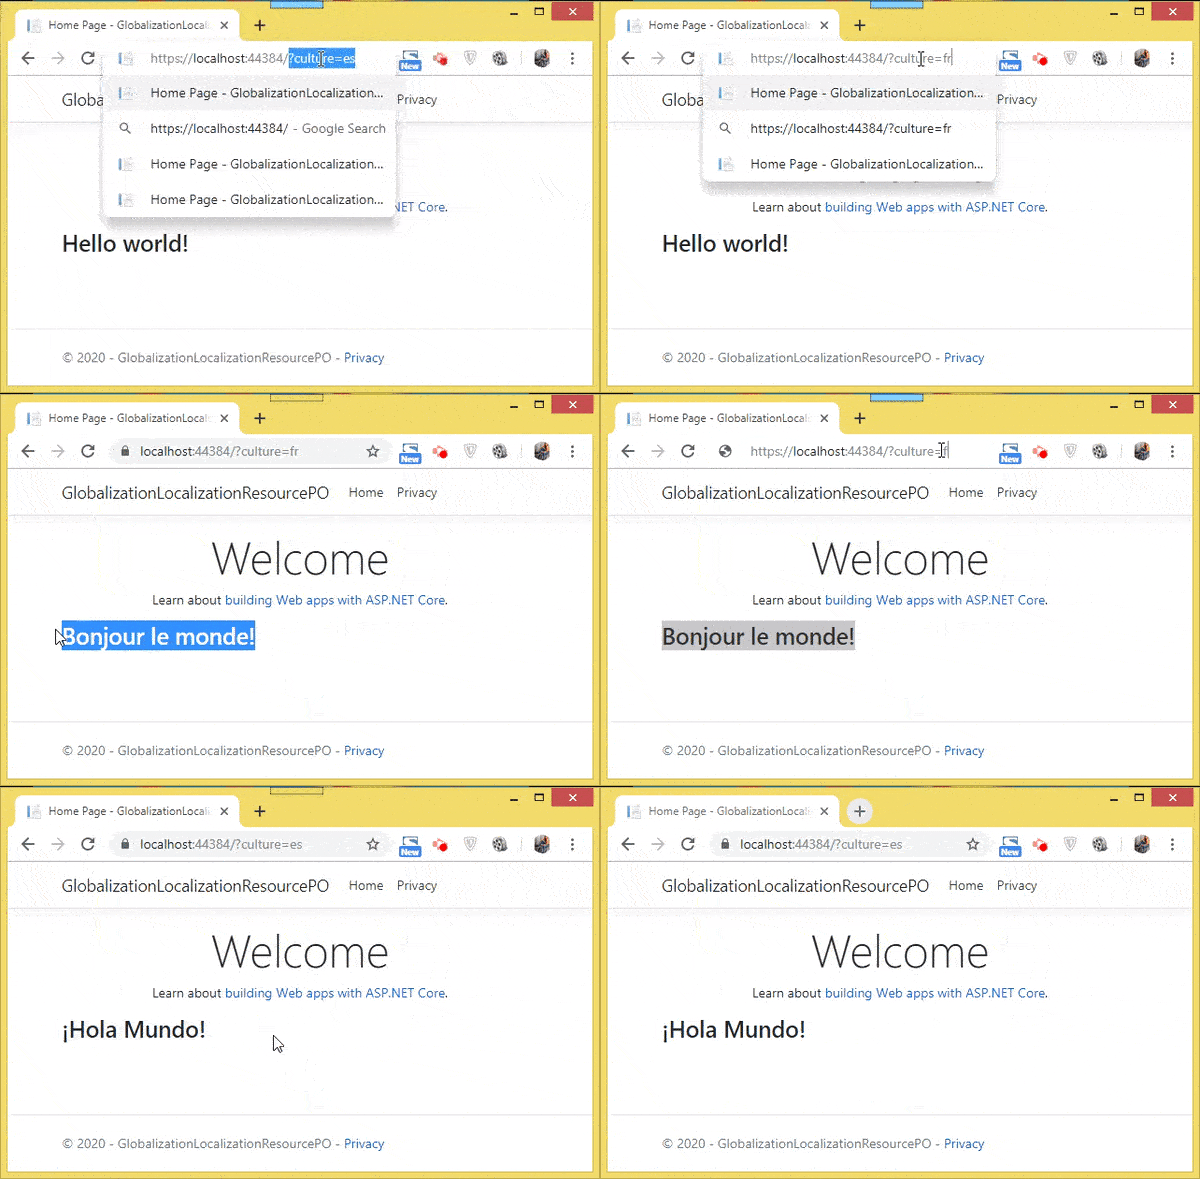
<p>@Localizer["Hello world!"]</p>You can test the working by opening the view in the browser and adding the French culture in the URL as query string – ?culture=fr. You will see the translated string of ‘Hello world!’ in your browser.
I have shown this in the below video:

Reading translated values from PO files in Controllers
You can also read the PO files content in the controller by using the IStringLocalizer object.
Use the dependency injection to get this object in the controller and use it in your action method. I have shown this in the below code:
private readonly IStringLocalizer<HomeController> _localizer;

public HomeController(IStringLocalizer<HomeController> localizer)
{
    _localizer = localizer;
}

public IActionResult Index()
{
    // reading the translated value from PO file
    string translatedString = _localizer["Hello world!"];
    return View();
}
Using Pluralization in PO files
Not all languages follow the pluralisation format of English. So pluralisation feature comes into play. Here the cardinality of one is mapped to the first plural form. Any other cardinality is mapped to the second plural form. To include plural forms of a text use msgid_plural entry in your PO file.
To see how it works, add the below texts in your ‘fr.po’ file.
msgid "There is one item."
msgid_plural "There are {0} items."
msgstr[1] "French text for first plural"
msgstr[2] "French text for second plural"
Next in your view add the below code to generated plural forms.
<p>@Localizer.Plural(1, "There is one item.", "There are {0} items.")</p>
<p>@Localizer.Plural(2, "There is one item.", "There are {0} items.")</p>
The view will display:
French text for first plural
French text for second plural
Use msgctxt entry in PO files to limit translations
The msgctxt entry is used to limit entries in PO files to certain classes or views only.
For example, when I add the below shown texts in the ‘fr.po’ file, then only the ‘About’ view will show the translated word for ‘thanks’.
msgctxt "Views.Home.About"
msgid "thanks"
msgstr "Merci"
Explanation: Here the msgctxt is set for “Views.Home.About”, and so the text translation occurs when navigating to /Home/About?culture=fr. The translation won’t occur when navigating to /Home/Contact?culture=fr.
Download all the source codes by click the below download button:
The PO file is extremely easy to use and works very well for localizing contents. I hope you liked this tutorial so give it a share, and do check other tutorials on asp.net core technology.


 Welcome to YogiHosting - A Programming Tutorial Website. It is used by millions of people around the world to learn and explore about ASP.NET Core, Blazor, jQuery, JavaScript, Docker, Kubernetes and other topics.