IdentityServer Role and Policy Based Authentication
When we want to allow users in specific roles to access certain resources then we apply role based authentication. In the same way when users satisfying a policy are allowed to access certain resources then this is called policy based authentication. In IdentityServer, both role and policy based authentications can be implemented very easily.
- ASP.NET Core Identity with MongoDB as Database
- IdentityServer with ASP.NET Core Identity and MongoDB as Database
- IdentityServer Role and Policy Based Authentication
- ASP.NET Core – Duende IdentityServer authentication and authorization with Identity
Page Contents
IdentityServer Role Based Authentication
To allow a MVC Controller to be accessible by users in a given role, we add [Authorize(Roles = "Admin")] attribute on the controller.
[ApiController]
[Route("[controller]")]
[Authorize(Roles = "Admin")]
public class BankController : ControllerBase
{
}
This controller is now accessible by only Admin role users.
I will now implement IdentityServer Role Based Authentication on the same project which I created on my previous tutorial IdentityServer with ASP.NET Core Identity. Check the above tutorial to find the link to my GitHub repository.
To Implement Role Based Authentication in IdentityServer, you have to make sure that the role claims of the user must come in the access token. For this you have to add UserClaims with value “role” under the “ApiResources” section of the appsettings.json file.
Recall that in my previous tutorial I added IdentityServerSettings in the appsettings.json file. Kindly see the highlighted code given below which you need to add to your project.
"ApiResources": [
  {
    "Name": "IS4API",
    "Scopes": [
      "fullaccess"
    ],
    "UserClaims": [
      "role"
    ]
  }
]
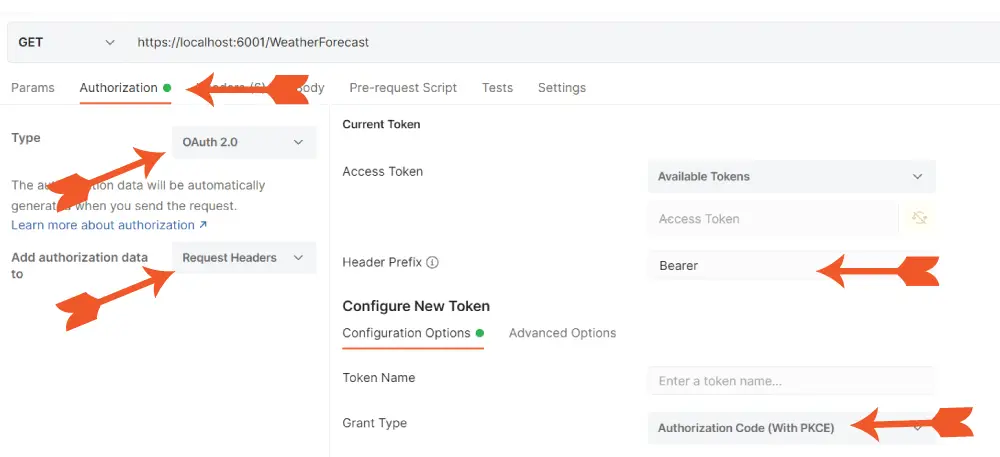
Run both the projects i.e. ISExample and ISClient. Now in Postman make GET request to https://localhost:6001/weatherforecast. Also add the following settings:
- Select Authorization tab.
- Select OAuth 2.0 for Type and Request Headers for “Add authorization data to”.
- For the Header Prefix select Bearer.
- For Grant Type select Authorization Code (With PKCE).
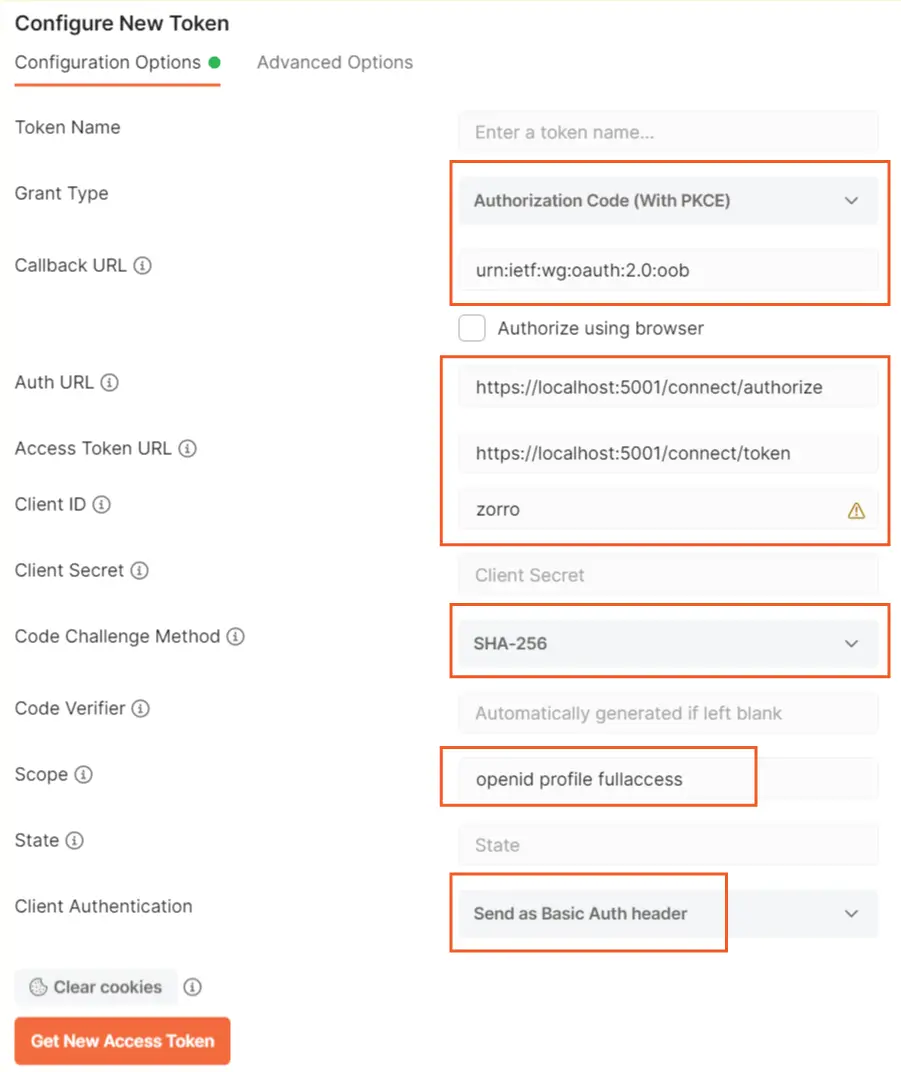
- Set Callback URL to urn:ietf:wg:oauth:2.0:oob. Recall it is the one we set for the RedirectUris in appsettings.json.
- Set Auth URL to the value of authorization_endpoint in the discovery endpoint which is https://localhost:44312/connect/authorize.
- Set Access Token URL to the value of token_endpoint in the discovery endpoint which is https://localhost:44312/connect/token.
- Client ID should be set at zorro. Recall we set this on the appsettings.json.
- Set Code Challenge Method to SHA-256.
- Set Scope to the 3 values which we set on the AllowedScopes in the appsettings.json. These were openid profile fullaccess.
- Set Client Authentication to Send as Basic Auth header.
Check the below 2 images where I have marked all of these settings.
Now click the Get New Access Token button. A new dialog window will open and it will show the login screen. So, login on this screen with any user who is in “Admin” role.
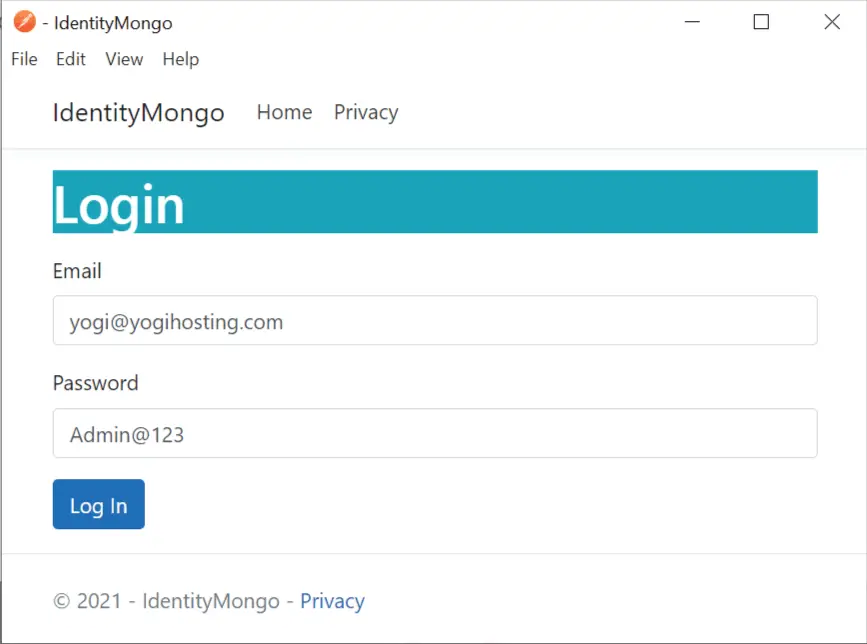
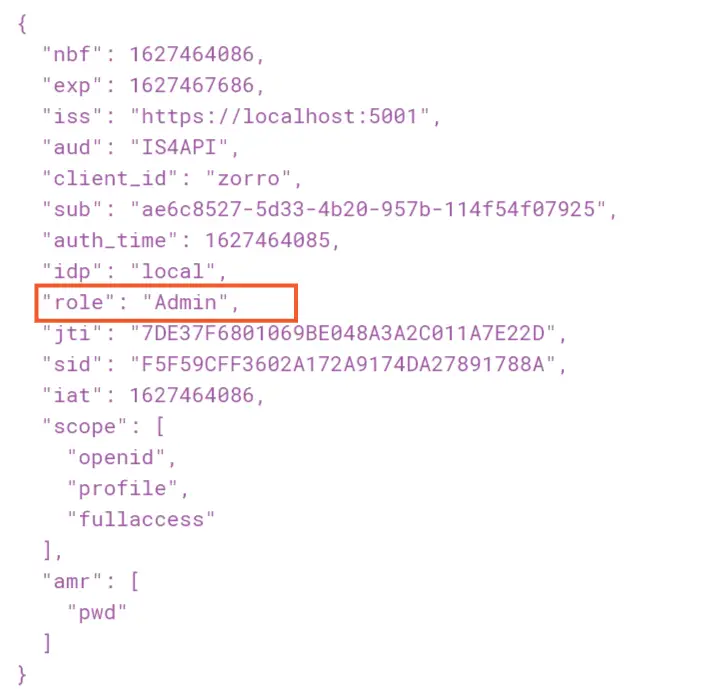
Grab the access token and decode it on jwt.io website. You will see “role” claim with “Admin” value is present on the token. So, you can now access any controller with admin role authentication with this token.
Role Claim in OpenID Connect
We have our Role Claim in the token but still we need to configure the Role claim in OpenID Connect. This is because we want Role claims to become available in the ClaimsPrincipal of the current logged in user.
Go to the ISExample project, and in the IdentityServerSettings.cs add a new IdentityResource that will add roles scope with role claim.
public IReadOnlyCollection<IdentityResource> IdentityResources =>
    new IdentityResource[]
    {
        new IdentityResources.OpenId(),
        new IdentityResources.Profile(),
        new IdentityResource("roles", "User role(s)", new List<string> { "role" })
    };
Now add the “roles” scope to AllowedScopes in appsetting.json.
"AllowedScopes": [
  "openid",
  "profile",
  "fullaccess",
  "roles"
],
Now on the ISClient project modify the OIDC (OpenID Connect) configuration in the program class to support roles scope. Check highlighted code lines which you have to add.
.AddOpenIdConnect("oidc", options =>
{
    options.Authority = "https://localhost:44312";
    options.ClientId = "zorro";
    options.ResponseType = "code";
    options.Scope.Add("openid");
    options.Scope.Add("profile");
    options.Scope.Add("fullaccess");

    options.Scope.Add("roles");
    options.ClaimActions.MapUniqueJsonKey("role", "role");

    options.SaveTokens = true;
});
Let us confirm that the Role claim is coming in the ClaimsPrincipal of the logged in user. So first we need to create “Admin” role and a new User in this Admin role.
Open OperationsController.cs Controller in ISExample project and uncomment the line in the Create action which adds the newly created user to “Admin” role.
//Adding User to Admin Role
await userManager.AddToRoleAsync(appUser, "Admin");
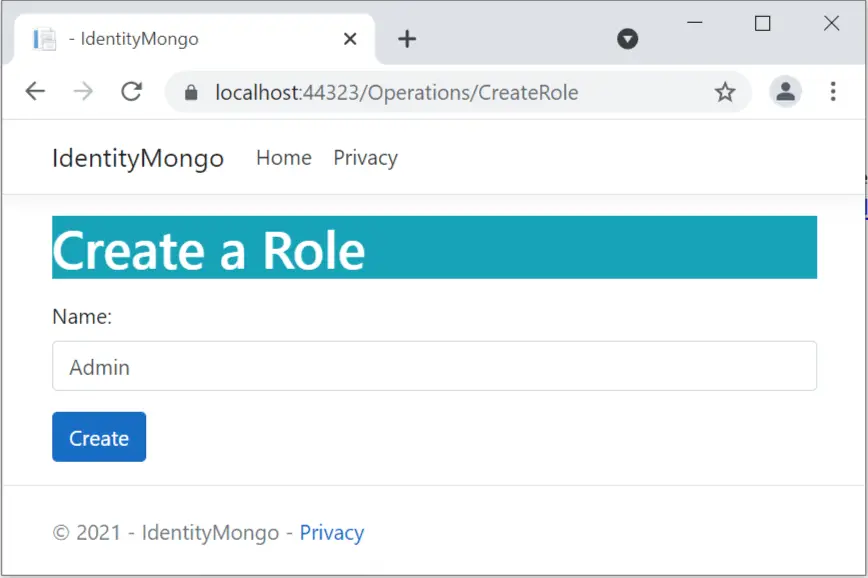
Now run the project and create a new Admin role from the url – https://localhost:44312/Operations/CreateRole.
Next, create a new user from the url – https://localhost:44312/Operations/Create.
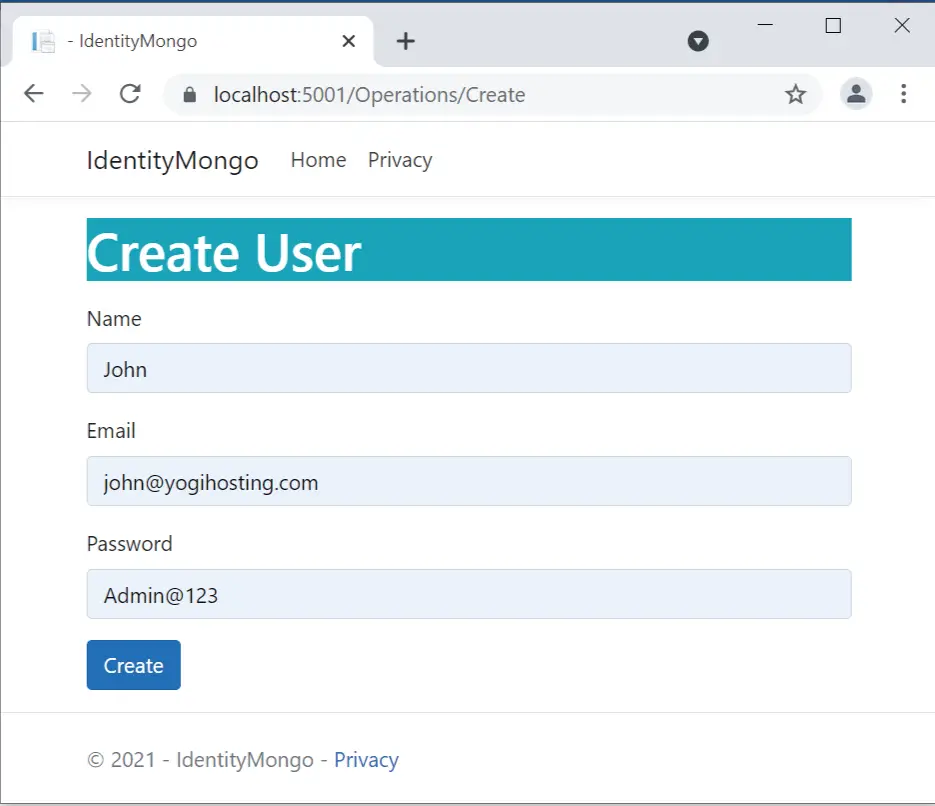
I have created this user in the Admin role and his credentials are:
- Name – John
- Email – [email protected]
- Password – Admin@123
Now go to the “ISClient” project and add a new action called “Claims” to the CallApiController.cs.
public IActionResult Claims()
{
    return View();
}
Also add Claims.cshtml razor view with the following code.
@using Microsoft.AspNetCore.Authentication

<h2>Claims</h2>

<dl>
    @foreach (var claim in User.Claims)
    {
        <dt>@claim.Type</dt>
        <dd>@claim.Value</dd>
    }
</dl>

<h2>Properties</h2>

<dl>
    @foreach (var prop in (await Context.AuthenticateAsync()).Properties.Items)
    {
        <dt>@prop.Key</dt>
        <dd>@prop.Value</dd>
    }
</dl>
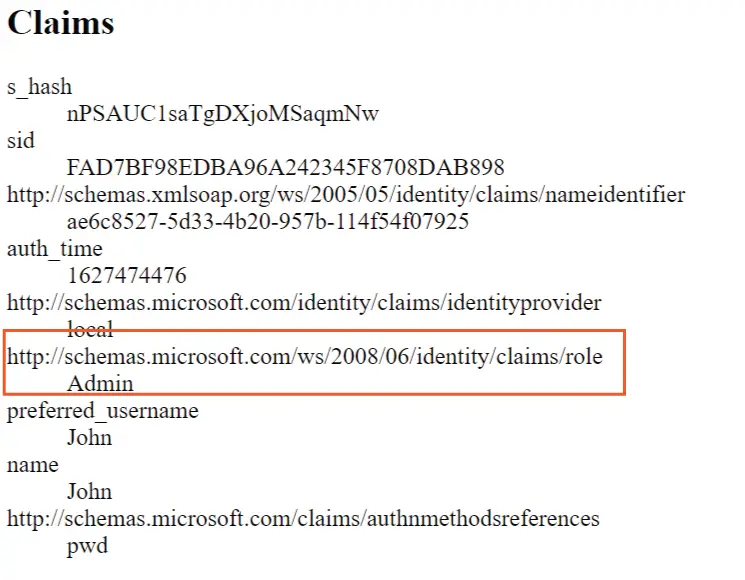
The claims view will show all the claims and properties in the ClaimsPrincipal of the Loggod on user.
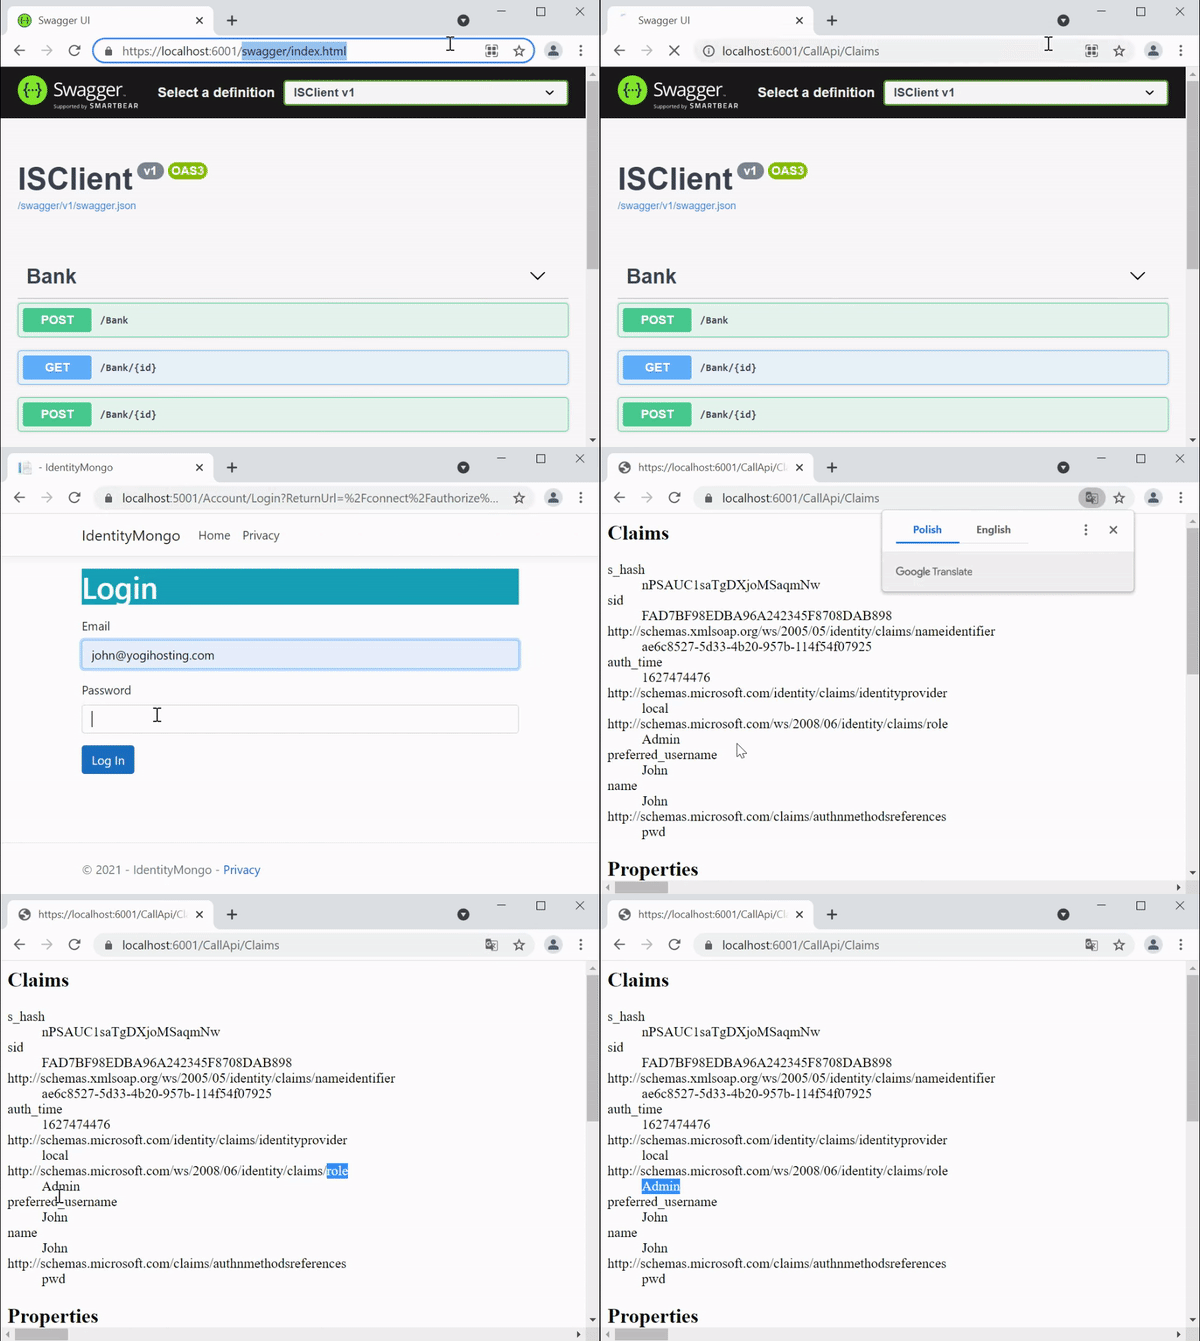
Now visit the url – https://localhost:6001/CallApi/Claims, you will be redirected to login page. Log in with the Admin role user we created just now. After login you can see the role claim is showing up.
I have created a small video, check it.
Securing Controllers with Role Based Authentication
Now we can protect any Controller with Role authentication. In the “ISClient” project add a new controller called BankController.cs with the following code.
[ApiController]
[Route("[controller]")]
public class BankController : ControllerBase
{
    [HttpGet]
    [Authorize(Roles = "Admin")]
    public string TranferAmount()
    {
        return "amount transferred";
    }
}
The TranferAmount action has [Authorize(Roles = “Admin”)] attribute so only Admin role users can execute it.
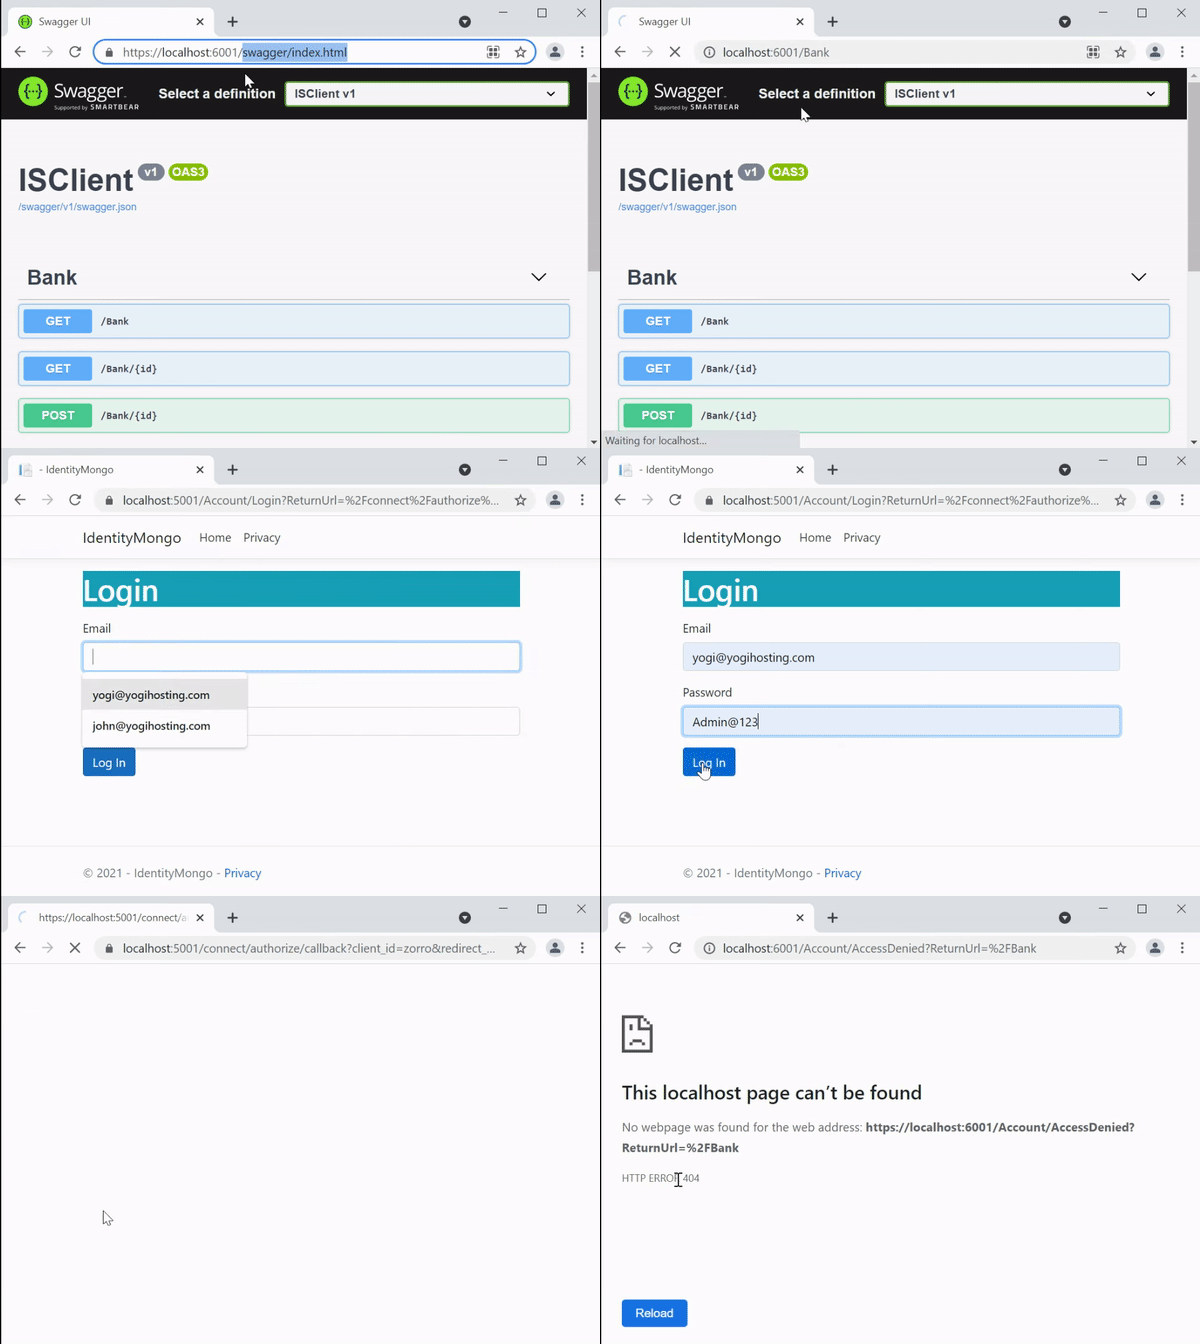
When we try to visit the url – https://localhost:6001/Bank and then login with “non-admin” user. We are redirected to AccessDenied page. See the below video.
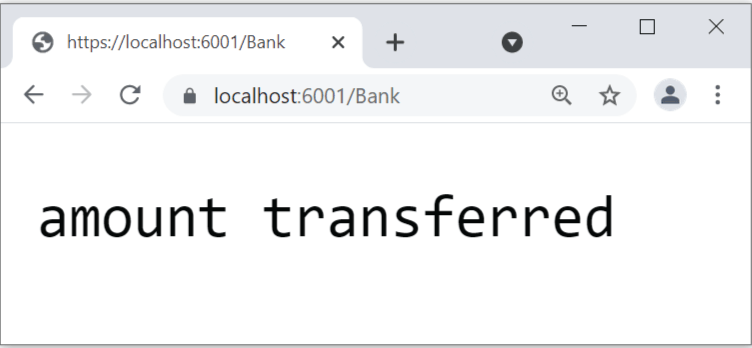
Now when we try to access with Admin user, we are permitted.
Add another action called ReadCustomerInfo to the BankController.cs. This will read a Customer information whose Id is provided in the url.
[HttpGet("{id}")]
[Authorize]
public ActionResult<Customer> ReadCustomerInfo(Guid id)
{
    if (id == Guid.Empty)
        return BadRequest();

    var currentUserId = User.FindFirstValue("http://schemas.xmlsoap.org/ws/2005/05/identity/claims/nameidentifier");

    if (Guid.Parse(currentUserId) != id)
    {
        if (!User.IsInRole("Admin"))
            return Unauthorized();
    }

    Customer customer = new Customer();
    // read customer from database and add it to "customer" object

    return customer;
}
This action has [Authorize] attribute and not [Authorize(Roles = “Admin”)]. But I can still restrict users who are not in admin role. See the if condition:
if (!User.IsInRole("Admin"))
    return Unauthorized();
The User.IsInRole("Admin") method checks if the user is in Admin role.
There is also another important check which allows Customers to access only their information and not somebody’s else. The url of this method is – https://localhost:6001/Bank/6B29FC40-CA47-1067-B31D-00DD010662DA. The last segment “6B29FC40-CA47-1067-B31D-00DD010662DA” is the id of the customer. Now in the code, I get the http://schemas.xmlsoap.org/ws/2005/05/identity/claims/nameidentifier claim’s value (which is actually “sub” claim) from the ClaimsPrincipal of the logged-on user. It will give me the id of the logged on customer.
var currentUserId = User.FindFirstValue("http://schemas.xmlsoap.org/ws/2005/05/identity/claims/nameidentifier");I can now match this id with the id in the url. If they don’t match then it means the logged in user is trying to access the account of another customer (a hacking attempt). So you need to restrict it.
// Condition to check if customer is trying to access others account.
if (Guid.Parse(currentUserId) != id)
{
    // check if the logged in user is in admin role.
    // If he is not in admin then block him. Otherwise grant him.
}
The role based authentication is although very useful but as the project becomes bigger and bigger we need to create large number of roles and even perform lot’s of checks in the code. This problem is solved by Policy Based Authentication.
IdentityServer Policy Based Authentication
An policy based authentication consists of one or more requirements. Like we can say, for a policy x:
- The user must be in a role “Admin”.
- The user must not be in role “Teacher”.
- The user email should be in gmail.com.
- The user must require claim called “Address”.
Now we can restrict access to a controller for only policy “x”.
Example – add a policy called Deactivate which requires 3 conditions:
- User must be in Admin or Manager role.
- User must be authenticated.
- User must have email claim.
builder.Services.AddAuthorization(opts =>
{
    opts.AddPolicy("Deactivate", policy =>
    {
        policy.RequireRole("Admin Manager");
        policy.RequireAuthenticatedUser();
        policy.RequireClaim("email");
    });
});
Now I apply this policy on UpdateCustomerInfo action. This will help Admin or Manger role people (who are authenticated and have email claims) to deactivate users.
[Authorize(Policy = "Deactivate")]
[HttpPost("{id}")]
public string UpdateCustomerInfo()
{
    var currentUserId = User.FindFirstValue("http://schemas.xmlsoap.org/ws/2005/05/identity/claims/nameidentifier");
    var currentUserEmail = User.FindFirstValue("email");

    // decativate "currentUserId" and inform this on email "currentUserEmail"
    return "Success";
}
Once the user is deactivated a confirmation email is send to the person who deactivate a user. You can see that Policy Based Authentication in IdentityServer simplifies a lot of things and makes the code small and clean.
In this tutorial we learn how to perform role and policy based authentications in IdentityServer. You will find the link to my GitHub repository (which contains the source code of this tutorial) at IdentityServer with ASP.NET Core Identity and MongoDB as Database. If you have any questions then use the comment box given below.


 Welcome to YogiHosting - A Programming Tutorial Website. It is used by millions of people around the world to learn and explore about ASP.NET Core, Blazor, jQuery, JavaScript, Docker, Kubernetes and other topics.