Host ASP.NET Core app on IIS
In this article we will host our ASP.NET Core app on Internet Information Services (IIS) in Windows. Make sure you have .NET SDK installed in your system. You can download it from here.
This tutorial is a part of the .NET Hosting Series which contains a total of 5 tutorials, which are:
Installing IIS
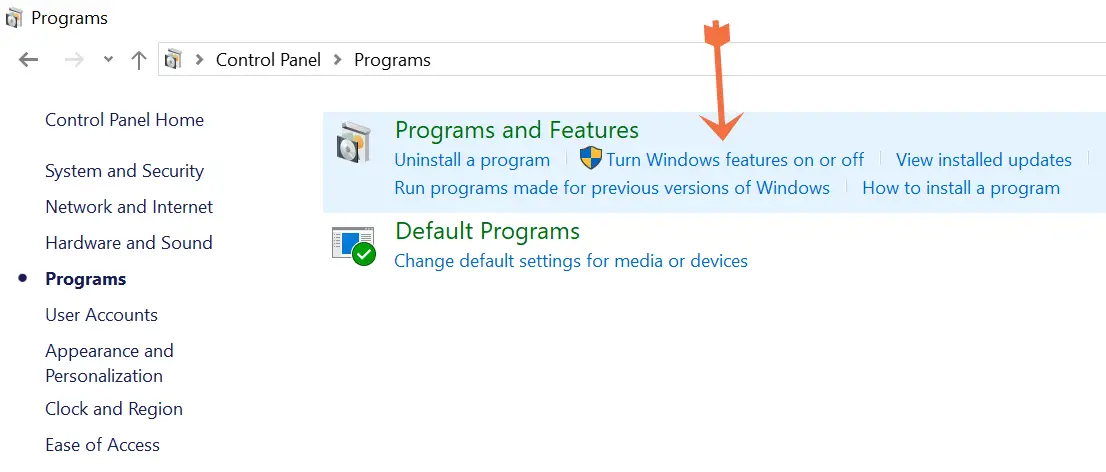
In Windows, open “Control Panel”, click Programs, and then click Turn Windows features on or off.
This opens Windows Features dialog box, select “Internet Information Services” and all options given inside it, these are :
- FTP Server
- Web Management Tools
- World Wide Web Services
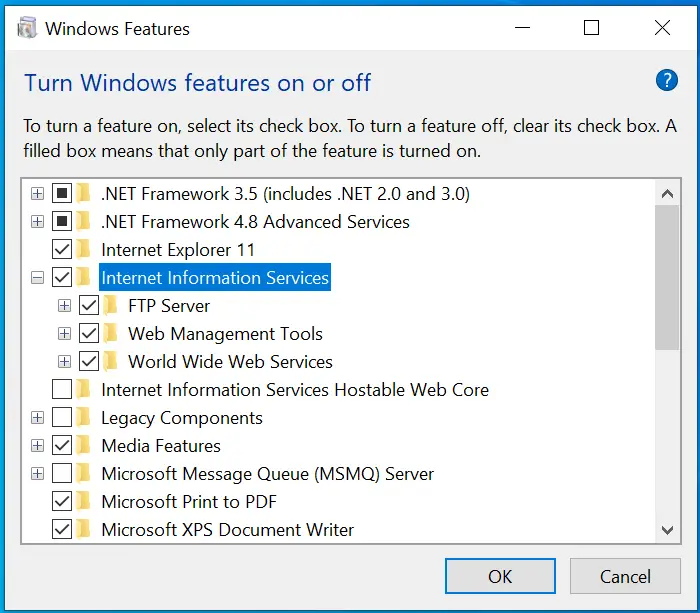
Click “OK” button to install all of them.
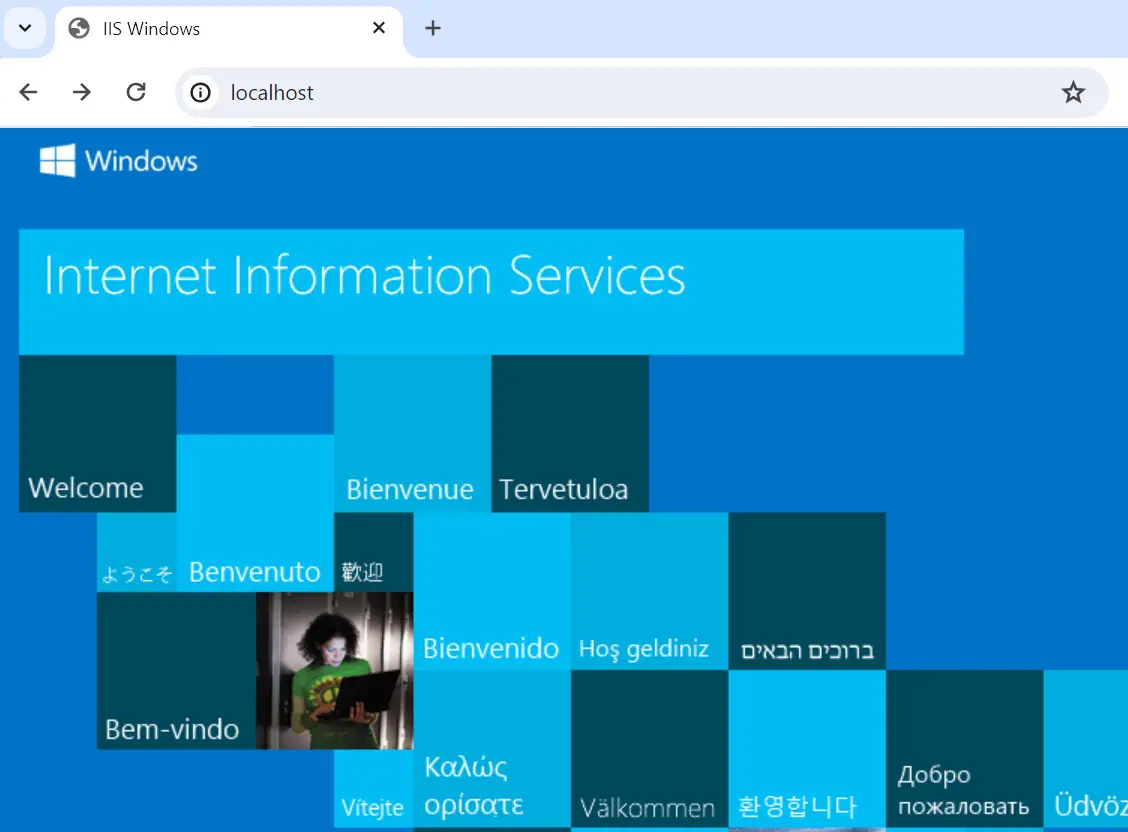
To verify that IIS installed successfully, type http://localhost into a web browser which should open the default IIS Welcome page.
Next, install .NET Core Hosting Bundle from here. Also note that if you installed the Hosting Bundle before IIS, then run the installer again. You will see repair option, choose this option to repain the the Hosting Bundle.
Hosting .NET app on IIS
Let’s create a new ASP.NET Core MVC app by running the following CLI command on the command prompt.
dotnet new mvc --name MyIISApp
The MVC app by the name of MyIISApp will be created.
Next, go inside the app’s directory – cd MyIISApp, and then run the publish command:
dotnet publish --configuration Release
The app get’s published inside the \bin\Release\net8.0\publish\ location.
We need to copy the published files to IIS default path for web app. This path is C:\inetpub. Here apps get necessary resources and permissions to run on IIS.
So, create a new folder called myiisapp inside the “inetpub” directory and copy all the files that are inside the “publish” folder to inside C:\inetpub\myiisapp.
Open IIS Manager from windows menu. Once it opens, see on it’s Connections panel on the left, you will find Sites area. Right click on it and select Add Website.
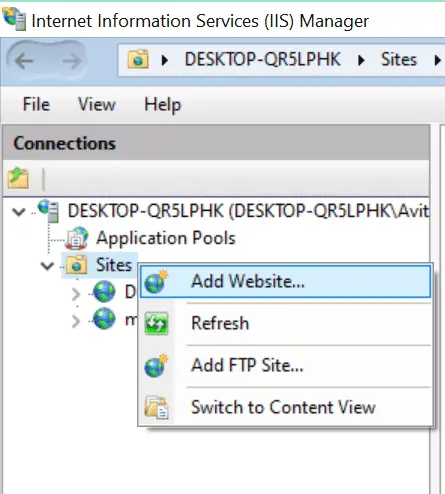
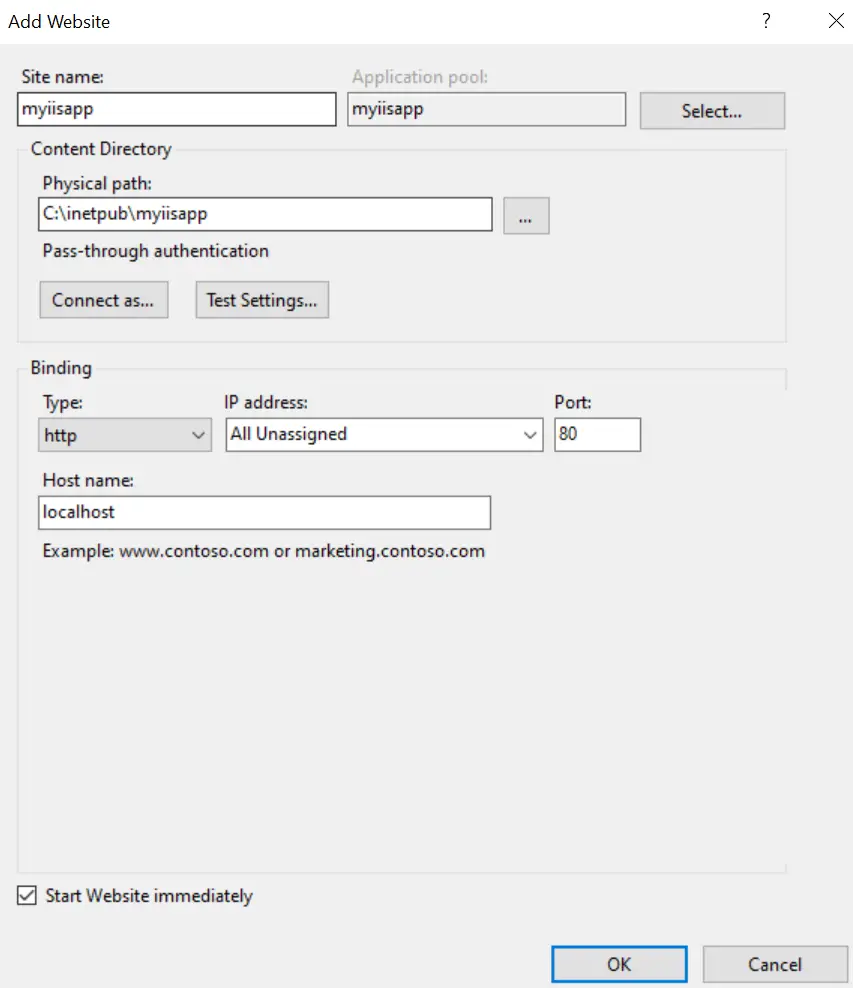
Add Website window opens here enter the following:
- Site name – enter “myiisapp”.
- Physical path – recall it is C:\inetpub\myiisapp.
- Port – 80 or any other free port.
- Host name – enter “localhost”. For production enter your domain name like yogihosting.com.
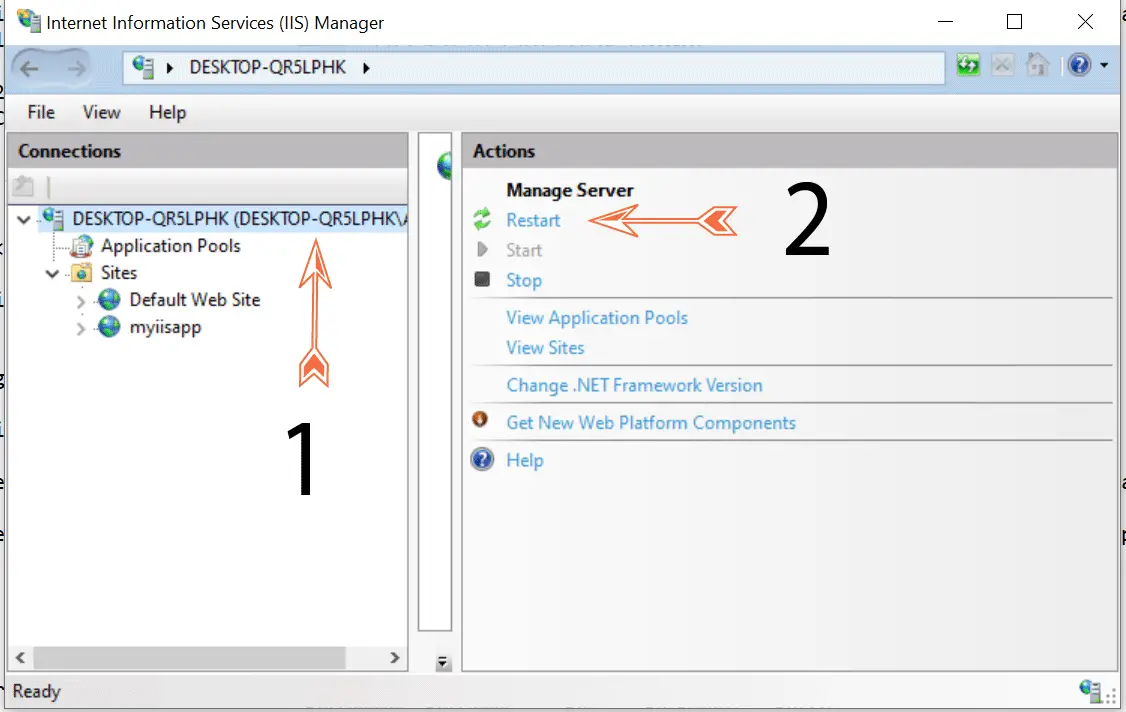
Restart IIS, you can do this by selecting top node in the Connections panel on the left. Then you will see “Actions” panel on the right side. Here you can find the Restart option. I have maked this in the below image.
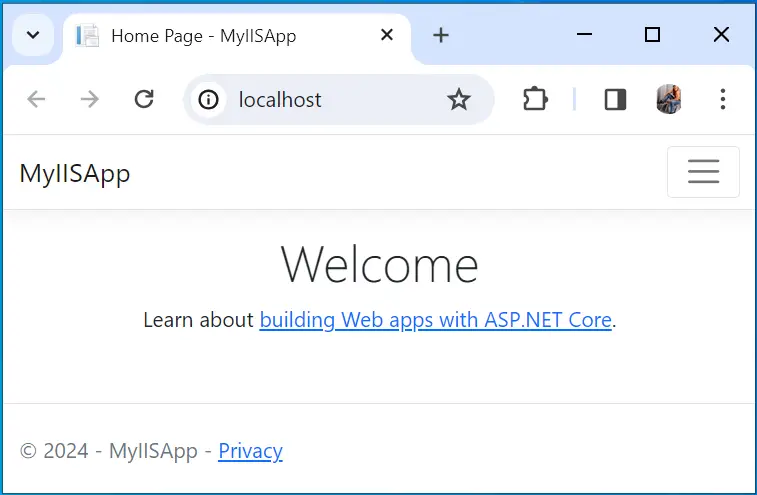
Now you can open the apps’ url on the browser which is http://localhost and start playing with it.
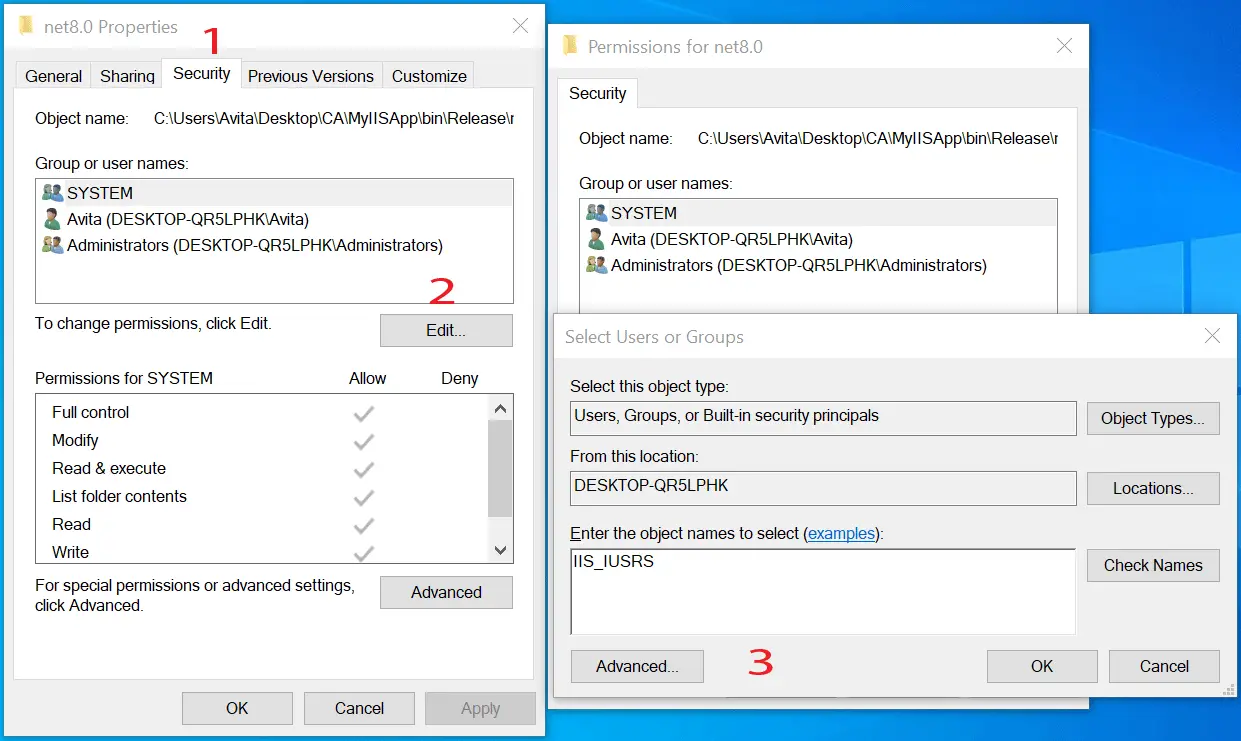
If we host the app from other than C:\inetpub folder then we have to give the IIS_IUSRS user full permissions to this app’s folder. Example – suppose the app folder is D:\myiisapp, then right click on the folder and select “Properties”. Next, select “Security” tab and click “Edit” button. Next, click the “Add” button to add the user “IIS_IUSRS” and give it the full permissions. See below image:
IIS and SSL Certificate
We can generate a Self Signed SSL Certificate from Powershell. Run Powershell in the Adminstrator mode then run the New-SelfSignedCertificate command to generate your SSL. The command is given below.
$params = @{
    DnsName = 'localhost'
    CertStoreLocation = 'Cert:\LocalMachine\My'
}

New-SelfSignedCertificate @params
We used “localhost” for the DnsName since we will be running the app locally. For production enter your domain name like www.yogihosting.com. See the below image:
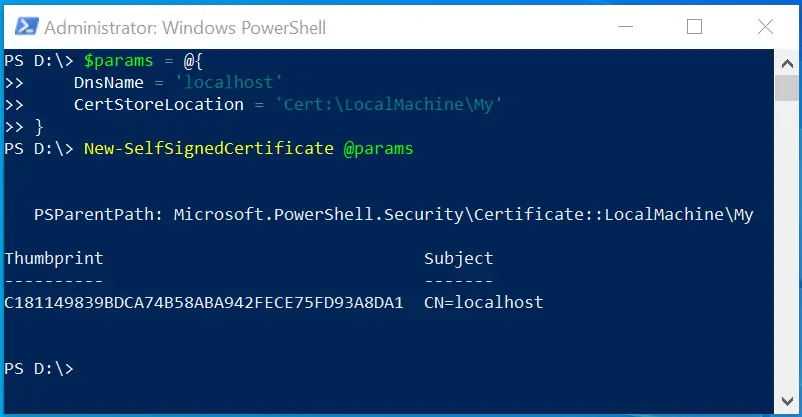
The command will give the thumbprint of the created SSL. Let’s export it in a .pfx file.
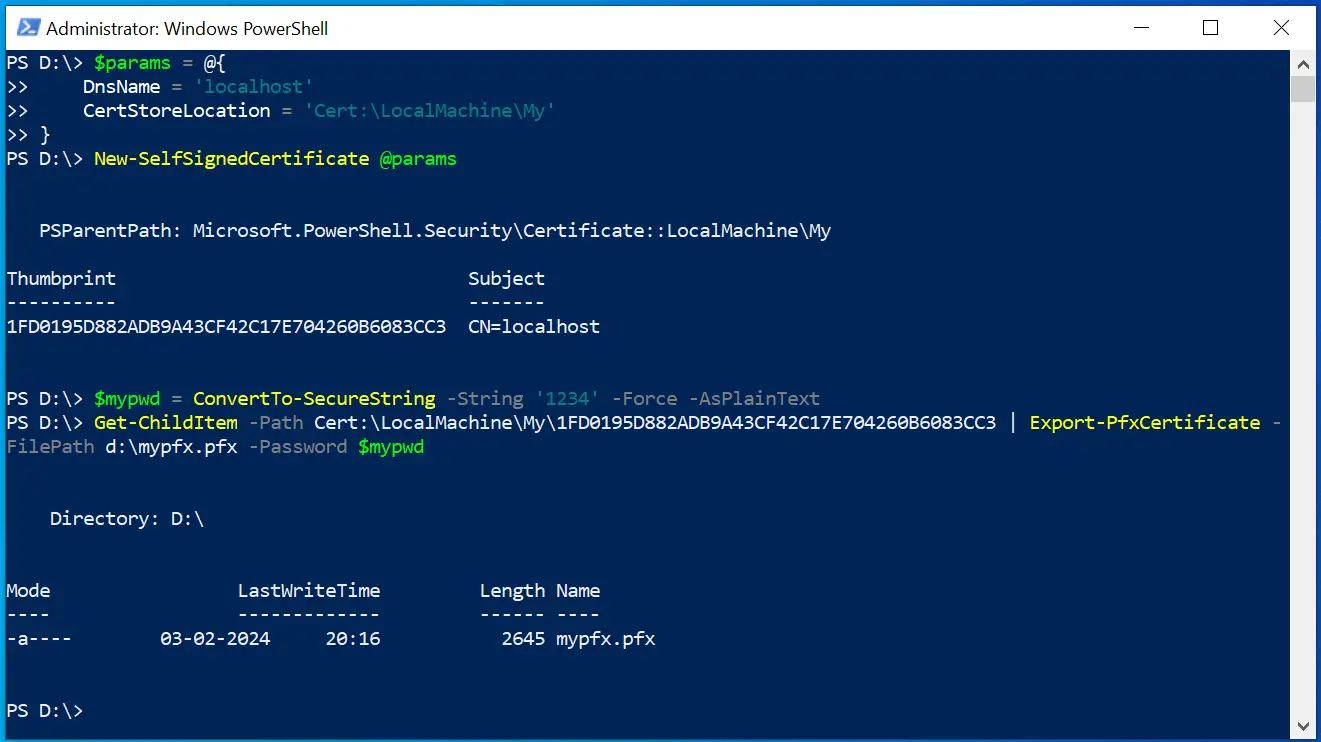
The Export-PfxCertificate command does this exports of the SSL to a Personal Information Exchange (.pfx) file. Run the below given 2 command to do this work. Note that in the first command we used the password for the .pfx file as 1234, you can use anything you want. While in the second command replace the thumbrint with your generated SSL certificate’s thumbprint.
$mypwd = ConvertTo-SecureString -String '1234' -Force -AsPlainText

Get-ChildItem -Path Cert:\LocalMachine\My\EE3D5FC94AB23AB3D03F8F24384E779A6CF53C3C | Export-PfxCertificate -FilePath d:\mypfx.pfx -Password $mypwd
The SSL Certificate “mypfx.pfx” is generated at the “D” drive.
Let’s import the SSL to IIS.
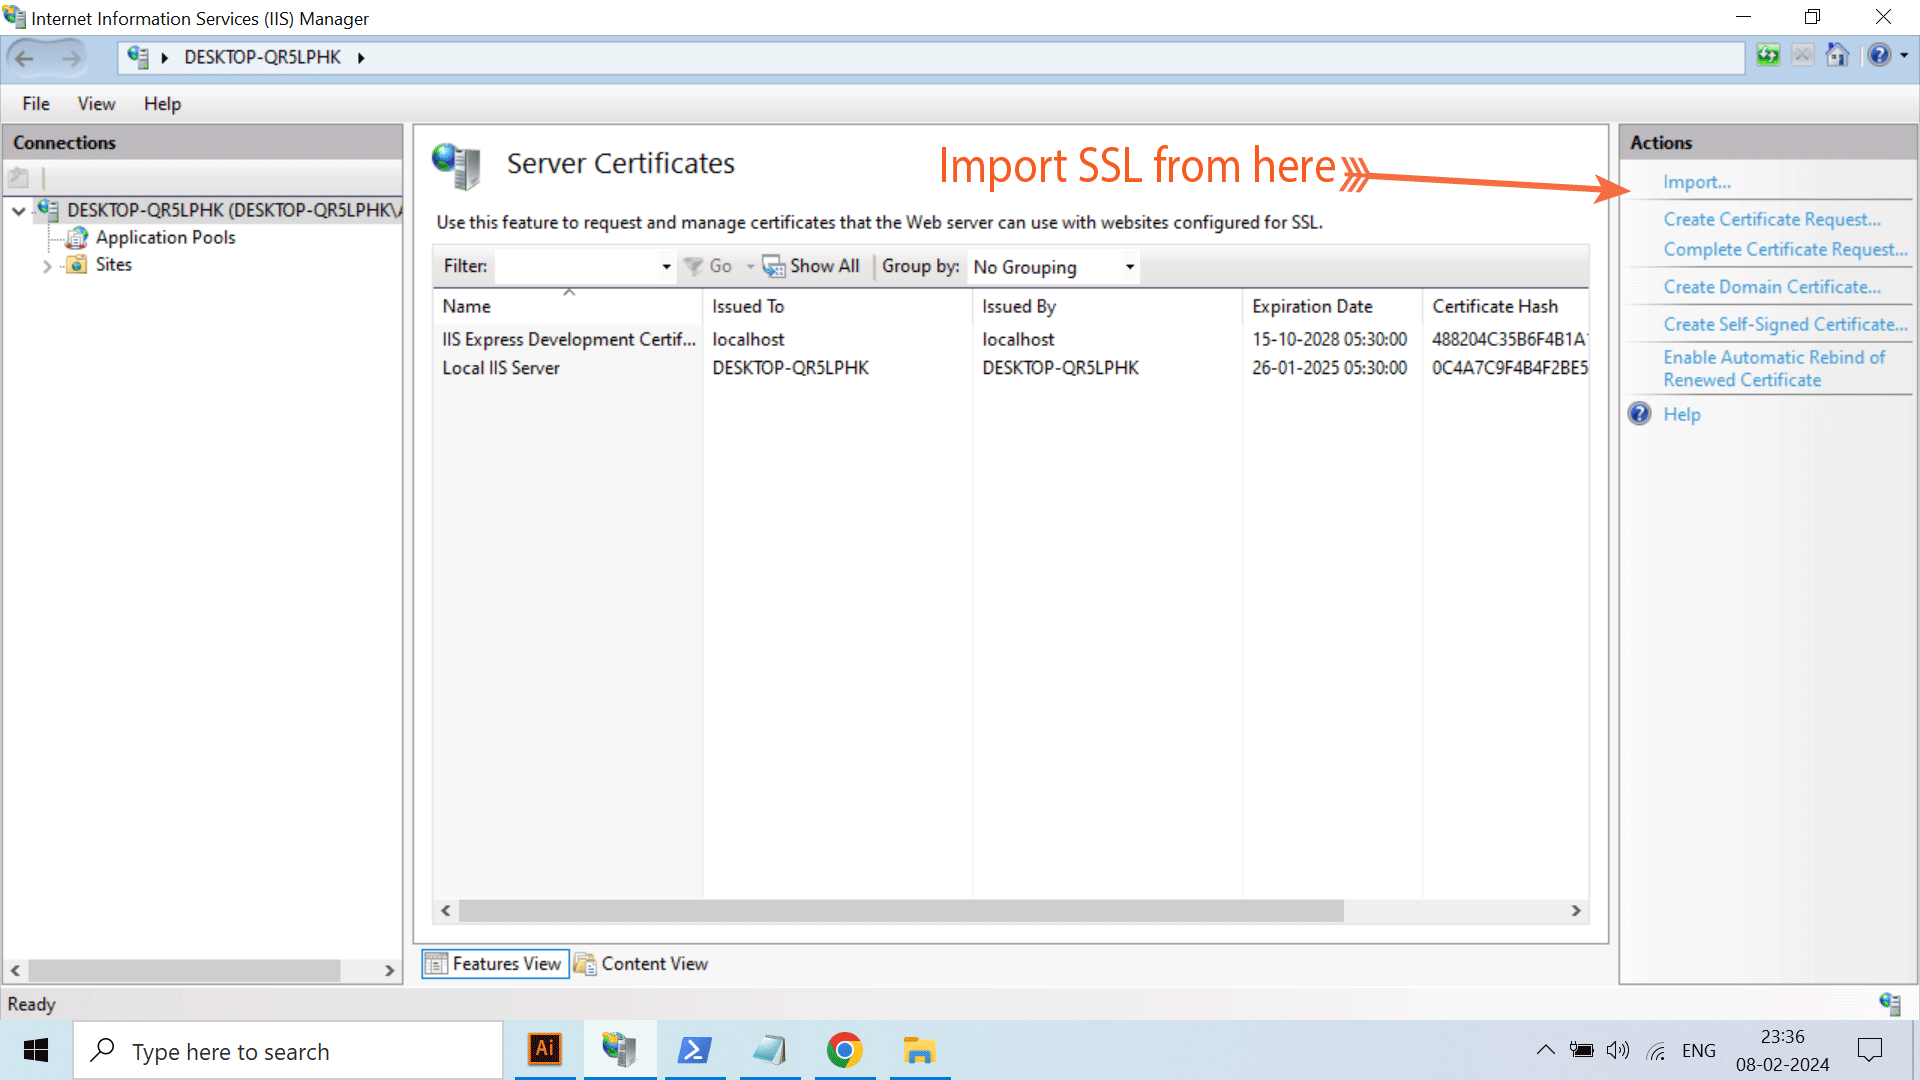
Click the top node in Connections panel on IIS Manager. Then on the middle section double click the Server Certificates
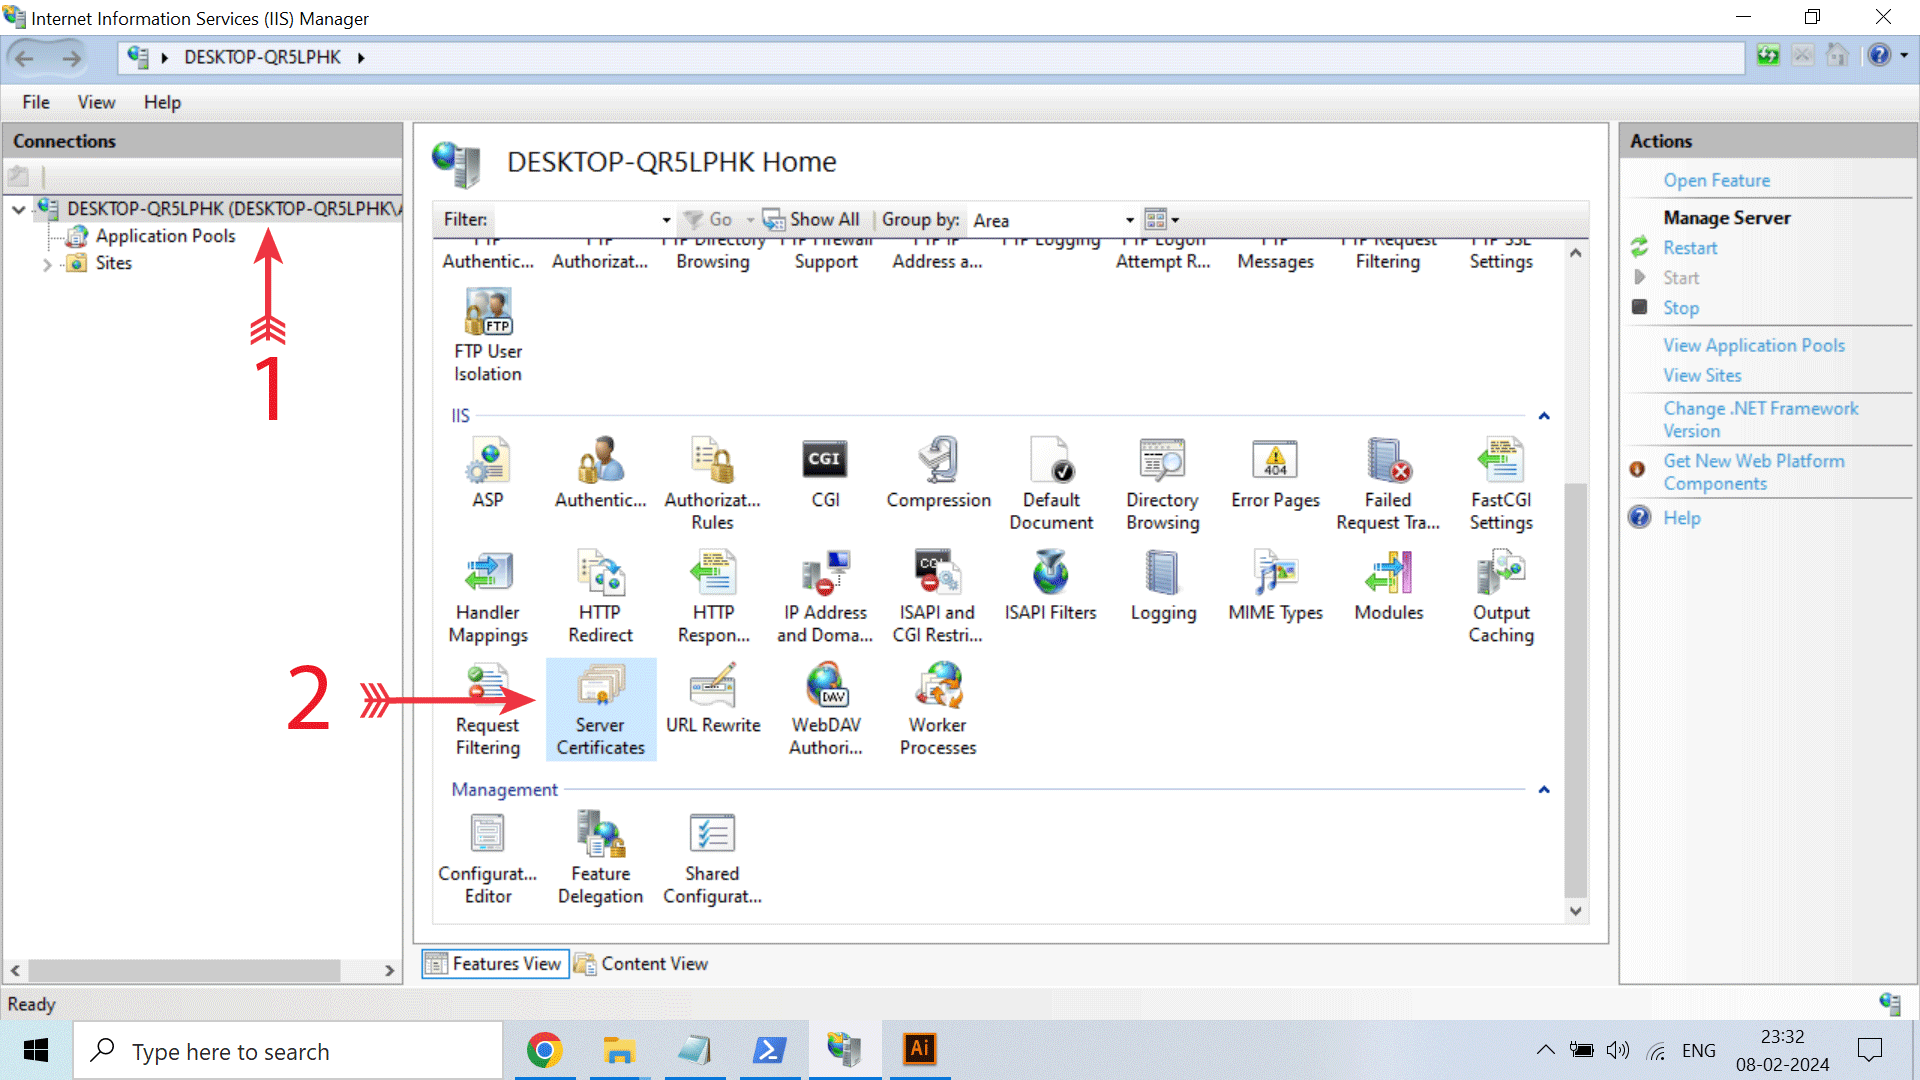
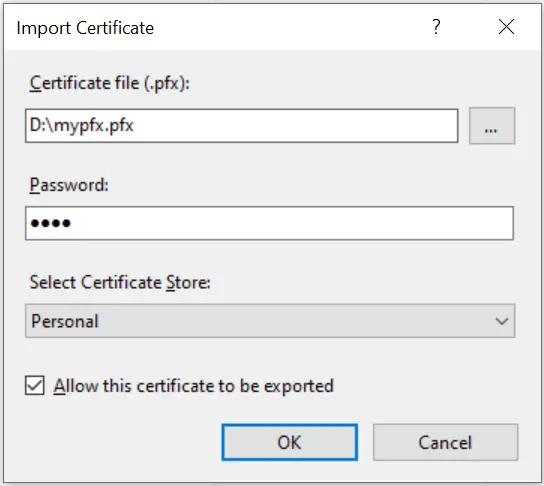
Ther Server Certificates section opens, on the Action panel on the right, there is “Import” window. Click it to open Import Certificate dialog. Select the certificate pfx file and for password enter 1234. Click the OK button to import the SSL.
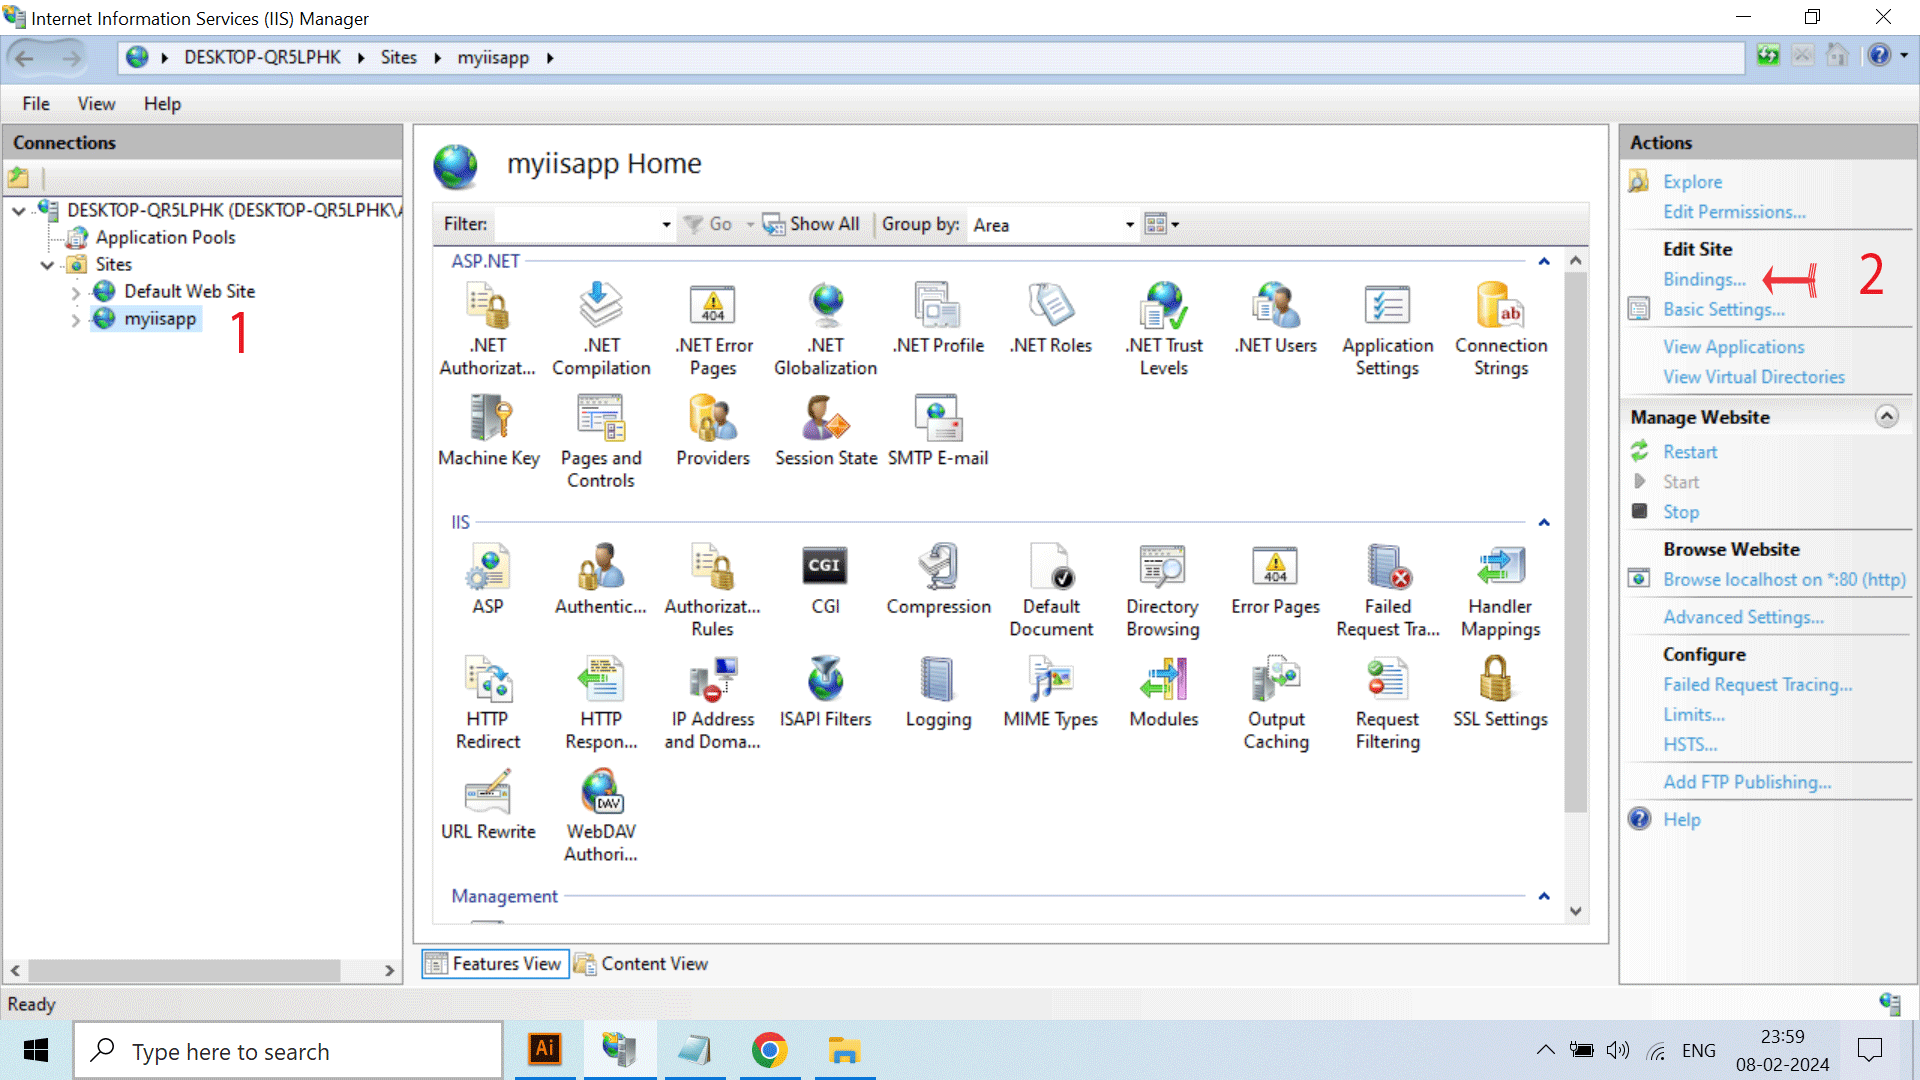
We now have to edit the site’s bindings on IIS Manger. So select the site “myiisapp” on the Connections panel then on Actions panel select Bindings. Check below image:
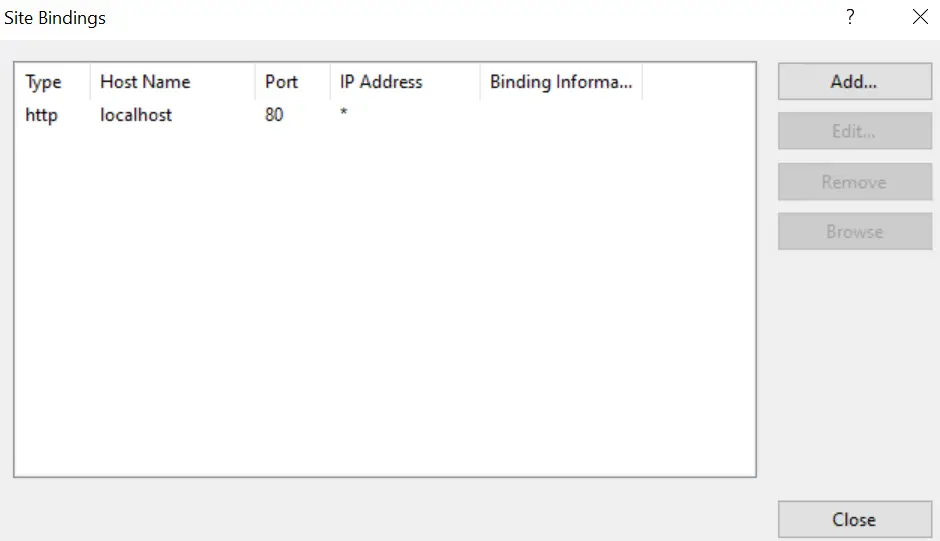
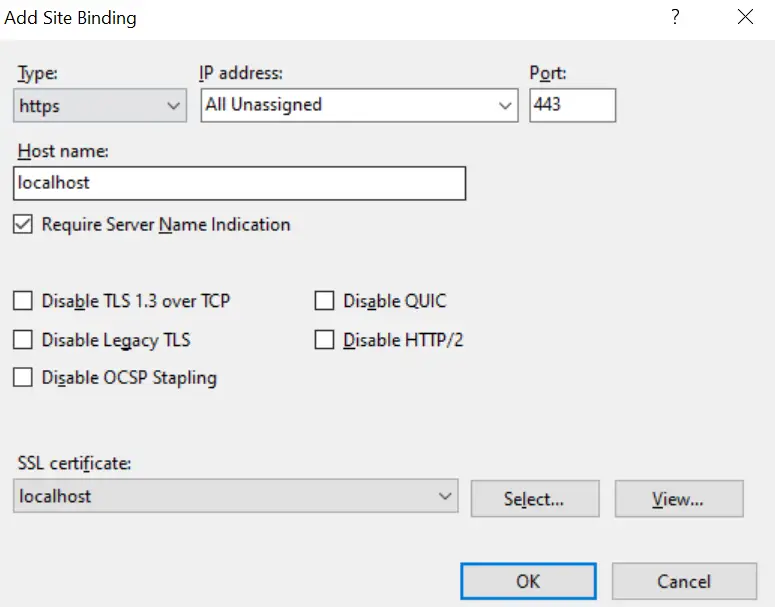
Site Binding window opens here click the “Add” button to open a new window called Add Site Binding.
Do the following things:
- For the “Type” select “https”.
- “localhost” for Host name.
- Select the check box Require Server Name indication.
- For the SSL certificate drop down, select the SSL we previously imported to IIS.
- Click the OK.
I have shown all these in the below image.
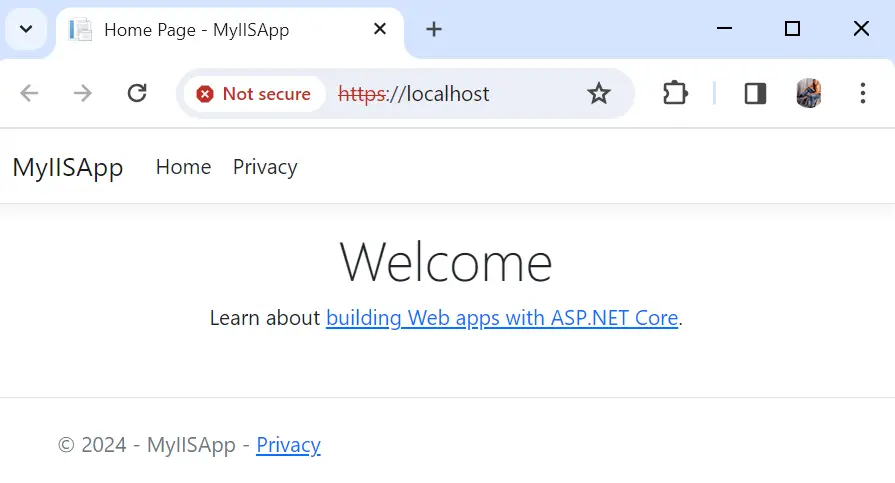
Now open http://localhost in your browser. You will be redirected to the https version with is https://locahost. See below image.
Congrats, we leaned and implemented the hosting of ASP.NET Core app on IIS with SSL Certificate. Hope you liked this long tutorial, let me know your thoughts on the comments section below.



 Welcome to YogiHosting - A Programming Tutorial Website. It is used by millions of people around the world to learn and explore about ASP.NET Core, Blazor, jQuery, JavaScript, Docker, Kubernetes and other topics.