CRUD Operations in ASP.NET Core and SQL Server with Docker
In this tutorial we will perform CRUD Operations in as ASP.NET Core Docker app with SQL Server as a backend. We will use Docker Compose for this so there will be 2 containers one running the ASP.NET Core app and other SQL Server 2022.
Page Contents
Pull and run the SQL Server 2022 Image
Open the command prompt and run the following command which will pull the SQL Server 2022 image from Microsoft Container Registry(mcr).
docker pull mcr.microsoft.com/mssql/server:2022-latestThe command will start the download of the sql server image which is around 450 mb in size.

Next, run a Docker Container with the SQL Server’s image which we just downloaded. The command is given below:
docker run -e "ACCEPT_EULA=Y" -e "MSSQL_SA_PASSWORD=vV5r9tn0M4@" -p 1440:1433 --name mysqlserver -h mysqlserver -d mcr.microsoft.com/mssql/server:2022-latestThe below image shows we ran this command:

The above command does the following things:
- 1. Creates a container by the name of mysqlserver which will run this image of SQL Server.
- 2. The SQL Server password is set to vV5r9tn0M4@. Note that the password which we set should be strong and at least 8 character in length. It should have a combination of letters, number, capital letters and special characters.
- 3. The container’s port mappings is done. See -p 1440:1433, Here 1433 is port of the container (second value) which is exposed to 1440 (first value) port on the host.
Now check the docker desktop which will show this container up and running, see the below image containing the screenshot of our docker desktop.

Alternately, we can also run the docker ps on the command prompt to see this container in running mode.
Now we can connect with the SQL Server running in the docker container. So, in SQL Server Management Studio (SSMS), enter the following:
- 1. localhost,1440 for the server name, recall 1440 was the port we set earlier. Instead of localhost we can also write your machine ip which we can get from running “ipconfig” command.
- 2. SA for login.
- 3. vV5r9tn0M4@ for password.
Click the Connect button to connect with this SQL Server running in the container.
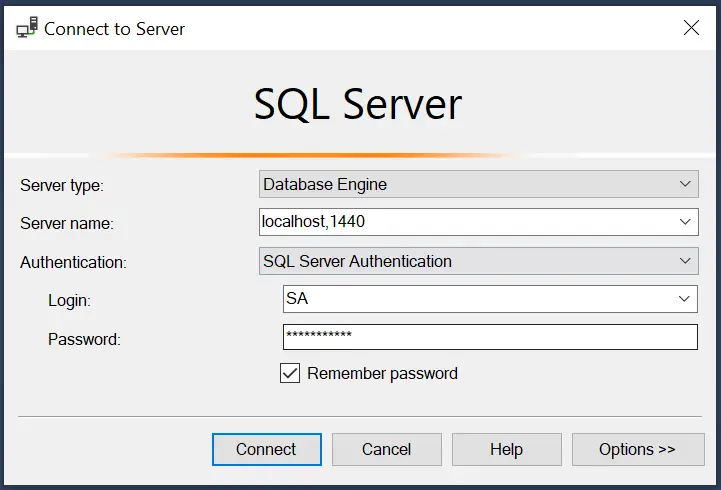
Once we are connected, we can create databases, tables, stored procedures and do any other stuff which we normally do in the database.
Changing the Database Password
We can also change the SQL Server’s password by running the following given command:
docker exec -it mysqlserver /opt/mssql-tools/bin/sqlcmd -S localhost -U SA -P "vV5r9tn0M4@" -Q "ALTER LOGIN SA WITH PASSWORD='abD5r9tn0M@4'"So, after running this command the new password becomes abD5r9tn0M@4.
Creating CRUD operations in ASP.NET Core app
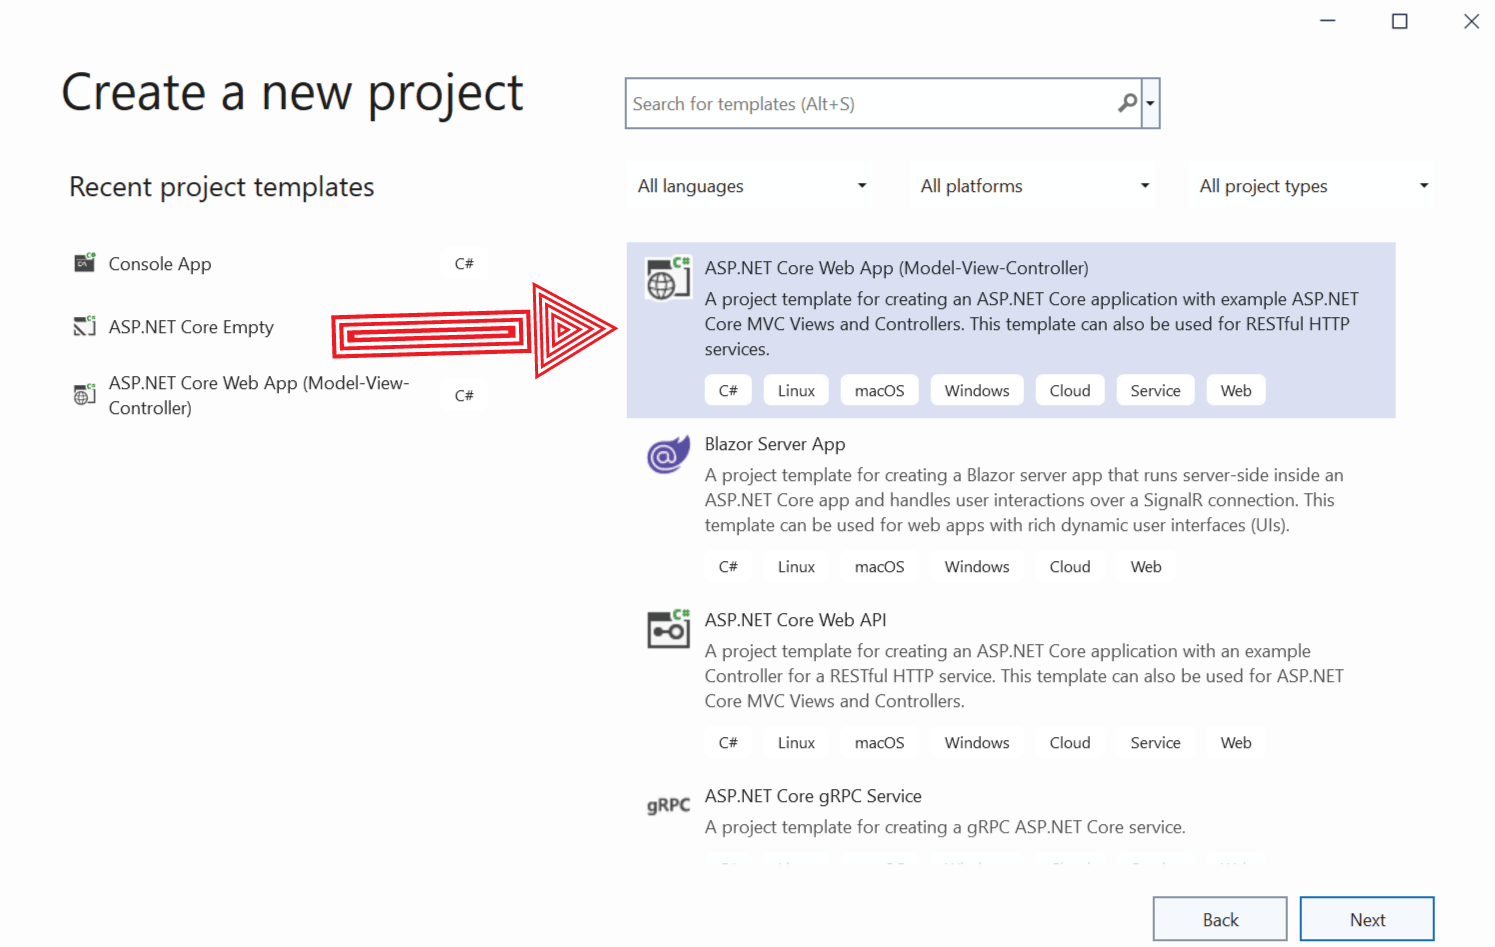
Let us now Create CRUD operations in an ASP.NET Core app which uses this SQL Server running on the docker container. So create a new ASP.NET Core Web App (Model-View-Controller) in visual studio.
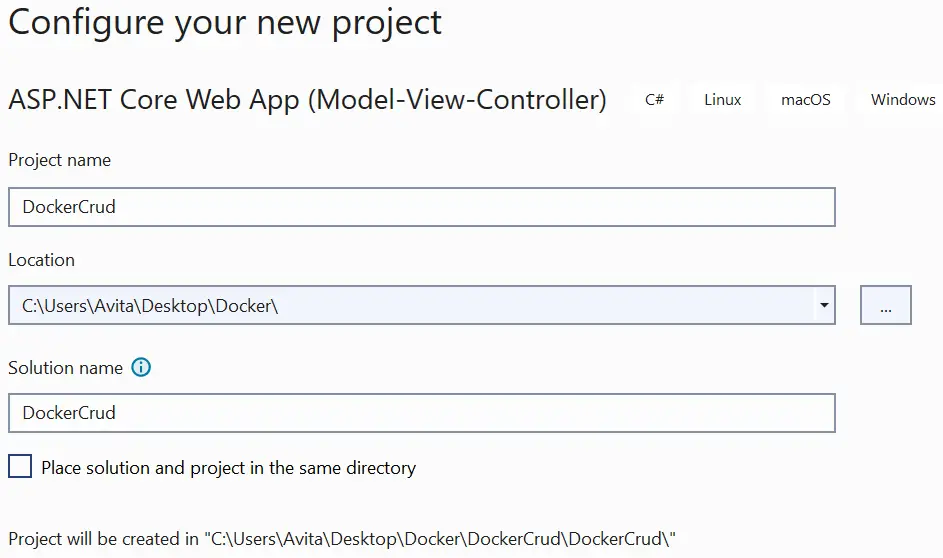
Next, give the app a name, we have named it as DockerCrud, and un-check the option Place solution and project in the same directory.
On the next screen, do not select Enable Docker.
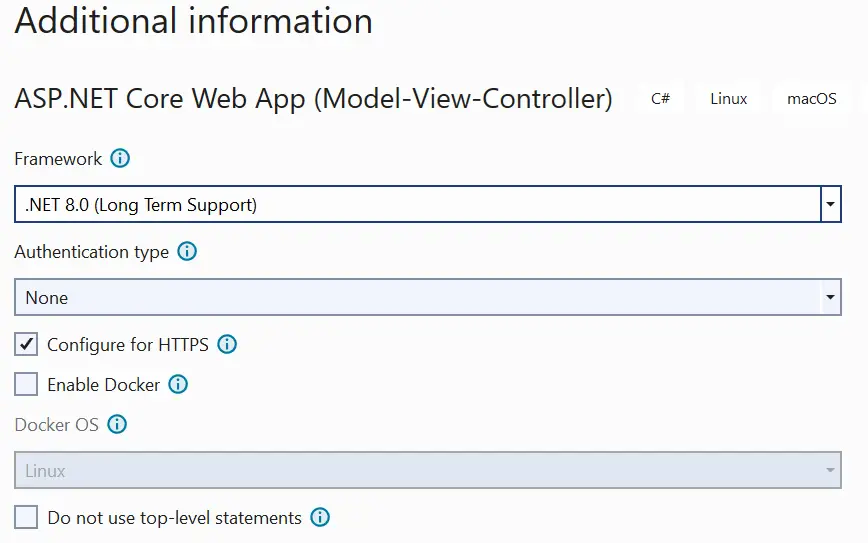
We will be creating a Movie Database called MovieDB in the SQL Server running on the docker container. There will be one table called as Movie, in this table Create, Read, Update and Delete operations will be performed from ASP.NET Core MVC app. The database creation and CRUD operations will be performed by Entity Framework Core (EF Core).
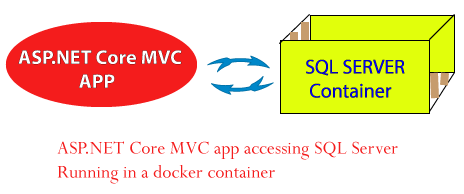
Note that here the ASP.NET Core MVC app will be accessing the SQL Server running on the container. Check the below image which describes this architecture.
So, first add the necessary packages of EF Core on the ASP.NET Core MVC app from NuGet. These packages are:
- Microsoft.EntityFrameworkCore.SqlServer
- Microsoft.EntityFrameworkCore.Design
- Microsoft.EntityFrameworkCore.Tools
Next, inside the Models folder create a new class called Movie.cs.
1 2 3 4 5 6 7 8 9 10 11 12 13 14 15 16 | using System.ComponentModel.DataAnnotations;namespace DockerCrud.Models{ public class Movie { [Required] public int Id { get; set; } [Required] public string Name { get; set; } [Required] public string Actors { get; set; } }} |
Add another class called MovieContext.cs to the Models folder. It will serve as a Database Context for EF Core. The code is given below:
1 2 3 4 5 6 7 8 9 10 11 12 13 14 15 16 17 18 19 20 21 | using Microsoft.EntityFrameworkCore;namespace DockerCrud.Models{ public class MovieContext : DbContext { public MovieContext(DbContextOptions<MovieContext> options) : base(options) { } public DbSet<Movie> Movie { get; set; } protected override void OnConfiguring(DbContextOptionsBuilder optionsBuilder) { } protected override void OnModelCreating(ModelBuilder modelBuilder) { } }} |
Now update the HomeController.cs file inside the Controllers folder, to include action methods that will be performing CRUD operations.
1 2 3 4 5 6 7 8 9 10 11 12 13 14 15 16 17 18 19 20 21 22 23 24 25 26 27 28 29 30 31 32 33 34 35 36 37 38 39 40 41 42 43 44 45 46 47 48 49 50 51 52 53 54 55 56 57 58 59 60 61 62 63 64 65 66 67 68 69 | using DockerCrud.Models;using Microsoft.AspNetCore.Mvc;namespace DockerCrud.Controllers{ public class HomeController : Controller { private MovieContext context; public HomeController(MovieContext mc) { context = mc; } public IActionResult Create() { return View(); } [HttpPost] public async Task<IActionResult> Create(Movie m) { if (ModelState.IsValid) { context.Add(m); await context.SaveChangesAsync(); return RedirectToAction("Index"); } else return View(); } public IActionResult Index() { var m = context.Movie.ToList(); return View(m); } public IActionResult Update(int id) { var pc = context.Movie.Where(a => a.Id == id).FirstOrDefault(); return View(pc); } [HttpPost] public async Task<IActionResult> Update(Movie m) { if (ModelState.IsValid) { context.Update(m); await context.SaveChangesAsync(); return RedirectToAction("Index"); } else return View(m); } [HttpPost] public async Task<IActionResult> Delete(int id) { var pc = context.Movie.Where(a => a.Id == id).FirstOrDefault(); context.Remove(pc); await context.SaveChangesAsync(); return RedirectToAction("Index"); } }} |
After that create 3 Views (Index.cshtml, Create.cshtml, Update.cshtml) inside the Views >> Home controller. These views will form the UI for the CRUD operations.
Index.cshtml
@model List<Movie>

@{
    ViewData["Title"] = "Movies";
}

<h1 class="bg-info text-white">Movies</h1>
<a asp-action="Create" class="btn btn-secondary">Create a Movie</a>

<table class="table table-sm table-bordered">
    <tr>
        <th>Id</th>
        <th>Name</th>
        <th>Actors</th>
        <th></th>
        <th></th>
    </tr>
    @foreach (Movie m in Model)
    {
        <tr>
            <td>@m.Id</td>
            <td>@m.Name</td>
            <td>@m.Actors</td>
            <td>
                <a class="btn btn-sm btn-primary" asp-action="Update" asp-route-id="@m.Id">
                    Update
                </a>
            </td>
            <td>
                <form asp-action="Delete" asp-route-id="@m.Id" method="post">
                    <button type="submit" class="btn btn-sm btn-danger">
                        Delete
                    </button>
                </form>
            </td>
        </tr>
    }
</table>
Create.cshtml
@model Movie

@{
    ViewData["Title"] = "Create a Movie";
}

<h1 class="bg-info text-white">Create a Movie</h1>
<a asp-action="Index" class="btn btn-secondary">View all Movies</a>

<div asp-validation-summary="All" class="text-danger"></div>

<form method="post" enctype="multipart/form-data">
    <div class="form-group">
        <label asp-for="Name"></label>
        <input type="text" asp-for="Name" class="form-control" />
        <span asp-validation-for="Name" class="text-danger"></span>
    </div>
    <div class="form-group">
        <label asp-for="Actors"></label>
        <input type="text" asp-for="Actors" class="form-control" />
        <span asp-validation-for="Actors" class="text-danger"></span>
    </div>
    <button type="submit" class="btn btn-primary">Create</button>
</form>
Update.cshtml
@model Movie

@{
    ViewData["Title"] = "Update a Movie";
}

<h1 class="bg-info text-white">Update a Movie</h1>
<a asp-action="Index" class="btn btn-secondary">View all Movies</a>

<div asp-validation-summary="All" class="text-danger"></div>

<form method="post" enctype="multipart/form-data">
    <div class="form-group">
        <label asp-for="Id"></label>
        <input type="text" asp-for="Id" readonly class="form-control" />
    </div>
    <div class="form-group">
        <label asp-for="Name"></label>
        <input type="text" asp-for="Name" class="form-control" />
        <span asp-validation-for="Name" class="text-danger"></span>
    </div>
    <div class="form-group">
        <label asp-for="Actors"></label>
        <input type="text" asp-for="Actors" class="form-control" />
        <span asp-validation-for="Actors" class="text-danger"></span>
    </div>
    <button type="submit" class="btn btn-primary">Update</button>
</form>Open the appsettings.json file and create the connection string to the SQL Server database. The Data Source should be the localhost, 1440 and Initial Catalog is the name of the database. You can name the database anything you like, I have named it “MovieDB”.
{
  "ConnectionStrings": {
    "DefaultConnection": "Data Source=localhost,1440;Initial Catalog=MovieDB;Persist Security Info=True;User ID=SA;Password=vV5r9tn0M4@;TrustServerCertificate=true"
  }
}
Instead of localhost we can also write our pc’s IP address. The IP address can be seen by running ipconfig command on the command prompt. In our case our pc’s ip address is 192.168.1.100, so we can use it on the connection string as shown below.
{
  "ConnectionStrings": {
    "DefaultConnection": "Data Source=192.168.1.100,1440;Initial Catalog=MovieDB;Persist Security Info=True;User ID=SA;Password=vV5r9tn0M4@;TrustServerCertificate=true"
  }
}
Next, go to the Program.cs file and add the Database Context as a service. Check the highlighted code below.
1 2 3 4 5 6 7 8 9 10 11 12 13 14 15 16 17 18 19 20 21 22 23 24 25 26 27 28 29 30 31 32 33 | using DockerCrud.Models;using Microsoft.EntityFrameworkCore;var builder = WebApplication.CreateBuilder(args);// Add services to the container.builder.Services.AddControllersWithViews();builder.Services.AddDbContext<MovieContext>(options => options.UseSqlServer(builder.Configuration.GetConnectionString("DefaultConnection")));var app = builder.Build();// Configure the HTTP request pipeline.if (!app.Environment.IsDevelopment()){ app.UseExceptionHandler("/Home/Error"); // The default HSTS value is 30 days. You may want to change this for production scenarios, see https://aka.ms/aspnetcore-hsts. app.UseHsts();}app.UseHttpsRedirection();app.UseStaticFiles();app.UseRouting();app.UseAuthorization();app.MapControllerRoute( name: "default", pattern: "{controller=Home}/{action=Index}/{id?}");app.Run(); |
Finally, we need to run EF Core migration commands on the Package Manager Console window in VS. Run these commands from Package Manager Console window.
add-migration Migration1
Update-Database
This will create the database called MovieDB on the SQL Server running in the container, now we can perform CRUD operation with the ASP.NET Core MVC app.
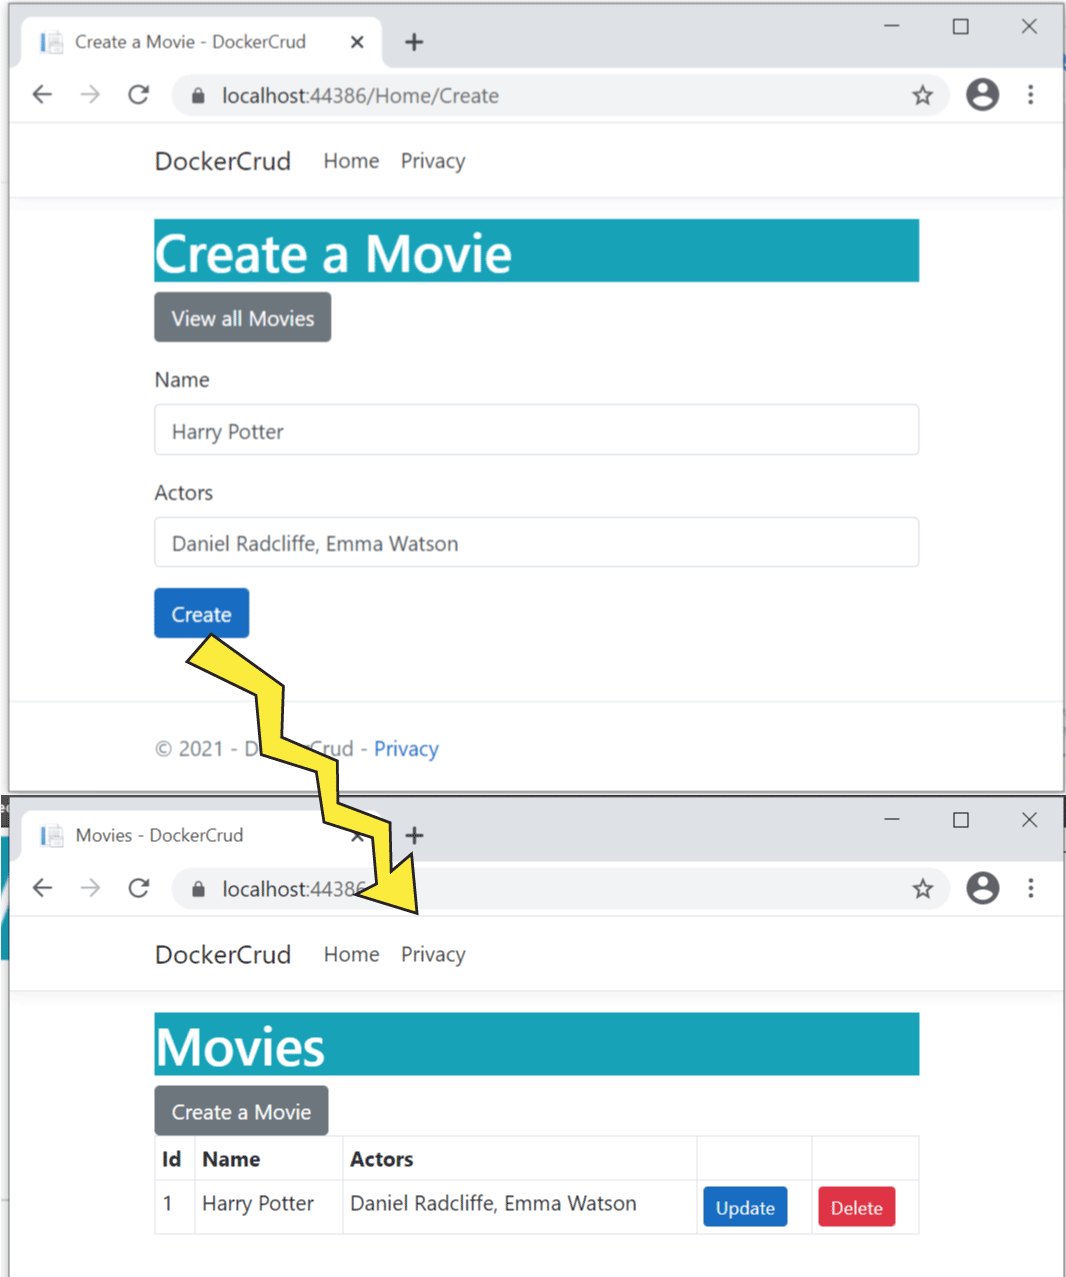
Now it’s time to test the workings of the CRUD operations. Run your ASP.NET Core MVC app in VS and go to Create Movie section, enter a movie name and it’s actors (separated by comma), and then click the Create button. The movie record will be inserted to the database. See the below image where we have shown this thing.
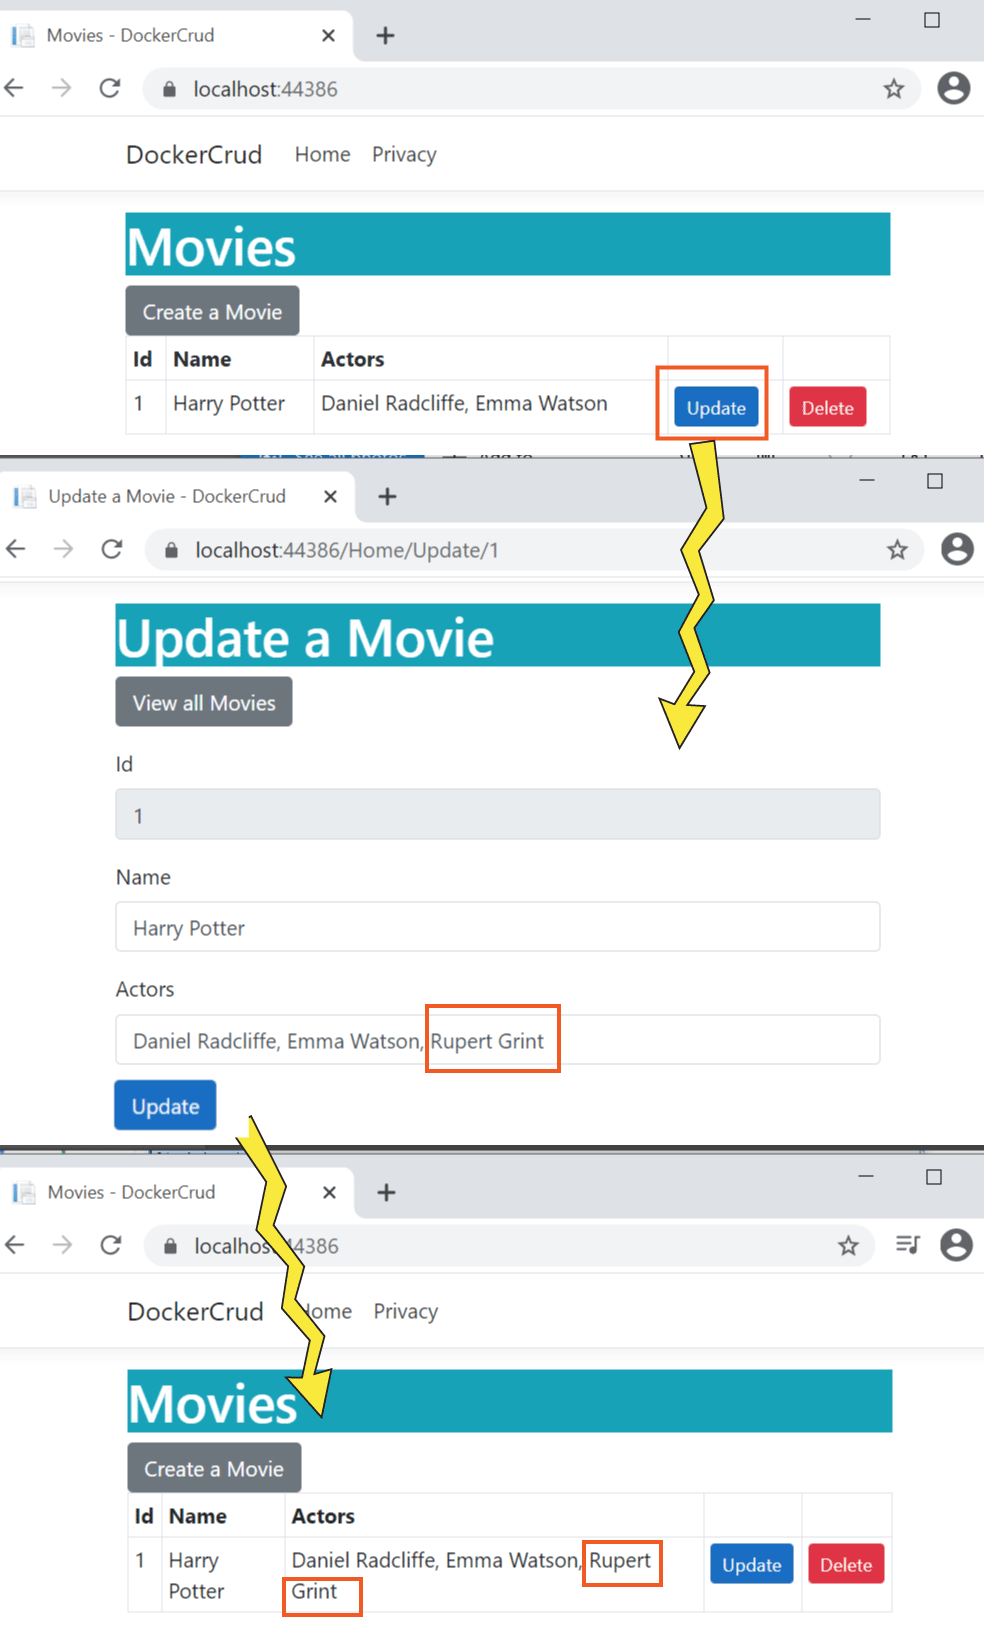
Next, click the update link and enter new values in the text box. Then click the update button for updating the record. Check the below screenshot where we have shown the update procedure.
Next click the delete button against a record to delete it. Check the below screenshot:
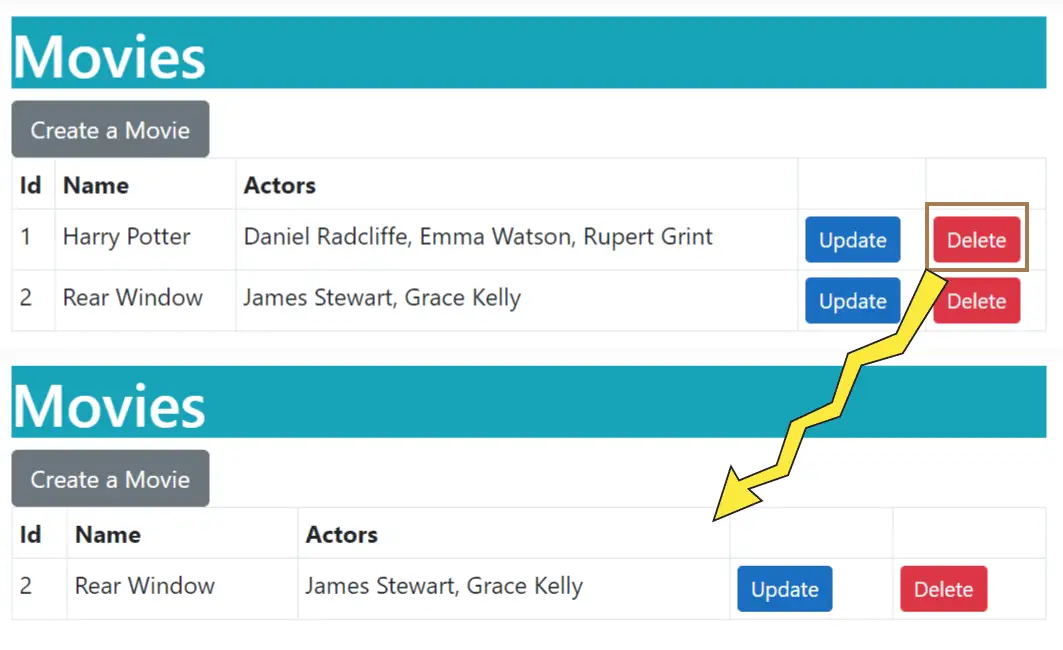
We have successfully tested the CRUD operations which are working perfectly. Remember the SQL Server database is running from a Docker Container.
Docker Compose for ASP.NET Core app and SQL Server Database
Now we will run ASP.NET Core MVC app and SQL Server database from Docker multi-containers using Docker Compose.
Start by right clicking the Project name in Solution Explorer and select Container Orchestrator Support.
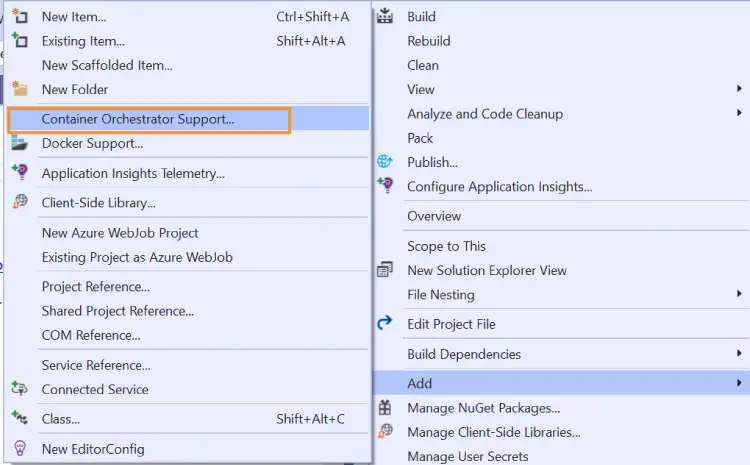
Next, on the new window that opens up select “Docker Compose”.

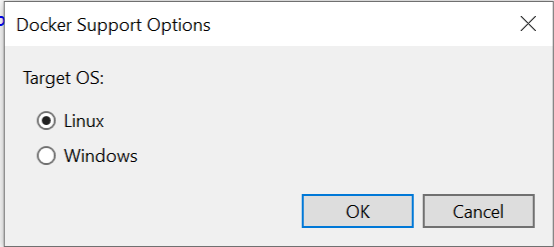
Next, select the Target OS as Linux and click the OK button.
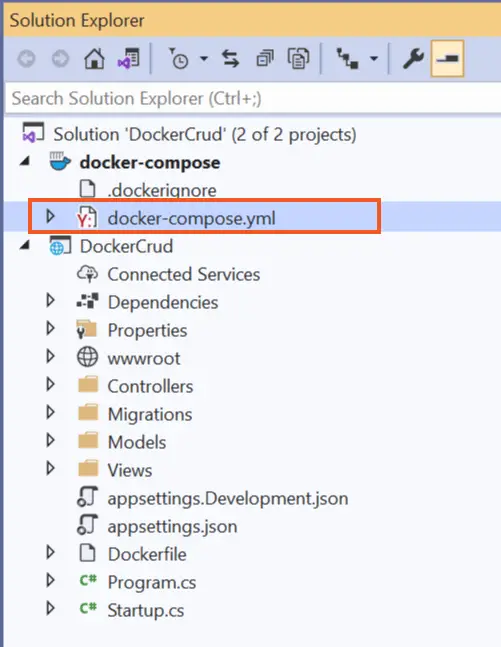
This will add a new project called docker-compose on the solution explorer.
Open the docker-compose.yml file which is inside the docker-compose project and add new service to it. Name this service sqldata.
Specify the image to be sql server 2022, password and expose ports. See the highlighted code given below.
1 2 3 4 5 6 7 8 9 10 11 12 13 14 15 16 | version: '3.4'services: dockercrud: image: ${DOCKER_REGISTRY-}dockercrud build: context: . dockerfile: DockerCrud/Dockerfile sqldata: image: mcr.microsoft.com/mssql/server:2022-latest environment: - MSSQL_SA_PASSWORD=vV5r9tn0M4@ - ACCEPT_EULA=Y ports: - "1450:1433" |
Notice the ports 1450:1433, the first port is the host’s port and the second is the port of the container running sql server (here the SQL Server used is different that the previous one, you can use the older one if you require). Now we have to create the database from Entity Framework Core Migration commands. We will do it in just a moment.
Visual Studio instructs Docker to create 2 containers – one will run the ASP.NET Core MVC app while the other one will run the SQL Server. The below image explains this thing.
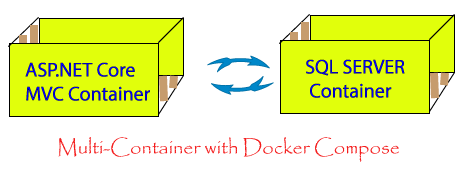
You can see these multi containers up and running in your docker desktop.

Next change the connection string by providing Data Source=sqldata which is the service name for the SQL Server in docker-compose.yml file. This is done because containers in docker compose can communicate with one another by their names. See the asp.net core docker connection string given below after the change.
{
  "ConnectionStrings": {
    "DefaultConnection": "Data Source=sqldata;Initial Catalog=MovieDB;Persist Security Info=True;User ID=SA;Password=vV5r9tn0M4@;TrustServerCertificate=true;"
  }
}
The app is ready to be run from docker containers but we have to do once more thing which is the creation of the database from migration command. The next section is going to cover it.
Running the EF Core Migrations
The EF Core migrations will create the database on the SQL Server. There is a catch when performing migrations, you have to change the database string to use localhost, 1450 instead of sqldata for Entity Framework Core to communicate with the database. Therefore the updated database connection string should be:
{
  "ConnectionStrings": {
    "DefaultConnection": "Data Source=localhost,1450;Initial Catalog=MovieDB;Persist Security Info=True;User ID=SA;Password=vV5r9tn0M4@;TrustServerCertificate=true;"
  }
}
Now select the “DockerCrud” project as Startup project in Visual Studio. Then in the package manager console window run the following 2 migration command.
add-migration Migration1
Update-Database
Once the migrations are completed revert the connection string to its previous state i.e. the one using the SQL Server Service name given in the docker compose yml file.
{
  "ConnectionStrings": {
    "DefaultConnection": "Data Source=sqldata;Initial Catalog=MovieDB;Persist Security Info=True;User ID=SA;Password=vV5r9tn0M4@;TrustServerCertificate=true;"
  }
}Running the APP
Now, in Visual Studio change the Startup project to “docker-compose” and press the run button. The app will run and you can perform the CRUD operations.
We have created a small 15 seconds video which shows the working. Check it.
Download the source codes:
In this tutorial you learned how to create a docker container with SQL Server 20220image. This procedure is helpful if you don’t want to install sql server on your system. You also learned how to run database driven ASP.NET Core MVC app with SQL Server 2022 container using Docker Compose. We also covered asp.net core docker connection string concepts in details.
If you love reading this tutorial makes sure to do a bit of promotion by sharing it on your facebook and twitter accounts.





 Welcome to YogiHosting - A Programming Tutorial Website. It is used by millions of people around the world to learn and explore about ASP.NET Core, Blazor, jQuery, JavaScript, Docker, Kubernetes and other topics.
Can we set sql data location in drive. So once image or container destroyed we still have access to data, so that we can restore in another server or deploy on production.
Yes you can do it with Docker Volumes. How to use volumes is given on my post – Exposing ports and configuring Environment variables for HTTPS.
We have to map the directory /var/opt/mssql/data for volume to your host machine. See the below command which uses -v tag for volume and specify it as –
-v sqlvolume:/var/opt/mssql/datadocker run -e "ACCEPT_EULA=Y" -e "SA_PASSWORD=vV5r9tn0M4@" -p 1440:1433 --name mysqlserver -h mysqlserver -v sqlvolume:/var/opt/mssql/data -d mcr.microsoft.com/mssql/server:2019-latestThanks Yogi!
This is another great post in this Docker series – one of the most comprehensive Docker tutorial for .Net developers.
Thank you Kevin for the kind words. I am also starting Kubernetes series for .NET developers. First article will come in the next 3 to 5 days. Kubernetes will automate docker containers.
How do you connect to a database server rather than to your localhost? What would the connection string look like and your docker file?
You can use Docker Compose to define a service for the database and in the connection string you use this service name. See the content under the heading “Docker Compose for ASP.NET Core app and SQL Server 2019”. If you are not using Docker Compose then use localhost,1440 in connection string.