Deploy a Docker based ASP.NET Core app to Azure

In this tutorial we are going to perform ASP.NET Core Docker app Deployment to Azure cloud service provider. We have already created the app on our last tutorial whose link is – First ASP.NET Core web App in Docker Container. Once the deployment is completed, we will be able to view the app on the browser with a URL.
Page Contents
Remember docker hub is a free registry for containing docker images. It is an easy way to create, manage, and deliver your images. You must create your free account on it if you haven’t done it till now.
ASP.NET Core Docker Deployment Procedure
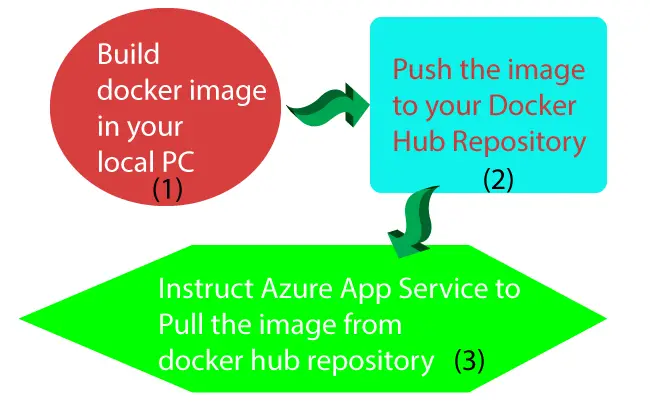
The Azure deployment procedure of the ASP.NET Core Dockerized APP contains 3 steps:
- Step 1 – First we will build a docker image of this app in our local docker environment which is our laptop.
- Step 2 – Next, we will push this image to our repository located on docker hub.
- Step 3 – Finally, we will instruct Azure to pull the image from the docker hub and make the app live.
The full procedure is explained in the below image:
Build the Docker Image locally
Open the command prompt and navigate to the directory of the Dockerfile of your ASP.NET Core app. Build the image so that it is named in this format – username/repository:tag.
Here “username” is the name of your docker hub account and “repository” is the name of a repository in your docker hub account. The “tag” can be anything like “v1”, etc.
The docker build command which we run is:
docker build -t yogyogi/apps:first .Note that yogyogi is the user name of our docker hub account. The name apps is the name of the repository situated in our docker hub account. To this repository this image will be pushed from our local pc. The first is the tag for the image.
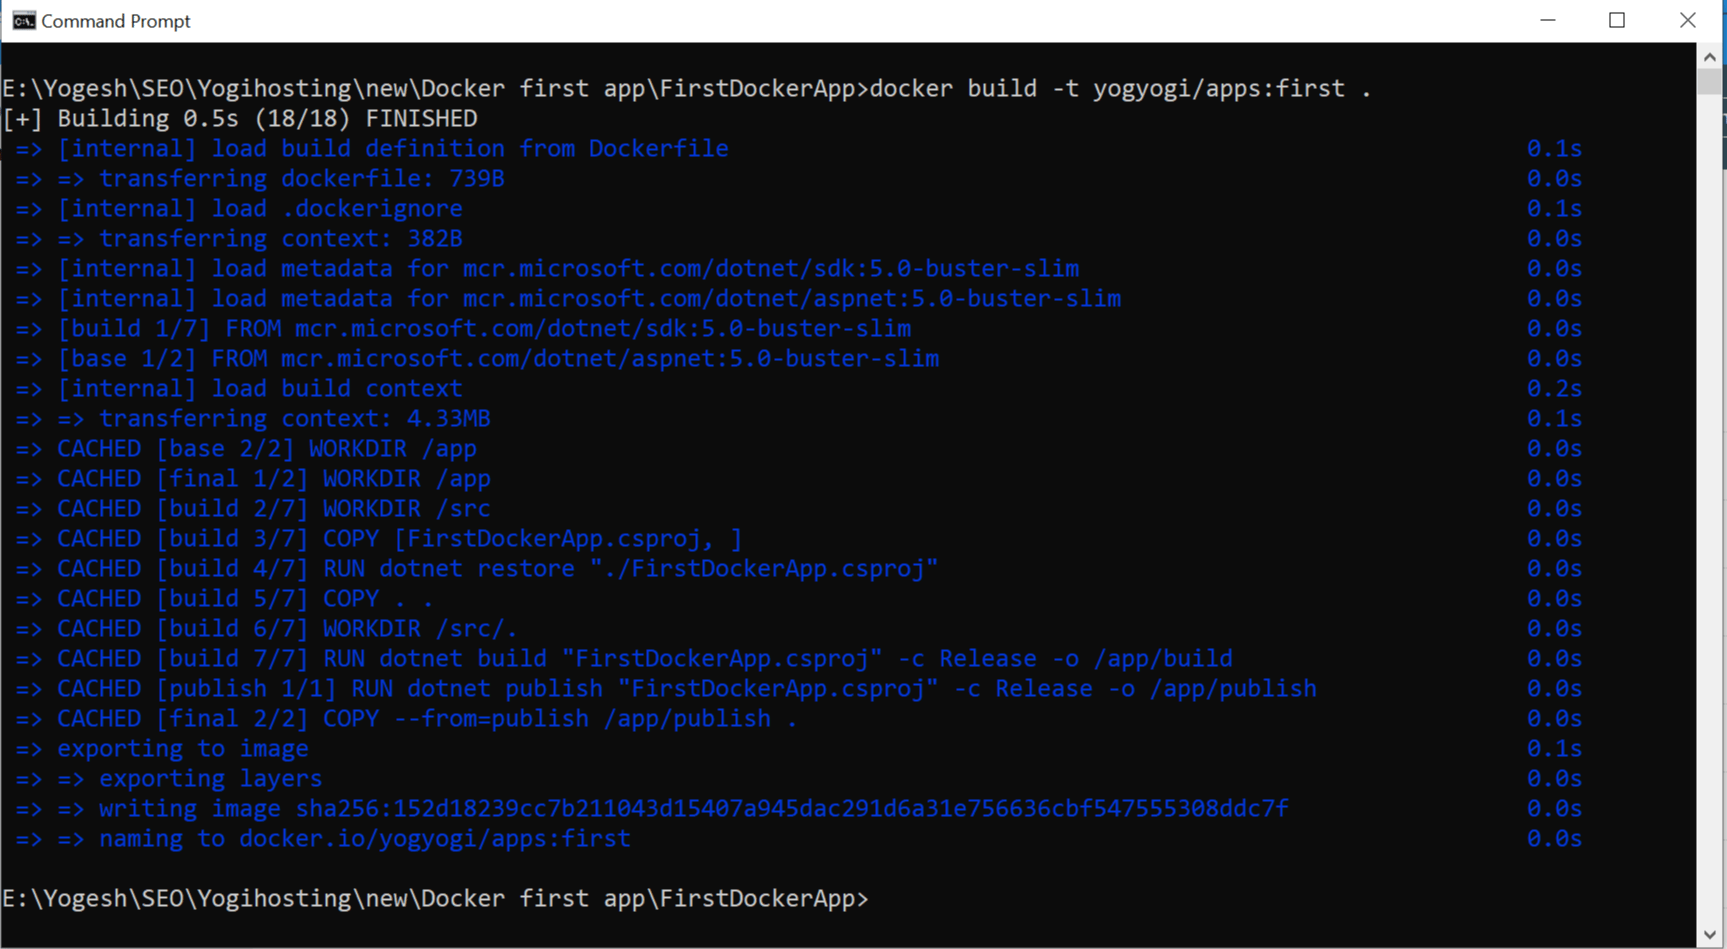
Tagging an image is helpful as we can keep multiple images in a single repository. For example we can push another image called yogyogi/apps:second into the same repository.
Pushing the image to docker hub using “docker push” command
Now login to your docker hub account and create a new repository by the name of apps. Once the repository is created it will show the push command that will push a local image to it. The command in our case is.
docker push yogyogi/apps:tagnameRecall, we have tagged the image as “first” so our push command would be:
docker push yogyogi/apps:first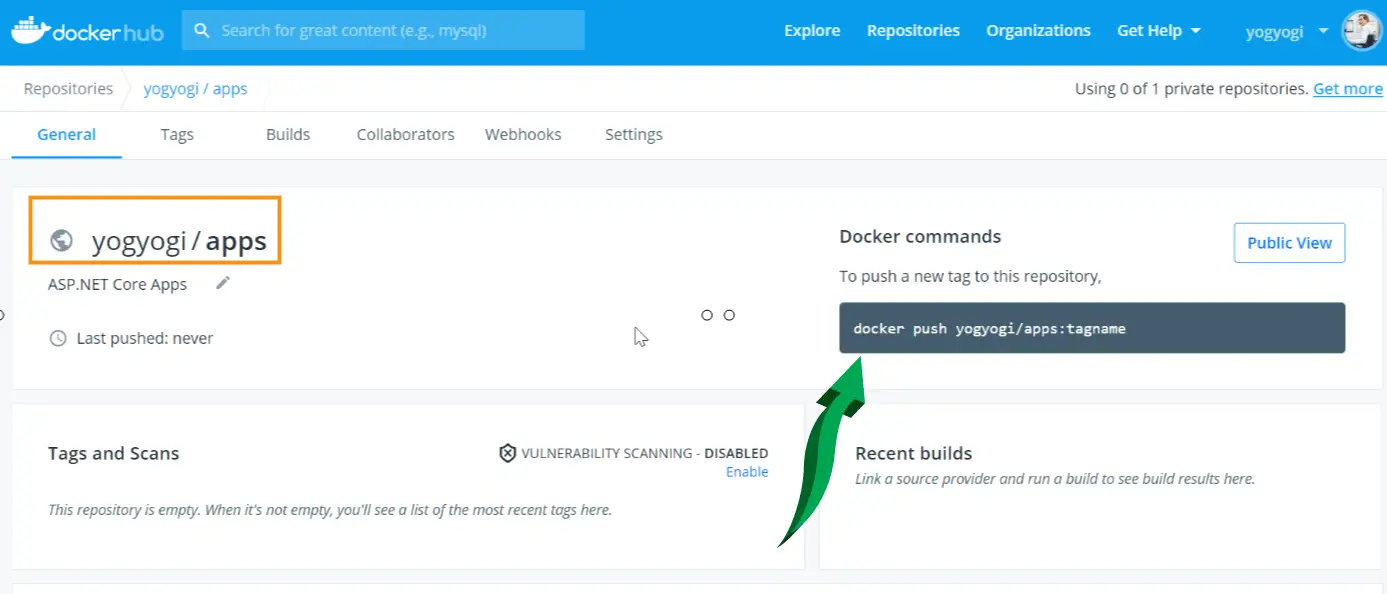
Pushing an image to docker hub requires an authentication. That is, you should be logged on to your docker hub account in your docker desktop. Right click on docker desktop and you can find out if you are logged in or not. See below image:
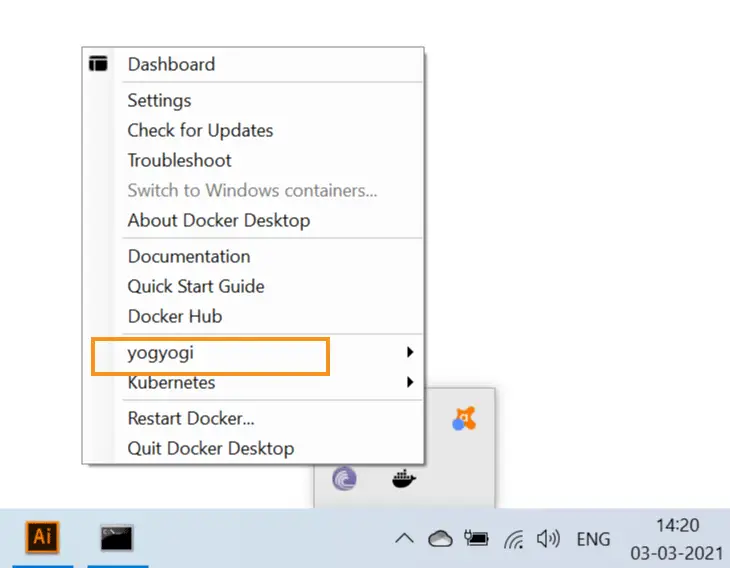
Suppose you are not logged in, then in that case you can log in from your docker desktop itself.
Another way to do is through login from the command prompt window. The command to login is:
docker loginIt will ask you for your username and password for the docker hub account. Note that when typing the password, it will not show anything. You will get login successful message. Check the below image which shown this message on successful login.

Next, we will push the image. The command to run is:
docker push yogyogi/apps:firstThe below image shown the screenshot of this docker push command.
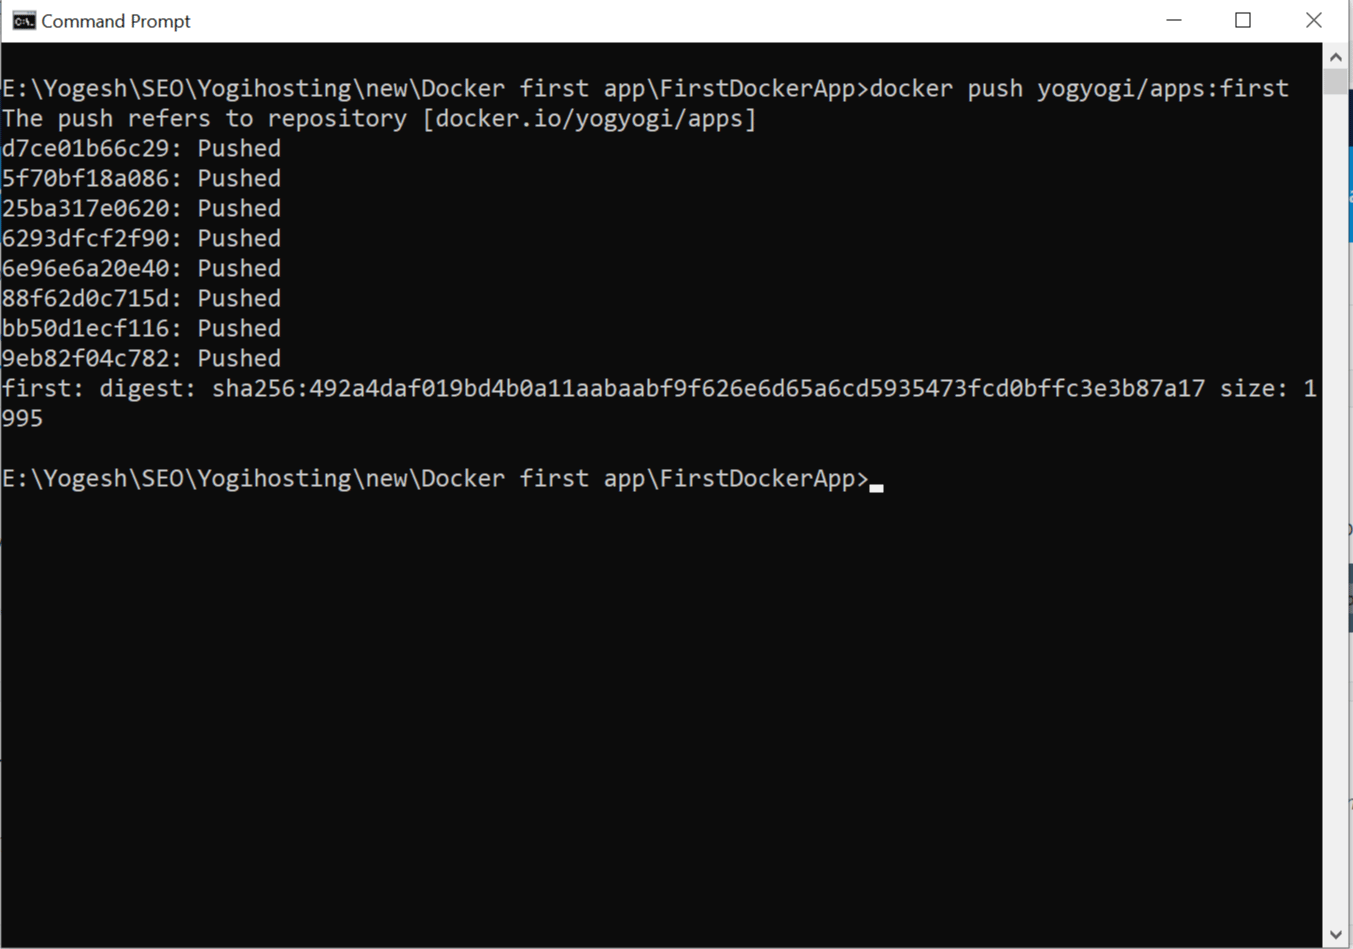
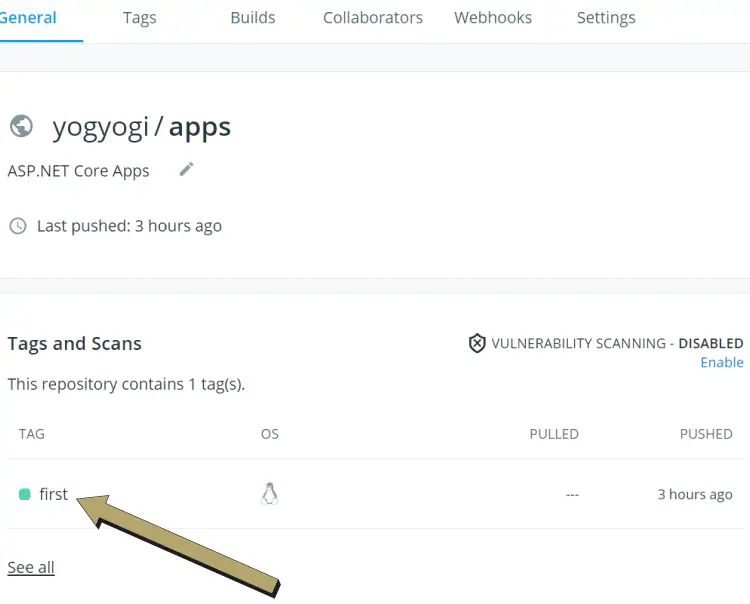
In a few minutes time, the image will be pushed to the docker hub. Now open your repository in the docker hub and you will find this pushed image there. In the below given image we have shown this thing.
Instructing Azure to pull the image from Docker Hub
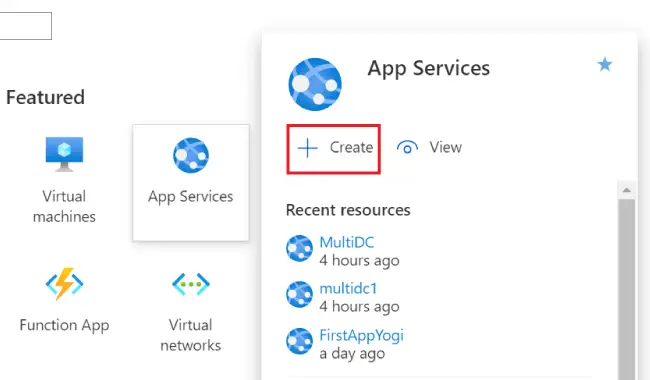
Now coming to the final part where we will instruct Azure to pull the image from our docker hub repository. Login to your Azure account and go to App Services, then click Create.
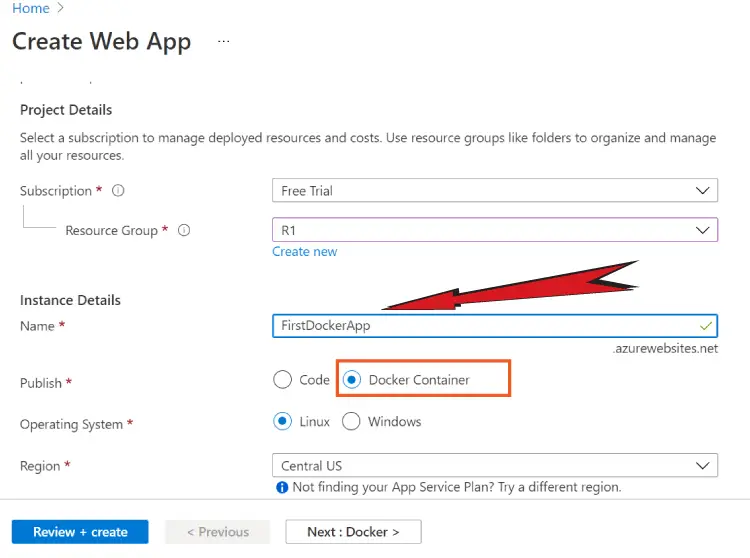
Next, on the Create Web App screen, give the name to your app. We have given it a name called FirstDockerApp. For the Publish field select Docker Container.
Also select the Operating System to be Linux. Then click the Next: Docker > button.
In the next screen you have to do some Docker settings in Azure for the ASP.NET Core app. Select Single Container as our app is based on single container. For the Image Source select Docker Hub, and for the Image and tag field add yogyogi/apps:first. This is the location of the image on our docker hub.
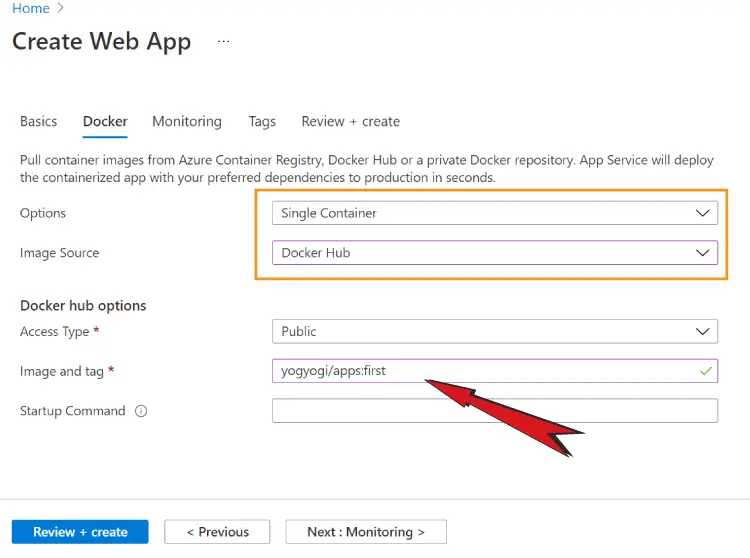
Click the Review + create button. The screen will show your docker setting for review. Next click the Create button to create your app and make it live.
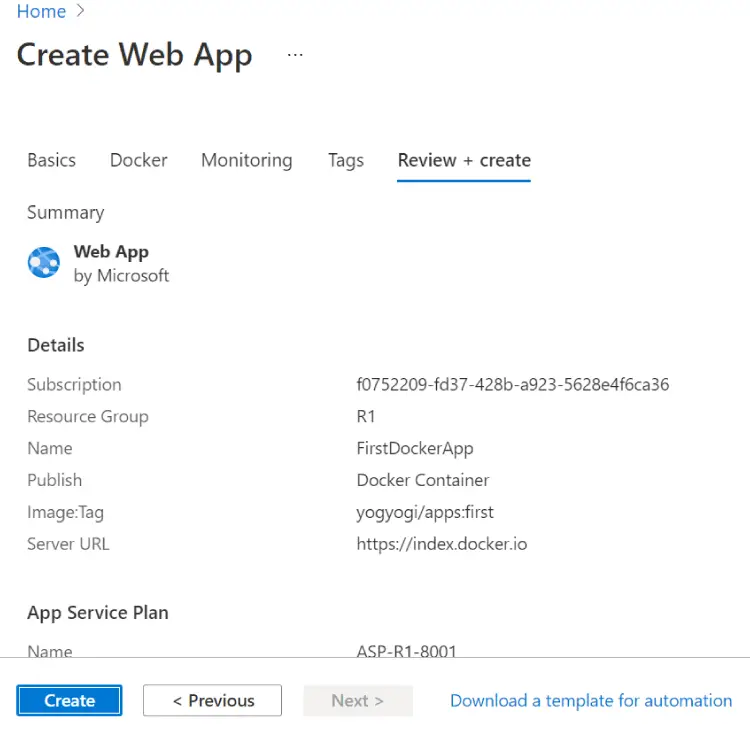
Azure will start the deployment of your app and it will be done in a minute or two. Azure will notify you once it is complete.
After that go your app service where you will see the url of this app.
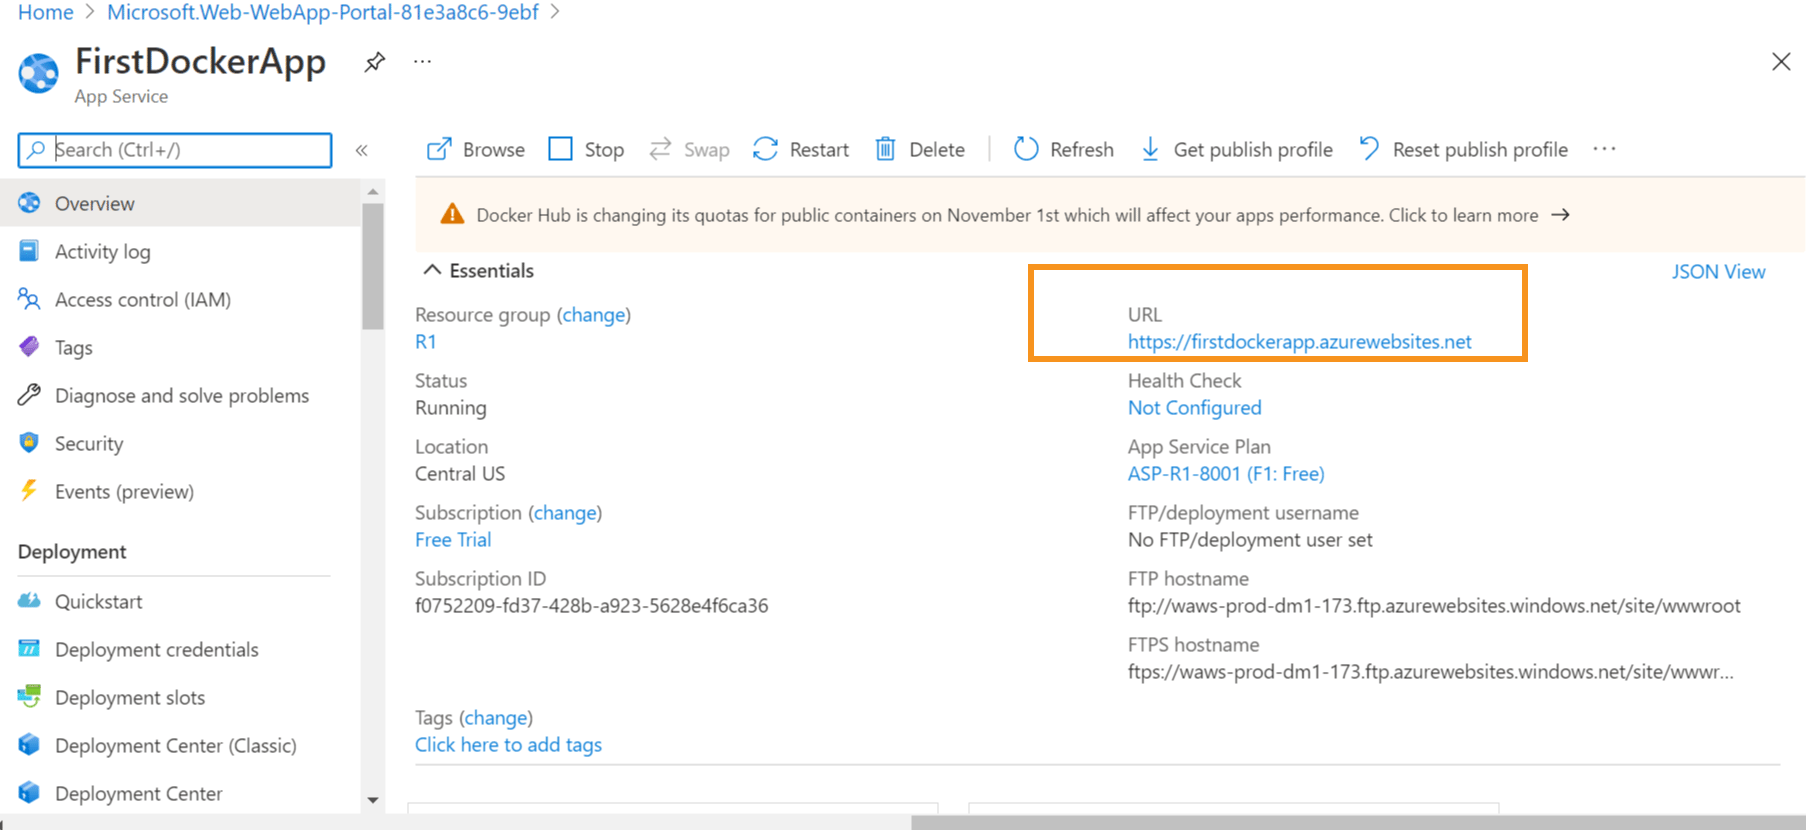
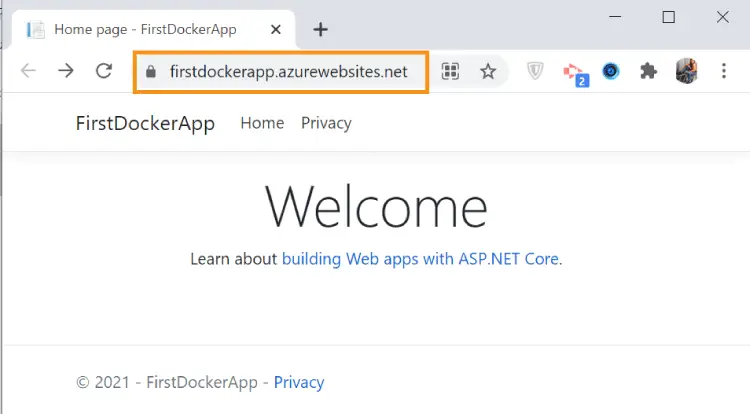
Click the url and your ASP.NET Core app will open in the browser. We have shown this in the below given image.
YouTube video – Deploy ASP.NET Core app on Docker to Azure
We have created a YouTube video showing this full deployment of the app to Azure. Kindly check it – Link Here.
Continuous Deployment
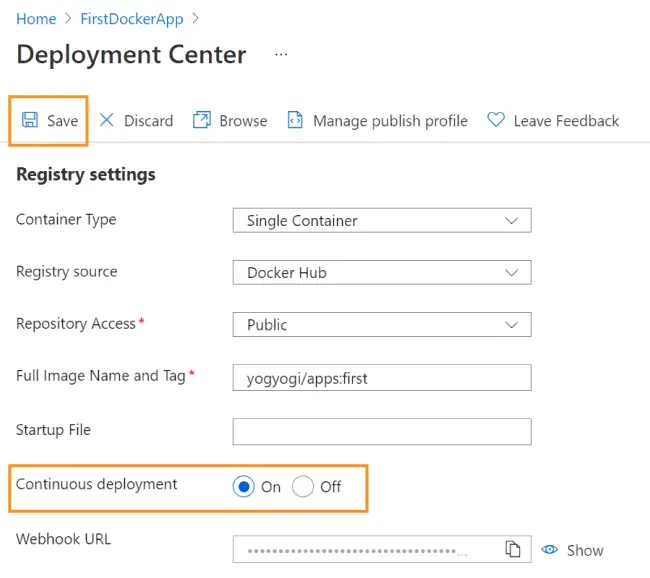
Next, we will show how to do Continuous Deployment in Azure. So, in the App Service called FirstDockerApp which we created earlier, go to the Deployment Center setting. Here change the Continuous deployment to On and save it.
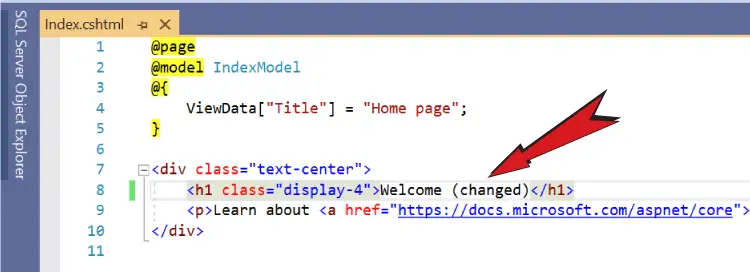
Now open the Index.cshtml page and change the heading as shown below.
Next, rebuild the image with the given command. This command should be run after you are logged in to Docker Hub. If not run the docker login first and then continue with the below command..
FirstDockerApp>docker build -t yogyogi/apps:first .Then push the image to docker hub.
docker push yogyogi/apps:firstAzure will automatically detect when the image is updated in Docker Hub and it will update the app with the new image.
Now open the apps URL once again and you will notice the changes.
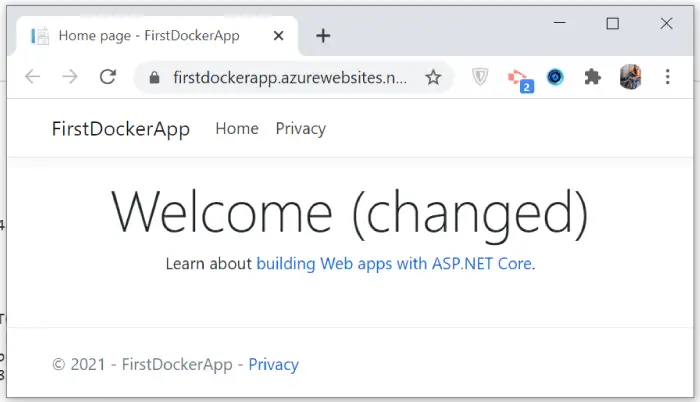
This completes the ASP.NET Core Docker app Deployment to Azure. We hope you loved learning for this article. Kindly share this knowledge with others.
We have launched Docker for .NET Developers – Complete Knowledge in Udemy, check it now – 





 Welcome to YogiHosting - A Programming Tutorial Website. It is used by millions of people around the world to learn and explore about ASP.NET Core, Blazor, jQuery, JavaScript, Docker, Kubernetes and other topics.