How to implement Certificate Authentication in ASP.NET Core
Certificate-based Authentication uses Digital Certificate to identify a client’s request and then grants it the access to a resource, network, application, etc. Certificate Authentication provides added security to web applications and Web APIs.
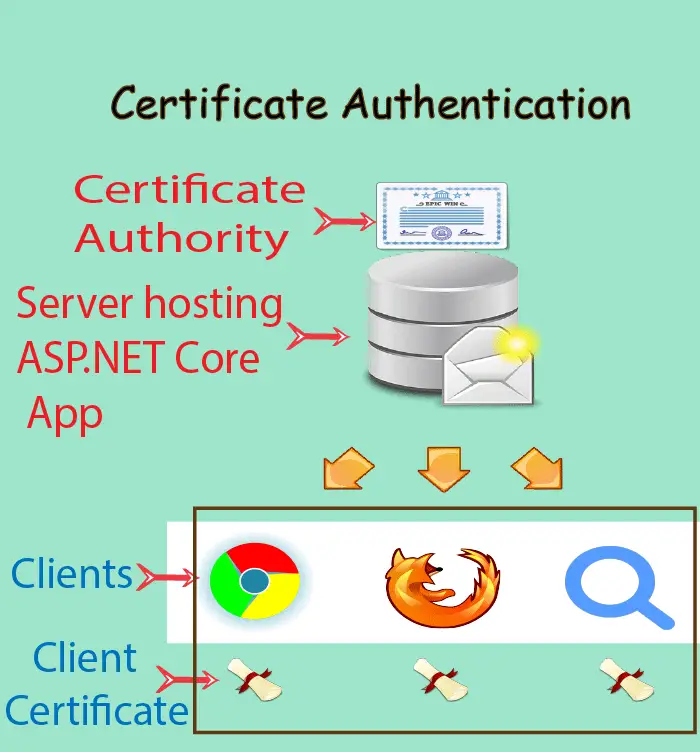
A Certificate Authorization architecture have 2 things:
- Server containing root certificate which makes it Certificate Authority. This server hosts our ASP.NET Core app which has Certificate Authentication implemented.
- Clients connecting to the ASP.NET Core app must provide Client Certificate to access the app. The client certificate can be added to the browser making the request or to the HttpClient class making the request.
Page Contents
PowerShell Commands to create Certificates
Certificate Authentication requires 2 types of Certificates, these are:
- Certification Authority (CA)
- Child Certificate
The below image explains it:
Now let us create both these certificates in PowerShell.
Creating Certification Authority (CA) in PowerShell
First open the PowerShell as an adminstrator. Then run the following 3 commands one by one.
New-SelfSignedCertificate -DnsName "localhost", "localhost" -CertStoreLocation "cert:\LocalMachine\My" -NotAfter (Get-Date).AddYears(20) -FriendlyName "Rlocalhost" -KeyUsageProperty All -KeyUsage CertSign, CRLSign, DigitalSignatureI have kept the value of -DnsName parameter as localhost which is absolutely right since I am securing the app running locally. In production you will have to use the value of your domain. Example -DnsName "yogihosting".
This command will create the self-signed Certificate Authority and provide it’s thumbprint. Keep this thumbprint safe as we will use it to create child certificate.
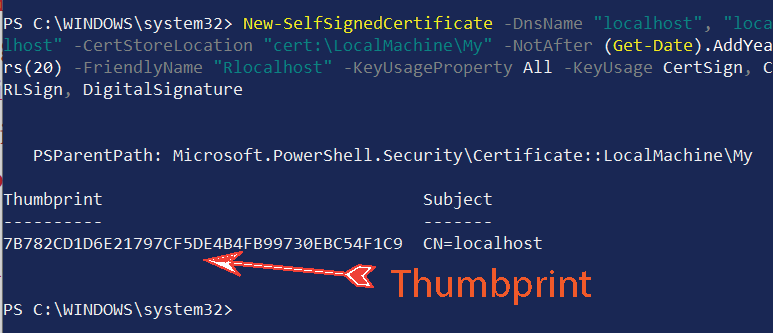
The below command sets the password. I am keeping the password 1234.
$mypwd = ConvertTo-SecureString -String "1234" -Force -AsPlainTextWe will now use the password which we set earlier and use it along with the thumbprint to export the certificate in a .pfx file.
Run the below command but before that change the text "thumbprint" with the thumbprint which you got earlier.
Get-ChildItem -Path cert:\localMachine\my\"thumbprint" | Export-PfxCertificate -FilePath D:\root.pfx -Password $mypwd
The command will export the certificate authority file called root.pfx on the “D” drive.
Creating Child Certificate in PowerShell
Let us create Child Certificate from root CA. So run the following 4 commands one by one. Note that:
- In the first command change the text
"ca thumbprint"with the thumbprint of root certificate which you got earlier. - After running the second command you will get the thumbprint of the child certificate. You have to change the text
"thumbprint"in the fourth command with this thumbprint.
These 4 commands are given below.
$rootcert = ( Get-ChildItem -Path cert:\LocalMachine\My\"ca thumbprint" )

New-SelfSignedCertificate -certstorelocation cert:\localmachine\my -dnsname "localhost" -Signer $rootcert -NotAfter (Get-Date).AddYears(20) -FriendlyName "Clocalhost"

$mypwd = ConvertTo-SecureString -String "1234" -Force -AsPlainText

Get-ChildItem -Path cert:\localMachine\my\"thumbprint" | Export-PfxCertificate -FilePath D:\child.pfx -Password $mypwd
Check the below image where I am doing this process.
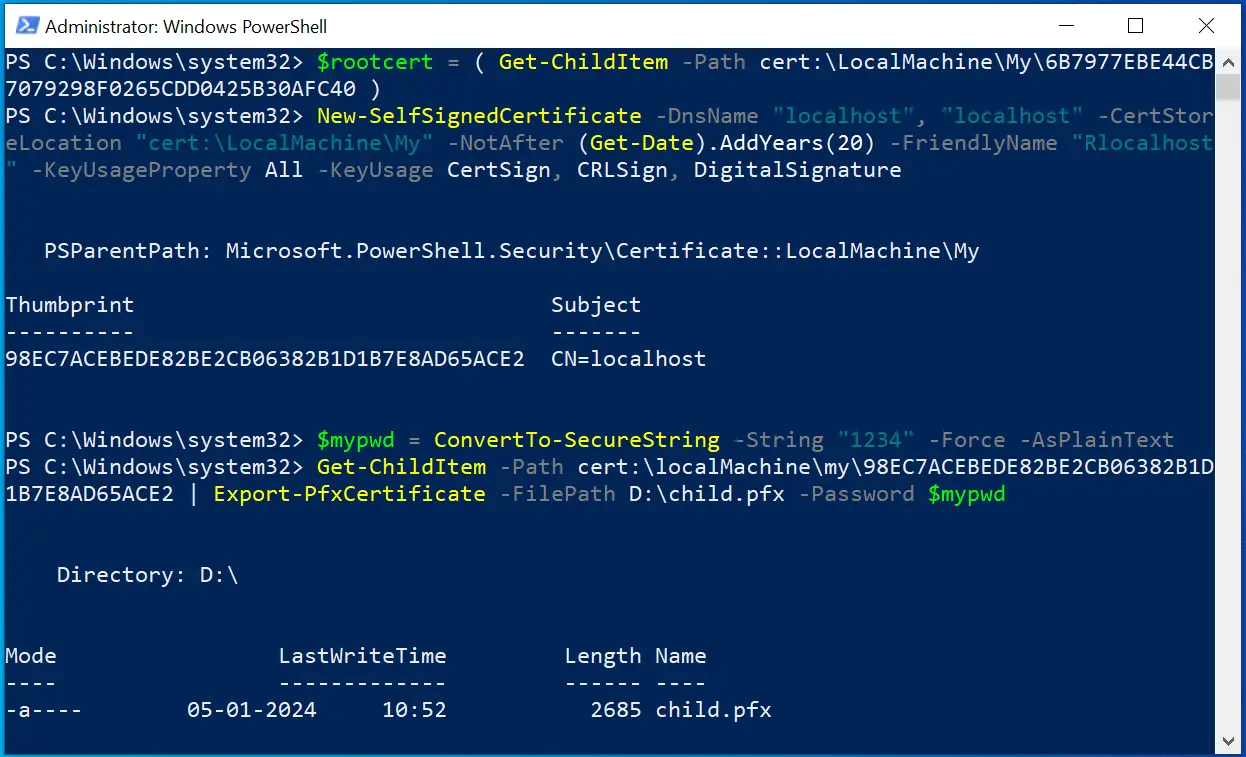
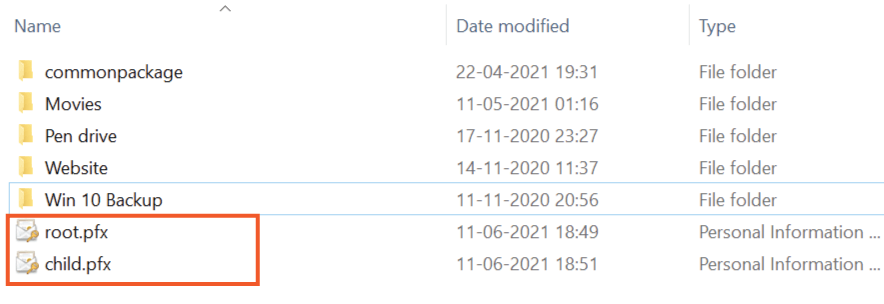
The child certificate file called child.pfx will be created on the “D” drive.
In the following image I have shown both the certificate files that are created on my D drive.
Implementing Certificate Based Authentication
In your ASP.NET Core app, first add the package called Microsoft.AspNetCore.Authentication.Certificate from NuGet.
Next, add a validation class called MyCertificateValidationService.cs whose role is to validate the child Certificates of the clients which are making the request.
using System.Security.Cryptography.X509Certificates;

namespace SecuredApp.Models
{
    public class MyCertificateValidationService
    {
        public bool ValidateCertificate(X509Certificate2 clientCertificate)
        {
            string[] allowedThumbprints = { "21A6E47A962C0E80A59517691FFA1D0500E3E548", "87A6E47A962C0E80A59517691FFA1D0500E3E548", "78A6E47A962C0E80A59517691FFA1D0500E3E548" };
            if (allowedThumbprints.Contains(clientCertificate.Thumbprint))
            {
                return true;
            }

            return false;
        }
    }
}
The string array allowedThumbprints contains 3 thumbprints of the child certificates. Make sure to put the child certificate thumbprint else you will fail to authorize.
Next, on the Program.cs file add 2 things:
- Register this validation class using AddTransient method.
- Tell app to use Certificate Authentication with the AddAuthentication method.
In the AddAuthentication() method provide a delegate for OnCertificateValidated and OnAuthenticationFailed events. These events will be called if child certificate validation passes or fails.
The code is given below:
builder.Services.AddTransient<MyCertificateValidationService>();
builder.Services.AddAuthentication(
    CertificateAuthenticationDefaults.AuthenticationScheme)
    .AddCertificate(options =>
    {
        options.AllowedCertificateTypes = CertificateTypes.SelfSigned;
        options.Events = new CertificateAuthenticationEvents
        {
            OnCertificateValidated = context =>
            {
                var validationService = context.HttpContext.RequestServices.GetService<MyCertificateValidationService>();

                if (validationService.ValidateCertificate(context.ClientCertificate))
                {
                    context.Success();
                }
                else
                {
                    context.Fail("invalid cert");
                }

                return Task.CompletedTask;
            },
            OnAuthenticationFailed = context =>
            {
                context.Fail("invalid cert");
                return Task.CompletedTask;
            }
        };
    });
Note that the code – options.AllowedCertificateTypes = CertificateTypes.SelfSigned must specifiy the certificate type which should be self signed in our case. It can have 3 values: All, Chained and SelfSigned.
app.UseAuthentication();
app.UseAuthorization();
Configure Kestrel to require certificates
Finally, you have to configure Kestrel so that the application always require certificates. This is done by adding the below code to the Program.cs file:
builder.Services.Configure<KestrelServerOptions>(options =>
{
    options.ConfigureHttpsDefaults(options =>
        options.ClientCertificateMode = ClientCertificateMode.RequireCertificate);
});
This completes the integration.
Test Certificate Authentication
In the app, we have Home Controller with an action “Index”.
using Microsoft.AspNetCore.Mvc;

namespace SecuredApp.Controllers
{
    public class HomeController : Controller
    {
        public IActionResult Index()
        {
            return View();
        }
    }
}
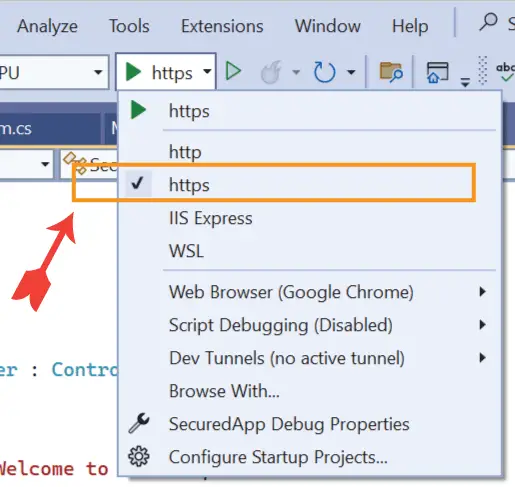
Next on Visual Studio select the kestrel option from the run dropdown. I have shown this in the below image. This makes sure that when I run the app on visual studio then kestrel should run it instead of IIS.
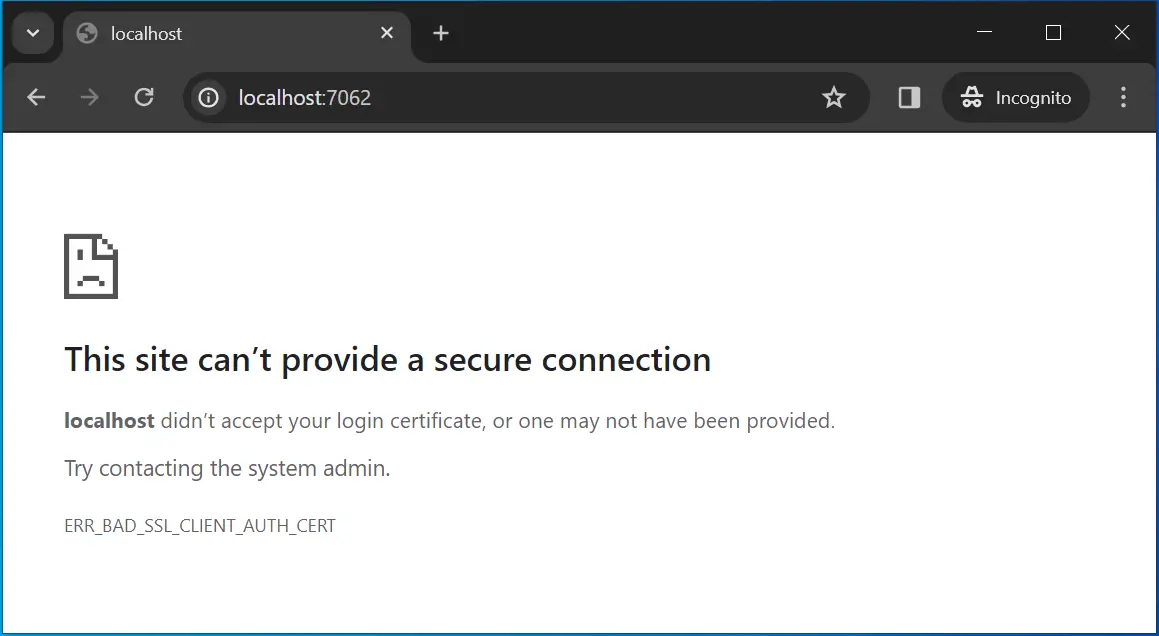
Now run your app on visual studio and you will not be able to access the controller as it will be asking for certificate. See the error message given by the browser.
Note that you have to add the Root Certificate to the server hosting the ASP.NET Core app. Windows based servers have a utility called CertMgr to manage certificates. Search for “CertMgr” or “Manage user certificates” in the windows search to open this utility. Next, right click on the “Certificates” folder which is under the “Trusted Root Certification Authorities” and select All Tasks ➤ Import and browse to the root.pfx file on the D drive.
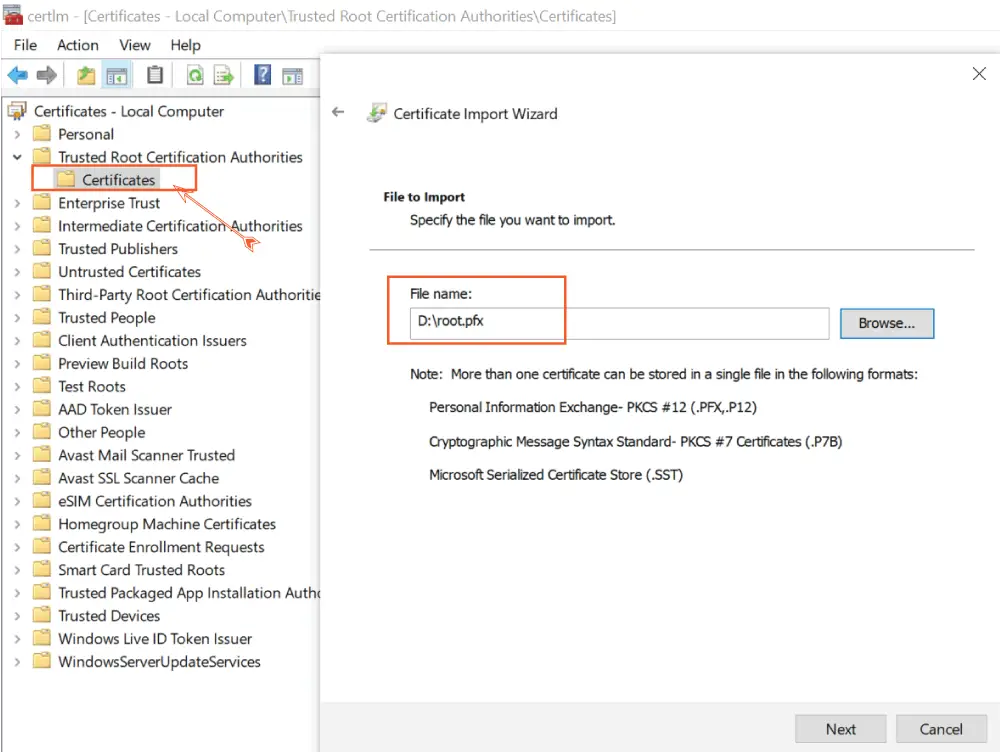
Click on the Next button to reach the next screen where you are asked to enter the private key (password). Recall we used “1234” as the password.
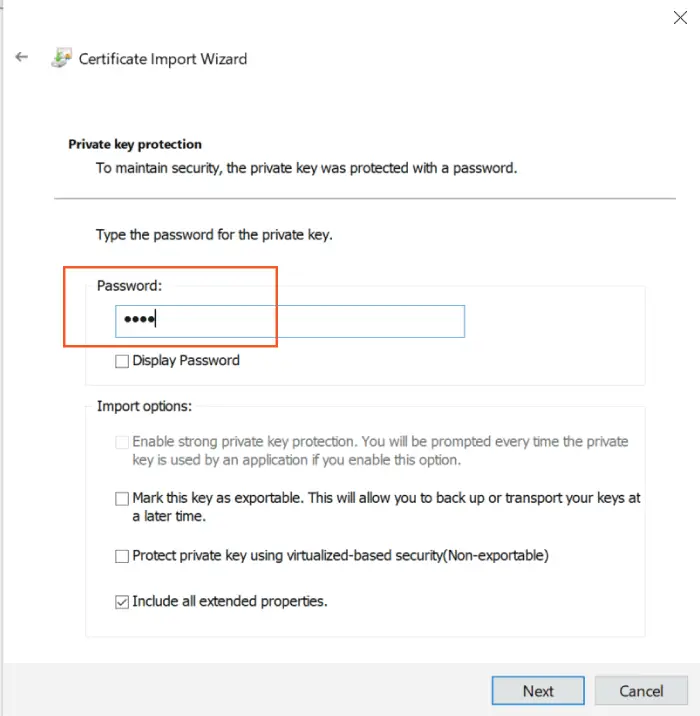
Continue the process and your root CA certificate will be added.
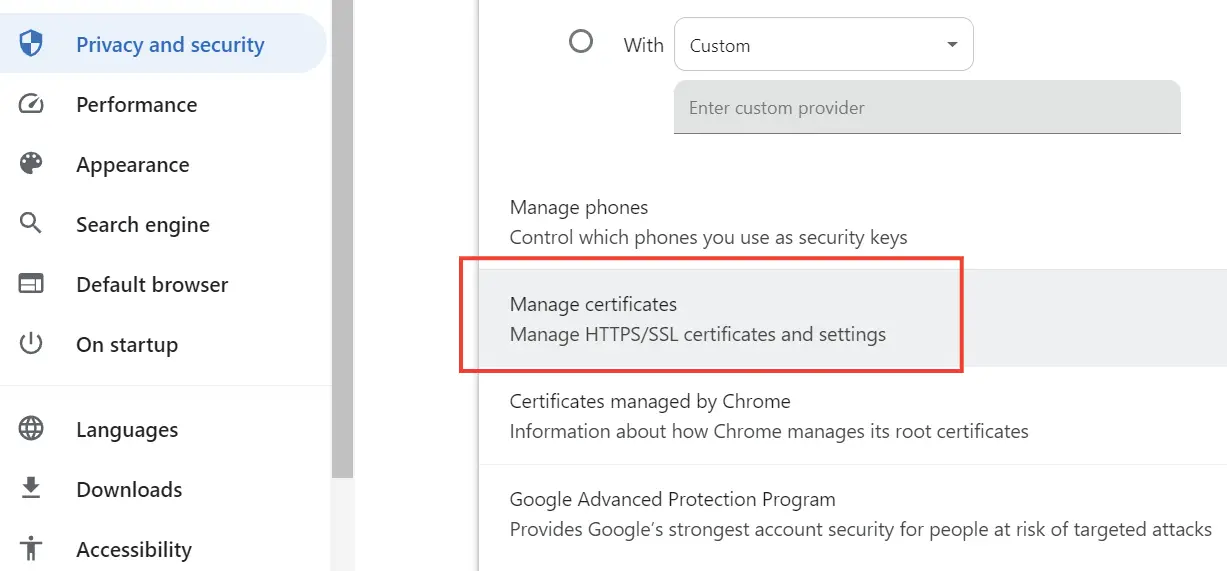
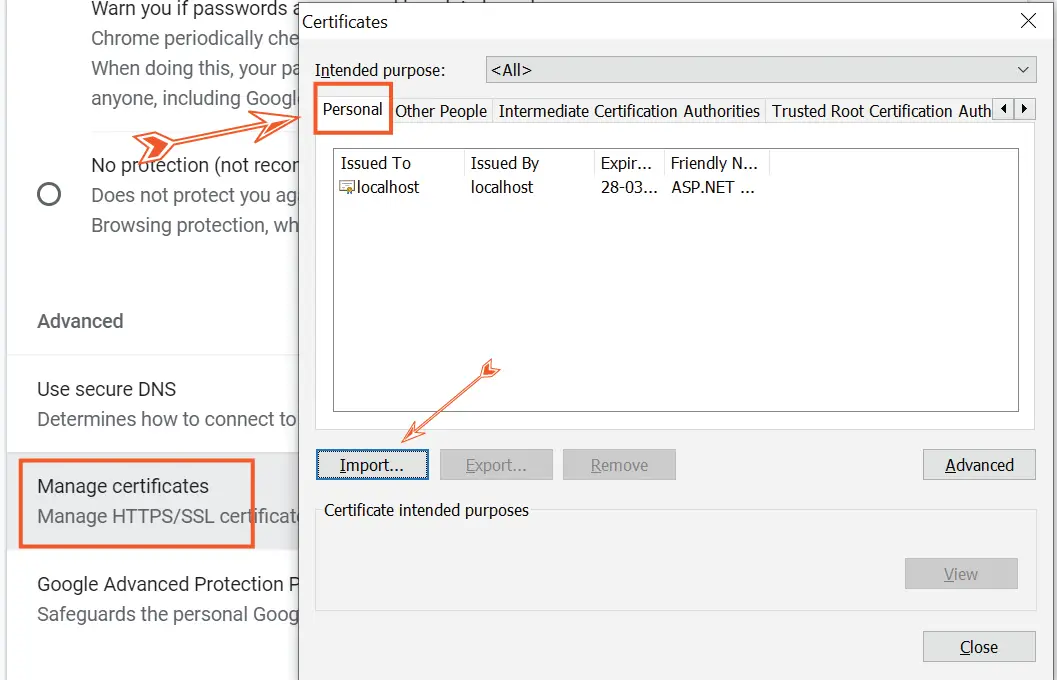
Client browsers wanting to access this app must add the child certificate to their store. In chrome browser, go to “Settings” then click the “Privacy and security” area, then to “Security”. Here you will find Manage Certificates, click on it to open a dialog window.
In this window make sure you are on the “Personal” tab and then click the Import button. Simply import the child.pfx file. As previously, enter the password 1234 when asked.
Now re-run your app on Visual Studio and this time chrome will ask you to select the child certificate.
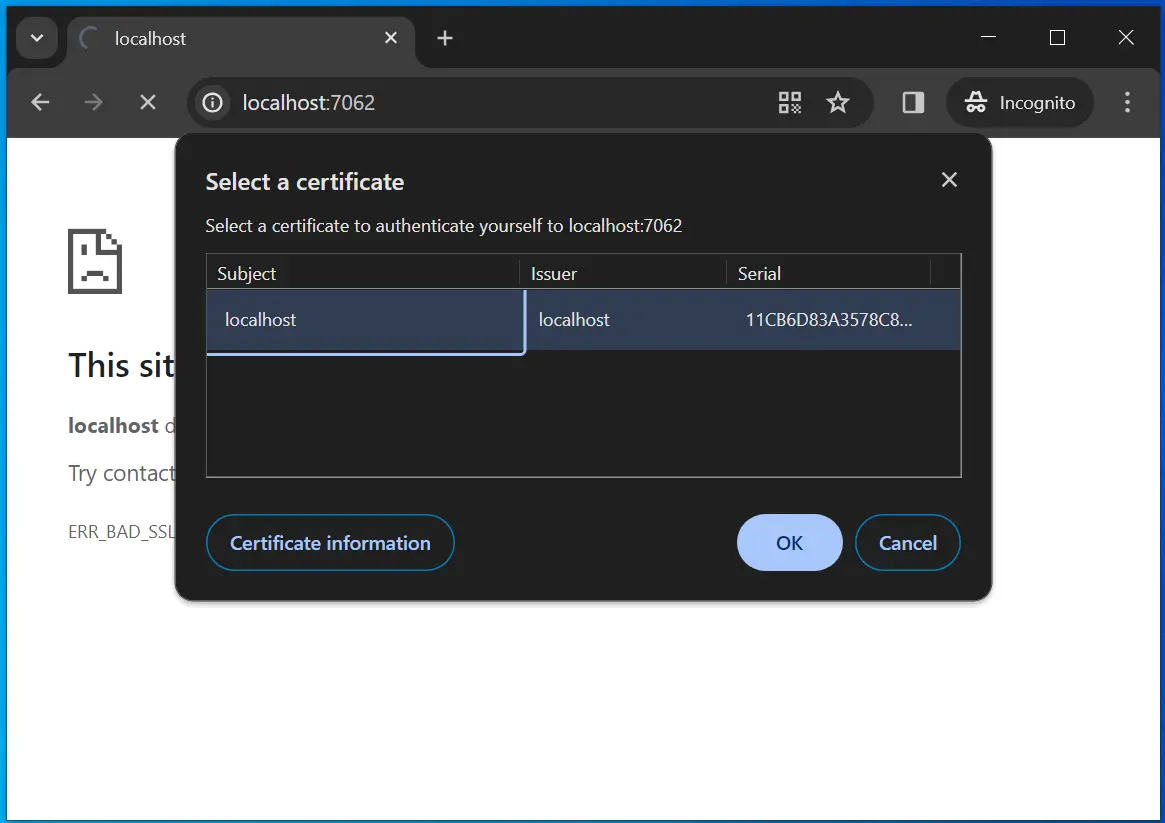
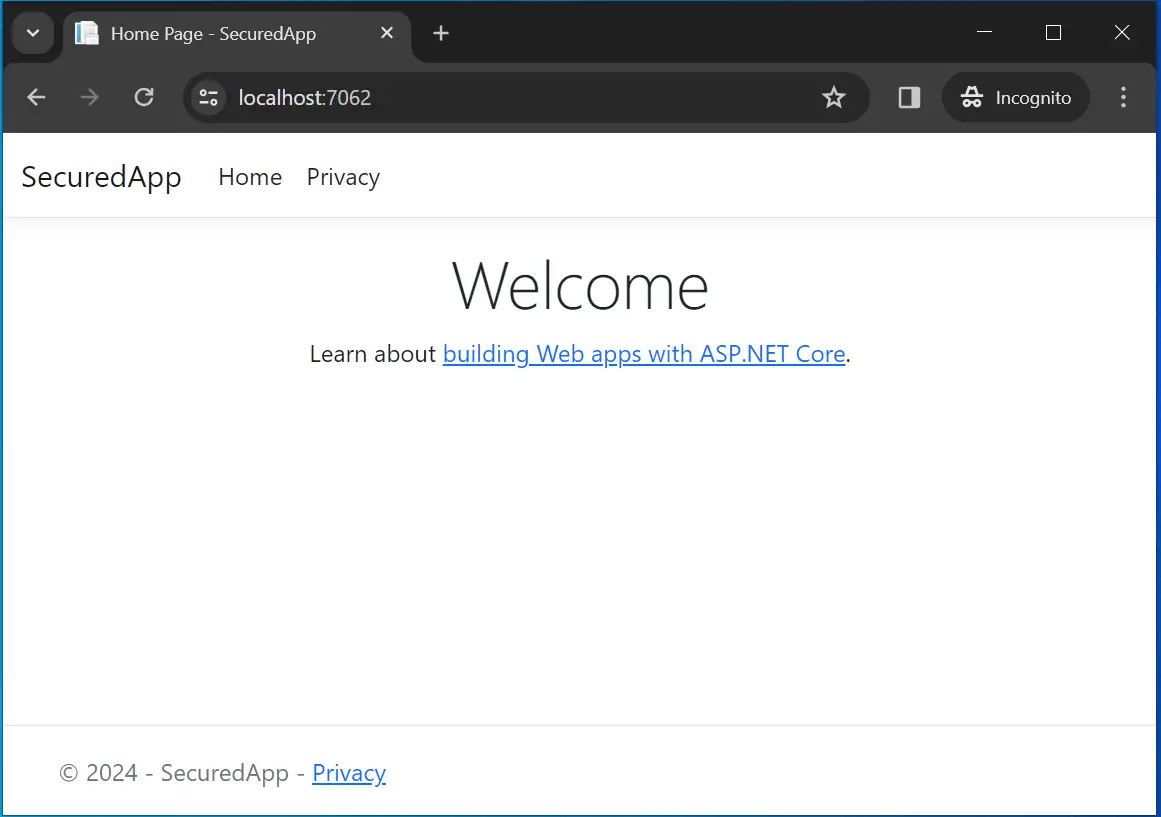
Click the OK button and this time you will be able to access the controller. See the below image which confirms this.
Implement HttpClient with Certificate Authentication
When using HttpClient class to call web apis (that are secured by certification authentication) you have to add the client certificate to the request, you do this with HttpClientHandler. Check the highlighted code given below.
The below API Controller is present on an ASP.NET Core app secured by Certificate Authentication.
[ApiController]
[Route("api/[controller]")]
public class SecuredController : ControllerBase
{
    [HttpGet]
    public string Get() => "Welcome to Narnia";
}
We can call this controller from another ASP.NET Core app by HttpClient class and adding Child Certificate to the request.
public async Task<IActionResult> Index()
{
    var cert = new X509Certificate2("Certificate-Location", "child.pfx"), "1234");
    var handler = new HttpClientHandler();
    handler.ClientCertificates.Add(cert);

    string apiResponse = "";

    using (var httpClient = new HttpClient(handler))
    {
        using (var response = await httpClient.GetAsync("https://localhost:5001/api/Secured"))
        {
            apiResponse = await response.Content.ReadAsStringAsync();
        }
    }
    return View((object)apiResponse);
}
Download full source codes:
- 1. Learn ASP.NET Core Views from A to Z
- 2. Learn Cookie Authentication in ASP.NET Core




 Welcome to YogiHosting - A Programming Tutorial Website. It is used by millions of people around the world to learn and explore about ASP.NET Core, Blazor, jQuery, JavaScript, Docker, Kubernetes and other topics.
Thanks much for your wonderful tutorial for the client certificate. I am having a problem connecting to the service from my console client.
var cert = new X509Certificate2(@”c:\…\root_localhost.pfx”, “1234”);
var handler = new HttpClientHandler();
handler.ClientCertificates.Add(cert);
var client = new HttpClient(handler);
var request = new HttpRequestMessage()
{
RequestUri = new Uri(“https://localhost”),
Method = HttpMethod.Get,
};
var response = await client.SendAsync(request);
if (!response.IsSuccessStatusCode)
{
//I am getting 403 always
}
I checked “Require SSL” on IIS SSL Ssettings and checked “Client Certirficate” to be “Required”.
I can’t figure out how to make it work.
Any help and advice are appreciated.
Thank again.
Yong
Thanks for the post. I implanted my certificate authentication based on your post. When I run my application in my windows 10 machine everything works correctly. However when I use docker, call my url (for example https://localhost:5001/api) I am having e err_connection_closed issue. Any suggestion please ? Thank you
Most probably the reason can be the Certificate is not allowed by the browser. You should try regenerating a new Root and client certificates from the Powershell command. Hope it helps you.
Regards,
Yogi
Hello. thank you for the post. I used the tutorial to add certifccate authentication in my app, it owrks perfectly on Windows. However when I execute the app on Ubuntu, I am always having an “ERR_CONNECTION_CLOSED”. I generated a certificate using openssl on my ubuntu machine but I am still having the same issue.
PS: if I comment the lines
“””
.ConfigureKestrel(options =>
{
options.ConfigureHttpsDefaults(opt =>
opt.ClientCertificateMode =
ClientCertificateMode.RequireCertificate);
})
“””
I am able to get a response, however the request has no certificate.
Any idea ? Thank you
I run sample code and get Access to localhost was denied You don’t have authorization to view this page.
HTTP ERROR 403
can you give steps on how to implement in .net farmework 4.8 version and not in .net core