Blazor forms and validation

In this tutorial we will cover Blazor Form Components and Form Validations and create a full feature from scratch. The form data will be validated before being inserted to the database. We will also cover how to perform data validations in forms so that the data should be in proper format before being inserted into the database. We will be using the database in MSSQLLocalDB and then perform data Insertion, Updation, Deletion and Reading through a popular ORM called Entity Framework Core.
Page Contents
Preparing the project and database
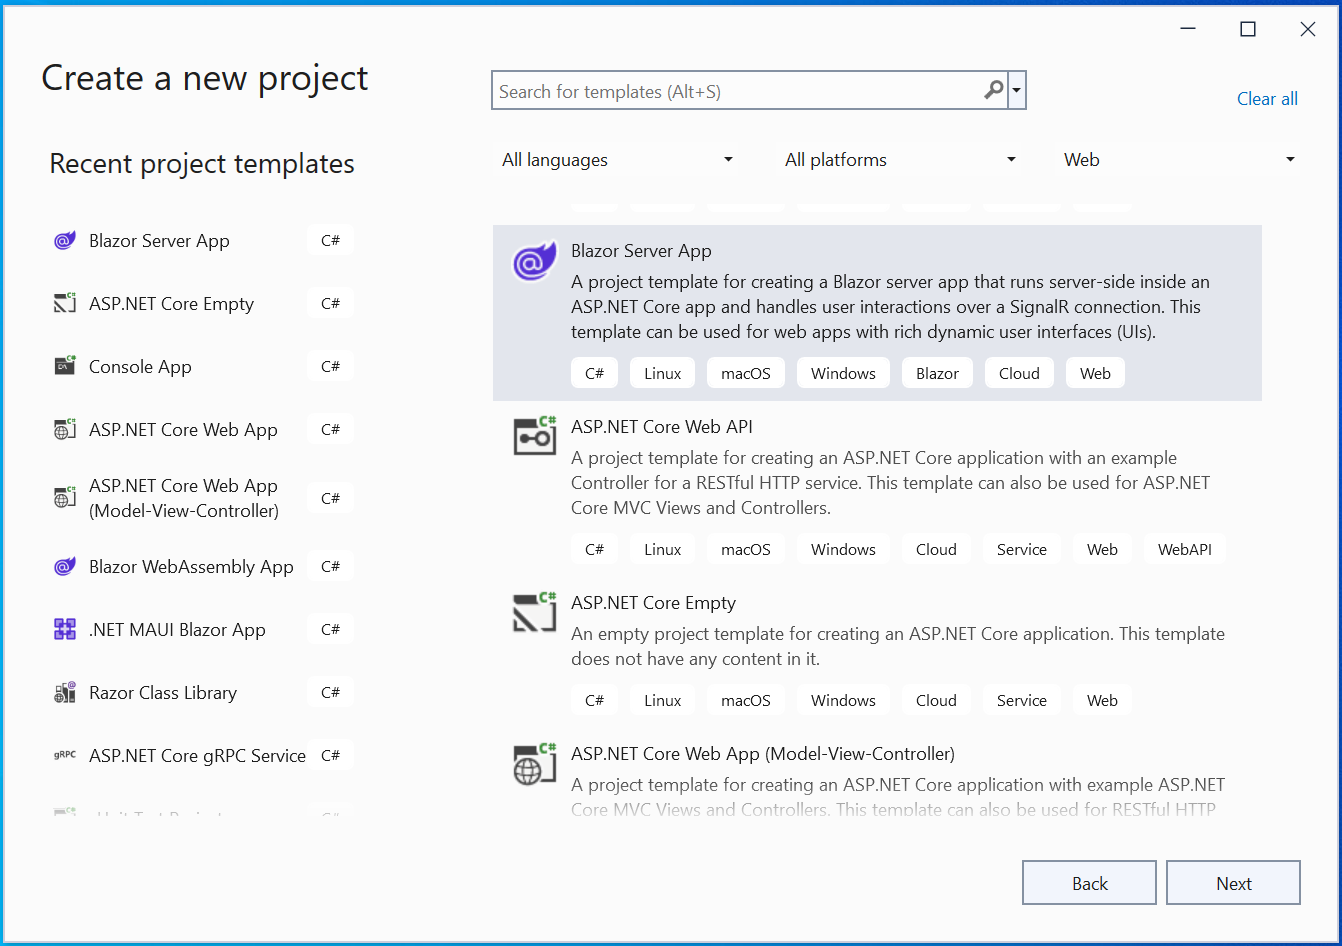
Create a new project in Visual Studio and select Blazor Server App template.
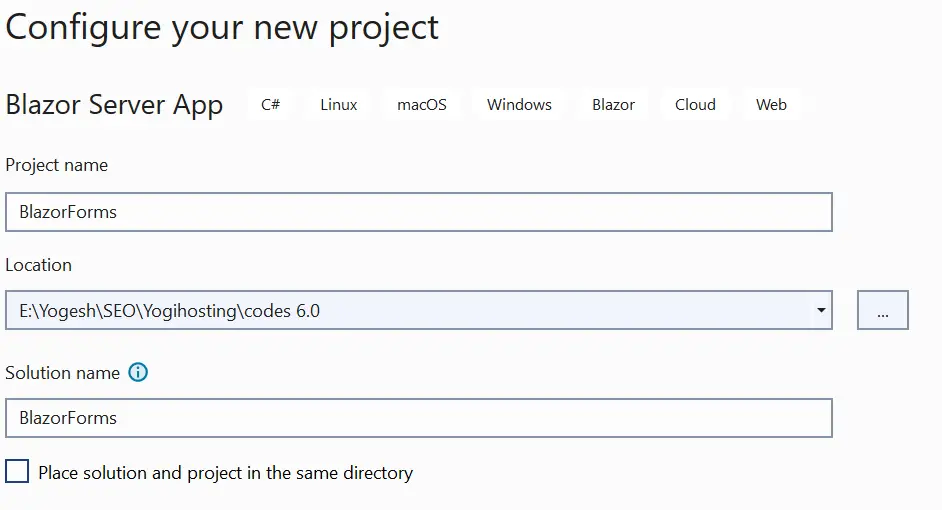
Name the app as BlazorForms.
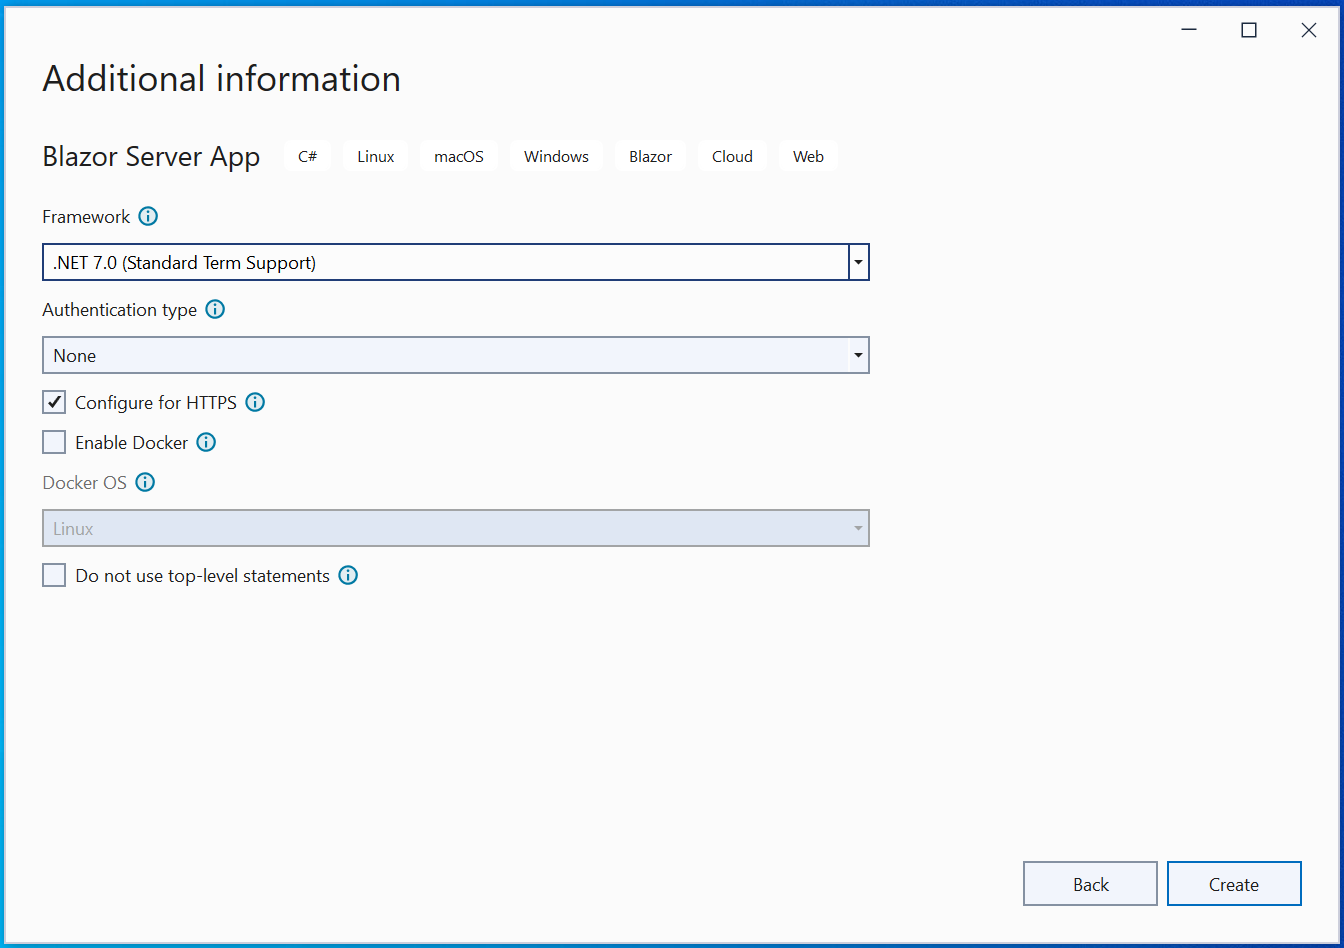
Make sure to select the latest version of DOT NET which is .NET 7.0 as shown by the below image.
Install Entity Framework Core
To work with Entity Framework Core we have to install the following 3 packages from NuGet:
Microsoft.EntityFrameworkCore.SqlServer
Microsoft.EntityFrameworkCore.Tools
Microsoft.EntityFrameworkCore.DesignAdding Model Classes
We will be dealing with a frictitious database of schools. Here we will have 3 entity classes – Student.cs, School.cs and Location.cs. These will be for Students information, School information and Location of Students.
So, first of all create a new folder called Models and inside it adds the following 3 classes.
using System.ComponentModel.DataAnnotations;

namespace BlazorForms.Models
{
    public class Student
    {
        public int Id { get; set; }

        [Required]
        [StringLength(50)]
        public string Name { get; set; }

        [Range(8, 15)]
        public int Age { get; set; }

        public DateTime DOB { get; set; }

        [Range(5, 10)]
        public int Standard { get; set; }

        [Required]
        public string Sex { get; set; }

        [RegularExpression("^[a-zA-Z0-9_\\.-]+@([a-zA-Z0-9-]+\\.)+[a-zA-Z]{2,6}$", ErrorMessage = "E-mail is not valid")]
        public string Email { get; set; }

        [Range(typeof(bool), "true", "true", ErrorMessage = "You must accept the Terms")]
        public bool Terms { get; set; }

        [Range(1, int.MaxValue, ErrorMessage = "Please Select School")]
        public int SchoolId { get; set; }
        public School School_R { get; set; }

        [Range(1, int.MaxValue, ErrorMessage = "Please Select Location")]
        public int LocationId { get; set; }
        public Location Location_R { get; set; }
    }
}
using System.ComponentModel.DataAnnotations;

namespace BlazorForms.Models
{
    public class School
    {
        public int Id { get; set; }

        [Required]
        [StringLength(50)]
        public string Name { get; set; }

        public IEnumerable<Student> Student_R { get; set; }
    }
}using System.ComponentModel.DataAnnotations;
namespace BlazorForms.Models
{
public class Location
{
public int Id { get; set; }
[Required]
[StringLength(50)]
public string City { get; set; }
[Required]
[StringLength(50)]
public string State { get; set; }
public IEnumerable<Student> Student_R { get; set; }
}
}The attributes applied on the fields like [Required], [StringLength], [Range] etc are Data Annotations, and they will be used for doing Validations. Refer – Model Validation from Data Annotations.
These attributes will also configure Entity Framework Core Entities. For example, by applying [Required] attribute, the respective field’s Allow Nulls property in the database will be un-checked.
In the same way the [StringLength(50)] will turn the max size of column to 50. It is applied to the “Name” field of the Student and School classes which makes the “Name” column in the database as nvarchar(50).
Data Context
Next add a new class called DataContext.cs inside the Models folder. It will work as the DBContext file and will communicate with the database aka Entity Framework Core. The full code of this class is given below:
using Microsoft.EntityFrameworkCore;

namespace BlazorForms.Models
{
    public class DataContext: DbContext
    {
        public DataContext(DbContextOptions<DataContext> options) : base(options) { }
        public DbSet<Student> Student { get; set; }
        public DbSet<School> School { get; set; }
        public DbSet<Location> Location { get; set; }

        protected override void OnModelCreating(ModelBuilder modelBuilder)
        {
            // Student & Location One to Many
            modelBuilder.Entity<Student>()
                    .HasOne(e => e.Location_R)
                    .WithMany(e => e.Student_R)
                    .HasForeignKey(e => e.LocationId)
                    .OnDelete(DeleteBehavior.Cascade);

            // Student & School One to Many
            modelBuilder.Entity<Student>()
                    .HasOne(e => e.School_R)
                    .WithMany(e => e.Student_R)
                    .HasForeignKey(e => e.SchoolId)
                    .OnDelete(DeleteBehavior.Cascade);
        }
    }
}
Inside the OnModelCreating method, we have added the One-to-Many Relationship between Student entity and School entity. Which means One School can have multiple Students in it.
Similarly, there is One-to-Many Relationship between the Student entity and Location entity.
Program.cs
In the Program.cs class we will register the DB Context as a service and specified the connection string of the database. Just add the below given code to the program class (add it after the builder object is created – var builder = WebApplication.CreateBuilder(args);).
builder.Services.AddDbContext<DataContext>(options =>
  options.UseSqlServer(builder.Configuration.GetConnectionString("DefaultConnection")));
appsettings.json
We also have to add the connection string to the database in the appsettings.json file which is located on the root of the project. The connection string code is shown highlighted.
{
  "Logging": {
    "LogLevel": {
      "Default": "Information",
      "Microsoft": "Warning",
      "Microsoft.Hosting.Lifetime": "Information"
    }
  },
  "AllowedHosts": "*",
  "ConnectionStrings": {
    "DefaultConnection": "Server=(localdb)\\MSSQLLocalDB;Database=SchoolDB;MultipleActiveResultSets=True"
  }
}
The database is selected as MSSQLLocalDB and name of the database is taken as SchoolDB.
_Imports.razor
We will need to import the necessary namespaces of the Entity Framework Core. So, we have added them to the _Imports.razor file. See it’s code below:
@using System.Net.Http
@using Microsoft.AspNetCore.Authorization
@using Microsoft.AspNetCore.Components.Authorization
@using Microsoft.AspNetCore.Components.Forms
@using Microsoft.AspNetCore.Components.Routing
@using Microsoft.AspNetCore.Components.Web
@using Microsoft.AspNetCore.Components.Web.Virtualization
@using Microsoft.JSInterop
@using BlazorForms
@using BlazorForms.Shared
@using BlazorForms.Models
@using Microsoft.EntityFrameworkCore;
@using System.Linq;
Performing Migrations
Now coming to the final step which is to perform migrations. This will create the Database. Run the following 2 commands one after the other in the Package Manager Console window. Note that you have to run them from the folder path where Program.cs file resides. So you will probably have to first navigate to this directory using the DOS Command – cd BlazorForms.
dotnet ef migrations add Migration1
dotnet ef database update
When the commands finished the database will be created. You can check the database in the SQL Server Object Explorer window.
We have shown the full working of this step in the below video:
Inserting Data in Entity Framework Core
In order to use Entity Framework Core in Blazor we will need to Inject the Database Context to the Razor Component by using the [Inject] attribute as shown below:
[Inject]
public DataContext Context { get; set; }
The Data Context file resides inside the Models folder so we have already imported it’s namespace in the _Imports.razor component in the earlier section.
@using BlazorForms.ModelsSo, let us create the Insert data feature to the School Table of the database. First create a new Razor Component called ManageSchool.razor inside the Pages folder of your app.
It will mainly have a text box for entering a School Name and a button which will insert the school to the School table of the database. Add the below code to this component.
@page "/ManageSchool"

<h1 class="bg-info text-white">Manage School</h1>

<h2 class="text-success bg-light p-2">Add a School</h2>

<h3 class="text-warning bg-light p-2">@FormSubmitMessage</h3>

<div class="form-group">
    <label>Name:</label>
    <input class="form-control" type="text" @bind="SchoolData.Name" />
    <button class="m-1 btn btn-primary" @onclick="Create">Click</button>
</div>

@code {
    [Inject]
    public DataContext Context { get; set; }

    public School SchoolData = new School();

    public string FormSubmitMessage { get; set; } = "Form Data Not Submitted";

    public void Create()
    {
        Context.Add(SchoolData);
        Context.SaveChanges();

        FormSubmitMessage = "Form Data Submitted";
   	    SchoolData = new School();
    }
}
We have defined a C# School type object called SchoolData and a text box is bound to it’s Name property using the @bind attribute as shown below:
<input class="form-control" type="text" @bind="SchoolData.Name" />This is the basics of binding a html element to a class type object, and it will be used throughout this tutorial. If their were more properties defined in the School class then they would be bind in the same way to different HTML elements.
Next, in the button click event we are inserting a new School to the School table of the database. Note that the Id property of the SchoolData object is set to 0 since is the default value of an Int type.
Context.Add(SchoolData);
Context.SaveChanges();
We have also updated the FormSubmitMessage variable value to “Form Data Submitted” so that users can know the outcome of the insert operation.
FormSubmitMessage = "Form Data Submitted";It’s value is shown inside a h3 tag:
Notice we have also reinitialized the SchoolData object inside the Create method:
SchoolData = new School();This is done so that new School can be inserted the next time. This is needed since Blazor maintains the state of variable and it becomes necessary to reinitialize them in this case.
<h3 class="text-warning bg-light p-2">@FormSubmitMessage</h3>Now run your app and go to the URL – https://localhost:44366/ManageSchool and try inserting a new school.
It will work perfectly as shown in the below video.
Now we will add a new feature to the same Razor Component. This feature will show all the School records from the School table. There will also be a delete button for deleting a school record.
So, add an HTML table and the binding code which is emphasize in changed colour, see below.
@page "/ManageSchool"

<h1 class="bg-info text-white">Manage School</h1>

<h2 class="text-success bg-light p-2">Add a School</h2>

<h3 class="text-warning bg-light p-2">@FormSubmitMessage</h3>

<div class="form-group">
    <label>Name:</label>
    <input class="form-control" type="text" @bind="SchoolData.Name" />
    <button class="m-1 btn btn-primary" @onclick="Create">Click</button>
</div>

<table class="table table-sm table-bordered table-striped ">
    <thead>
        <tr>
            <th>ID</th>
            <th>Name</th>
            <th>Delete</th>
        </tr>
    </thead>
    <tbody>
        @foreach (School s in Schools)
        {
            <tr>
                <td>@s.Id</td>
                <td>@s.Name</td>
                <td>
                    <button class="btn btn-sm btn-danger"
                            @onclick="@(() => Delete(s))">
                        Delete
                    </button>
                </td>
            </tr>
        }
    </tbody>
</table>

@code {
    [Inject]
    public DataContext Context { get; set; }

    public School SchoolData = new School();

    public string FormSubmitMessage { get; set; } = "Form Data Not Submitted";

    public void Create()
    {
        Context.Add(SchoolData);
        Context.SaveChanges();
        FormSubmitMessage = "Form Data Submitted";

        SchoolData = new School();
        UpdateSchools();
    }

    public List<School> Schools = new List<School>();
    protected override void OnInitialized()
    {
        UpdateSchools();
    }

    public void UpdateSchools()
    {
        Schools = Context.School.ToList();
    }

    public void Delete(School s)
    {
        Context.Remove(s);
        Context.SaveChanges();
        UpdateSchools();
    }
}
Explanation : We have defined a List<School> type variable called School which will contain all the Schools record. Whenever the component is initialized the UpdateSchools() method is called, which will fetch all the Schools from the database with Entity Framework Core.
protected override void OnInitialized()
{
    UpdateSchools();
}

public void UpdateSchools()
{
    Schools = Context.School.ToList();
}The HTML form shows all the Schools by looping through them and showing each of them inside a tr element.
@foreach (School s in Schools)
{
    …
}
The last column of each row of Schools contains a button whose work is to delete the respective row of School.
<td>
    <button class="btn btn-sm btn-danger"
            @onclick="@(() => Delete(s))">
        Delete
    </button>
</td>

public void Delete(School s)
{
    Context.Remove(s);
    Context.SaveChanges();
    UpdateSchools();
}
You can now run and check all the functionality which we have shown in the below video.
Although this works but there are lots of shortcoming in this approach. These are:
- 1. There is no Data Validations.
- 2. No error messages are displayed.
Thankfully Blazor provides built-in Form Components which we can use in our app and create professional forms having validations support. Let us now understand them.
Blazor Form Components
Blazor provides Built-in Form Component that are used to receive and validate the user inputs. These inputs are validated when they are changed and also when the form is submitted. These components resides in the Microsoft.AspNetCore.Components.Forms namespace. In the below table we have listed all of them.
| Component | Description |
|---|---|
| EditForm | It renders a form element that also performs data validations. |
| InputText | It renders an input element of type text. It can be bind to a C# value. |
| InputNumber |
It renders an input element of type number. It can be bind to a C# int, long, float, double, or decimal values. Here “T” is the type. |
| InputFile | It renders an input element of type file. |
| InputDate |
It renders an input element of type date. It can be bind to a C# DateTime or DateTimeOffset values. |
| InputCheckbox | It renders an input element of type checkbox and that is bound to a C# bool property. |
| InputSelect |
It renders a html select element. T is the type |
| InputRadio | It renders a input type radio element. |
| InputRadioGroup | Use InputRadio components with the InputRadioGroup component to create a radio button group. |
| InputTextArea | It renders a html select element. |
Now we will use these Blazor Form Components to create CRUD features for Location entity.
So, create a new Razor Component called ManageLocation.razor inside the Pages folder and add to it the following code:
@page "/ManageLocation"

<h1 class="bg-info text-white">Manage Location</h1>
<h2 class="text-success p-2">@FormSubmitMessage</h2>

<EditForm Model="LocationData" OnValidSubmit="HandleValidSubmit" OnInvalidSubmit="HandleInvalidSubmit">
    <DataAnnotationsValidator />
    <ValidationSummary />
    <div class="form-group">
        <label>City</label>
        <InputText class="form-control" @bind-Value="LocationData.City" />
    </div>
    <div class="form-group">
        <label>State</label>
        <InputText class="form-control" @bind-Value="LocationData.State" />
    </div>
    <div class="text-center">
        <button type="submit" class="btn btn-primary">Click</button>
    </div>
</EditForm>

@code {
    [Inject]
    public DataContext Context { get; set; }

    public Location LocationData { get; set; } = new Location();

    public string FormSubmitMessage { get; set; } = "Form Data Not Submitted";

    public void HandleValidSubmit()
    {
        Context.Add(LocationData);
        Context.SaveChanges();
        FormSubmitMessage = "Form Data Submitted";
    }

    public void HandleInvalidSubmit() => FormSubmitMessage = "Invalid Data Submitted";
}
Here we have used the EditForm component of Blazor. The 4 important attributes of the EditForm component are:
- Model – is used to provide the EditForm component with the object that the form is used to edit and validate.
- OnValidSubmit – is used to call an event which is triggered when the form is submitted and the form data passes validation.
- OnInvalidSubmit – is used to call an event which is triggered when the form is submitted and the form data fails validation.
- OnSubmit – is used to call an event which is triggered when the form is submitted and before validations are performed.
These Blazor Events are triggered by adding a conventional submit button.
Notice in the above code we have used the EditForm component to render a form. We have applied the 3 attributes – Model, OnValidSubmit and OnInvalidSubmit to the EditForm component.
<EditForm Model="LocationData" OnValidSubmit="HandleValidSubmit" OnInvalidSubmit="HandleInvalidSubmit">The Model attribute specifies the Model object for the form which is LocationData variable.
public Location LocationData = new Location();The LocationData properties called “City” and “State” are bound to the two InputText components using the bind-Value attribute.
<InputText class="form-control" @bind-Value="LocationData.City" />
<InputText class="form-control" @bind-Value="LocationData.State" />
There is a simple submit button which will submit this form.
<button type="submit" class="btn btn-primary">Click</button>The OnValidSubmit attribute specifies the event called when the form is submitted and the form data passes validation. This is the ideal place to insert the record to the database. So, we have called a hander HandleValidSubmit where the location data is inserted.
public void HandleValidSubmit()
{
    Context.Add(LocationData);
    Context.SaveChanges();
    FormSubmitMessage = "Form Data Submitted";

    LocationData = new Location();
}
The OnInvalidSubmit attribute specifies the event called when the form is submitted but the form data fails validation. We have applied a hander method called “HandleInvalidSubmit” for this event, and which changes the value of the FormSubmitMessage property to “Invalid Data Submitted”.
public void HandleInvalidSubmit() => FormSubmitMessage = "Invalid Data Submitted";
The value of this property is shown inside a h2 tag:
<h2 class="text-success p-2">@FormSubmitMessage</h2>We have also added 2 Blazor Validation Components inside the EditForm component and these are:
<DataAnnotationsValidator />
<ValidationSummary />
Blazor Validation Components
Blazor provides 3 Validation components to perform data validations, and show Validation messages. These are:
| Component | Description |
|---|---|
| DataAnnotationsValidator | This component integrates the validation attributes applied to Model Class i.e. Data Annotations into the Blazor Validation system. |
| ValidationMessage | It displays validation error messages for a single property. |
| ValidationSummary | It displays validation error messages for the entire form. |
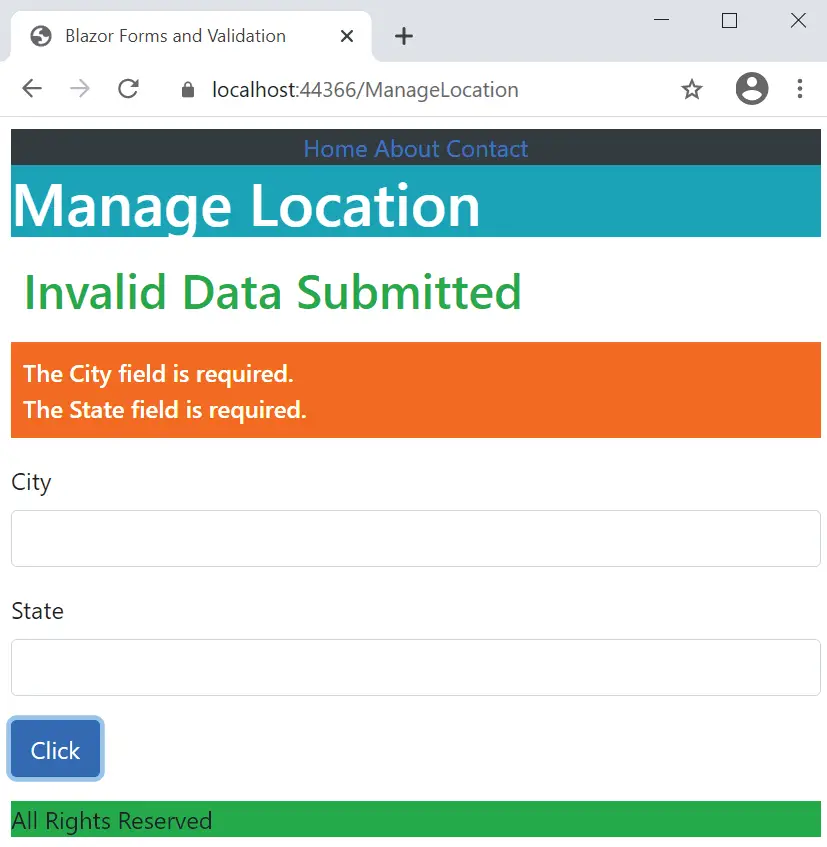
You can now run the project and go to the URL – https://localhost:44366/ManageLocation, just click the button without entering anything on the text boxes. You will see message – ‘Invalid Data Submitted’ along with 2 validation error messages:
- The City field is required.
- The State field is required.
We have shown these messages in the below image:
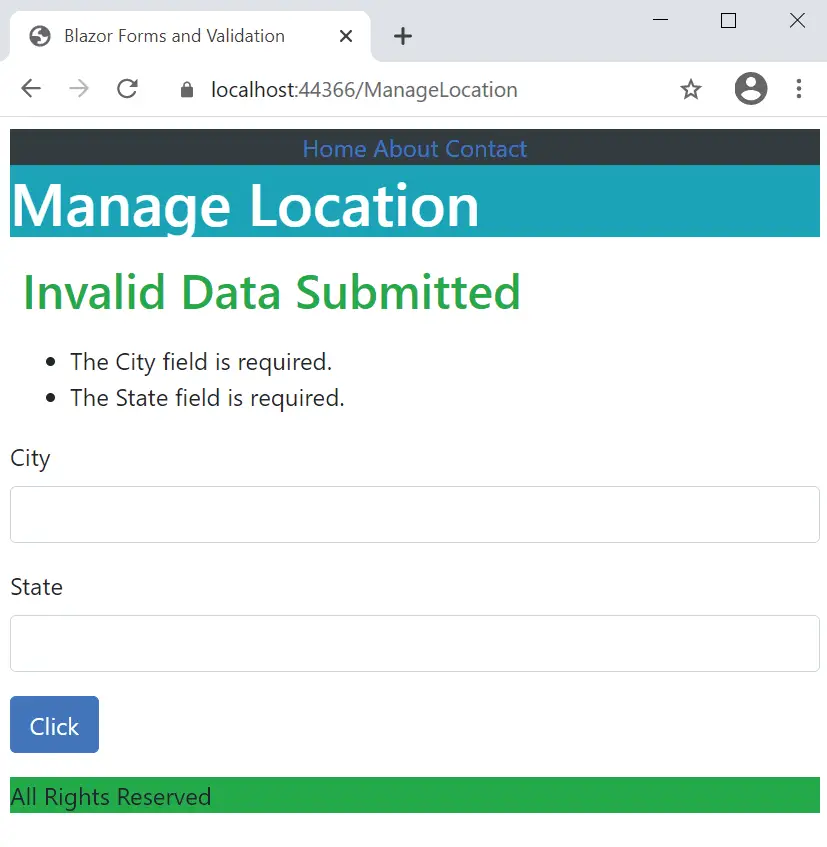
The ValidationSummary component is rendered as a ul elements containing li elements and validation messages are shown inside the li elements. On checking the page source, you will find the generated HTML as given below.
<ul class="validation-errors">
<li class="validation-message">The City field is required.</li>
<li class="validation-message">The State field is required.</li>
</ul>
Notice the CSS Classes validation-errors and validation-message that are assigned to the generated html elements where validation messages are shown. We have described them in the below table:
| Component | Description |
|---|---|
| validation-errors | The ValidationSummary component generates a top level ‘ul’ container for the summary of validation messages and assigns validation-errors CSS class to it. |
| validation-message | The top level ‘ul’ container is populated with ‘li’ elements for each validation message. These li elements are assigned with validation-message CSS class. |
We will now style these CSS class to show the Blazor Form Validation Errors in a better way. So create a new stylesheet called validation.css inside the wwwroot folder of your project and add the following code to it:
.validation-errors {
    background-color: #ff6a00;
    padding: 8px;
    font-size: 16px;
    font-weight: 500;
}

li.validation-message {
    color: #FFFFFF;
    font-weight: 500
}
Here we have applied the styling for the classes added by the ValidationSummary component. It typically makes the red background with white error messages.
Now add the reference of this style to the ManageLocation.razor component by adding it’s link at the top of the razor component.
<link href="validation.css" rel="stylesheet" />Run the app and check how it look. Now the validation messages are shows like below.
ValidationMessage – Showing Validation Messages for individual properties
We can also display validation messages for a specific fields by using ValidationMessage component. Update the code of the component to contain 2 ValidationMessage as shown in highlighted way:
@page "/ManageLocation"
<link href="/validation.css" rel="stylesheet" />

<h1 class="bg-info text-white">Manage Location</h1>
<h2 class="text-success p-2">@FormSubmitMessage</h2>

<EditForm Model="LocationData" OnValidSubmit="HandleValidSubmit" OnInvalidSubmit="HandleInvalidSubmit">
    <DataAnnotationsValidator />
    <ValidationSummary />
    <div class="form-group">
        <label>City</label>
        <ValidationMessage For="@(() => LocationData.City)" />
        <InputText class="form-control" @bind-Value="LocationData.City" />
    </div>
    <div class="form-group">
        <label>State</label>
        <ValidationMessage For="@(() => LocationData.State)" />
        <InputText class="form-control" @bind-Value="LocationData.State" />
    </div>
    <div class="form-group">
        <button type="submit" class="btn btn-primary">Click</button>
    </div>
</EditForm>

@code {
    [Inject]
    public DataContext Context { get; set; }

    public Location LocationData = new Location();

    public string FormSubmitMessage { get; set; } = "Form Data Not Submitted";

    public void HandleValidSubmit()
    {
        Context.Add(LocationData);
        Context.SaveChanges();
        FormSubmitMessage = "Form Data Submitted";

        LocationData = new Location();
    }
        public void HandleInvalidSubmit() => FormSubmitMessage = "Invalid Data Submitted";
}
I have added 2 ValidationMessage components to show individual validation messages for City and State fields. See below.
<ValidationMessage For="@(() => LocationData.City)" />
<ValidationMessage For="@(() => LocationData.State)" />
The ValidationMessage components are rendered as a div element containing “validation-message” CSS class.
Blazor Validation System also adds individual CSS Classes to form elements when they are edited by the user. This is the case when they pass or fail validations. We have described these CSS classes on the below table.
| Component | Description |
|---|---|
| modified | This CSS is added to the element when the user has edited it’s value. |
| valid | This CSS is added when the element passes valdiation. |
| invalid | This CSS is added when the element fails valdiation. |
We will also need to add these CSS classes in the stylesheet to increase the feel and look of the form. So add the following code to the validation.css file.
.validation-errors {
    background-color: #ff6a00;
    padding: 8px;
    font-size: 16px;
    font-weight: 500;
}

li.validation-message {
    color: #FFFFFF;
    font-weight: 500
}

div.validation-message {
    color: #ff6a00;
    font-weight: 500
}

modified.valid {
    border: solid 3px #ffd800;
}

.invalid {
    border: solid 3px #ff6a00;
}
Now run and check the functionality. The Blazor Form Validations work perfectly and we have shown this in the below video.
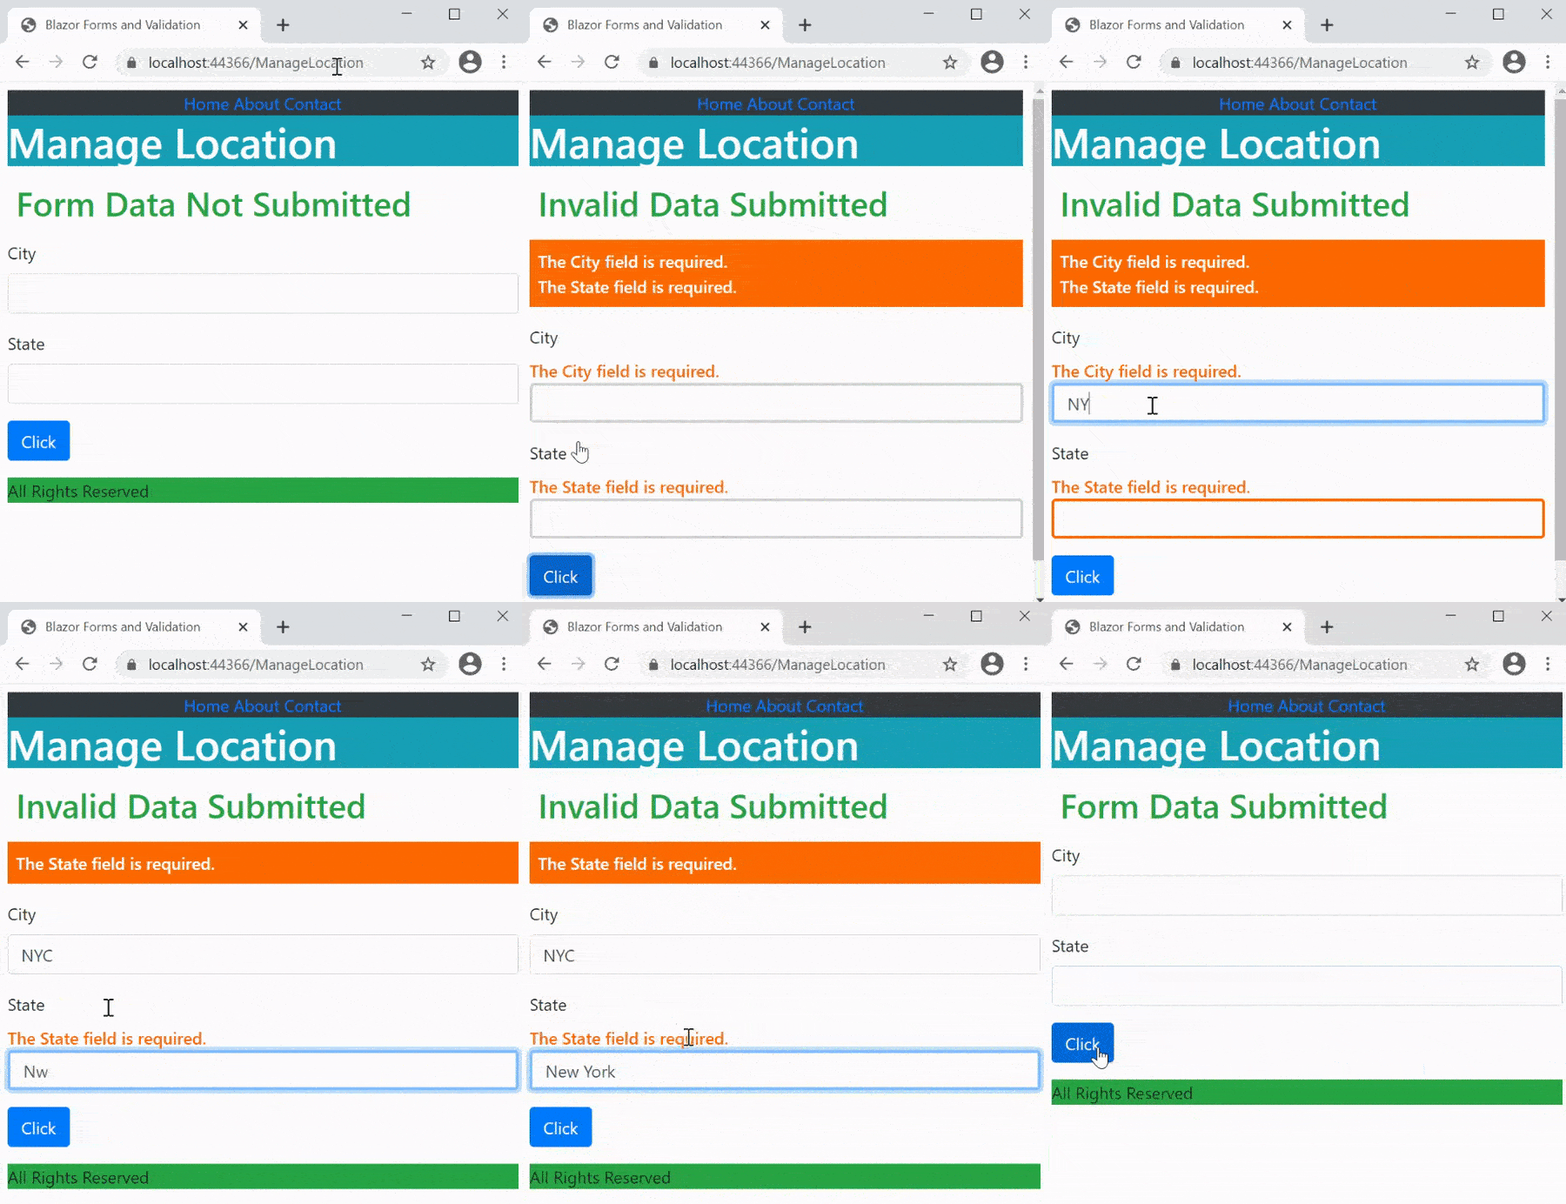
We get the errors messages as:
- The City field is required.
- The State field is required.
We can change their text using the ErrorMessage property that can be applied to the DataAnnotations attributes. In the below code we have applied it to the Location.cs class.
using System.ComponentModel.DataAnnotations;

namespace BlazorForms.Models
{
    public class Location
    {
        public int Id { get; set; }

        [Required(ErrorMessage = "Please add city")]
        [StringLength(50)]
        public string City { get; set; }

        [Required(ErrorMessage = "Please add state")]
        [StringLength(50)]
        public string State { get; set; }

        public IEnumerable<Student> Student_R { get; set; }
    }
}
Now the validation messages will become:
- Please add city
- Please add state
Reading of Location Records
In the above section we built the insert feature for Location. We will now create the feature for Reading of Location record in the same razor component.
We will first need to create 2 column design for the razor component. In the left column we will show the Create Location form while on the right column we will show all the Location Records. We will use Bootstrap to create this design. Below, we have shown the updated code of the ManageLocation.razor component.
This includes addition of new divs containing css classes – “container”, “row”, “col-sm-12”, “col-sm-5”, “col-sm-7”, which are bootstrap classes to create a 2-column design. There is also an HTML form element which will show all the location records. Notice the use of foreach loop to create tr elements for each row of records.
@page "/ManageLocation/{id:int}"
@page "/ManageLocation"

<link href="/validation.css" rel="stylesheet" />

<div class="container">
    <div class="row">
        <div class="col-sm-12">
            <h1 class="bg-info text-white">Manage Location</h1>
        </div>
        <div class="col-sm-5">
            <h2 class="text-success p-2">@FormSubmitMessage</h2>
            <EditForm Model="LocationData" OnValidSubmit="HandleValidSubmit" OnInvalidSubmit="HandleInvalidSubmit">
                <DataAnnotationsValidator />
                <ValidationSummary />

                <div class="form-group">
                    <label>City</label>
                    <ValidationMessage For="@(() => LocationData.City)" />
                    <InputText class="form-control" @bind-Value="LocationData.City" />
                </div>
                <div class="form-group">
                    <label>State</label>
                    <ValidationMessage For="@(() => LocationData.State)" />
                    <InputText class="form-control" @bind-Value="LocationData.State" />
                </div>
                <div class="form-group">
                    <button type="submit" class="btn btn-primary">Click</button>
                </div>
            </EditForm>
        </div>
        <div class="col-sm-7">
            <table class="table table-sm table-bordered table-striped ">
                <thead>
                    <tr>
                        <th>ID</th>
                        <th>City</th>
                        <th>State</th>
                    </tr>
                </thead>
                <tbody>
                    @foreach (Location a in Locations)
                    {
                        <tr>
                            <td>@a.Id</td>
                            <td>@a.City</td>
                            <td>@a.State</td>
                        </tr>
                    }
                </tbody>
            </table>
        </div>
    </div>
</div>
@code {
    [Inject]
    public DataContext Context { get; set; }

    public Location LocationData = new Location();

    public string FormSubmitMessage { get; set; } = "Form Data Not Submitted";

    public void HandleValidSubmit()
    {
        if (Id == 0)
            Context.Add(LocationData);
        Context.SaveChanges();

        UpdateBindings(0, "/ManageLocation", "Form Data Submitted");
        UpdateLocations();
    }

    public void HandleInvalidSubmit() => FormSubmitMessage = "Invalid Data Submitted";

    public List<Location> Locations = new List<Location>();

    protected override void OnInitialized()
    {
        UpdateLocations();
    }

    public void UpdateLocations()
    {
        if (Id != 0)
            LocationData = Context.Location.Where(a => a.Id == Id).FirstOrDefault();
        Locations = Context.Location.ToList();
    }

    [Parameter]
    public int Id { get; set; }

    [Inject]
    public NavigationManager NavManager { get; set; }

    public void UpdateBindings(int idValue, string NavigationValue, string FormSubmitValue)
    {
        Id = idValue;
        NavManager.NavigateTo(NavigationValue);
        FormSubmitMessage = FormSubmitValue;
        LocationData = new Location();
    }
}
There are also few more additions to the C# code which are shown in highlighted manner.
- The UpdateLocation() method task is to fetch Location records from the database. It fills 2 variables with the data –
a. LocationData with a single record whose Id is provided to the route variable ‘Id’.
b.Locations with all the location records.
- The UpdateBindings() method task is to update the URL of the razor component. So that if the Id of the record is send to the route then URL will become https://localhost:44366/ManageLocation/1, https://localhost:44366/ManageLocation/2 and so on.
It also updated the value of Id property based on the URL. Also changes the value of FormSubmitMessage property and initializes the ‘LocationData’ object.
This thing will come out to be very handy when creating the Edit and Delete feature.
- Added the OnInitialized() method which fetches all the Location records from the database.
Now run and see how it works. We have shown this in the below video:
Editing of Location Records
For doing editing, we will need to add a new column called Edit to the HTML table. In this column add a button and handle it’s click event. The necessary code to be added is shown in highlighted way.
@page "/ManageLocation/{id:int}"
@page "/ManageLocation"

<link href="/validation.css" rel="stylesheet" />

<div class="container">
    <div class="row">
        <div class="col-sm-12">
            <h1 class="bg-info text-white">Manage Location</h1>
        </div>
        <div class="col-sm-5">
            <h2 class="text-success p-2">@FormSubmitMessage</h2>
            <EditForm Model="LocationData" OnValidSubmit="HandleValidSubmit" OnInvalidSubmit="HandleInvalidSubmit">
                <DataAnnotationsValidator />
                <ValidationSummary />

                <div class="form-group">
                    <label>City</label>
                    <ValidationMessage For="@(() => LocationData.City)" />
                    <InputText class="form-control" @bind-Value="LocationData.City" />
                </div>
                <div class="form-group">
                    <label>State</label>
                    <ValidationMessage For="@(() => LocationData.State)" />
                    <InputText class="form-control" @bind-Value="LocationData.State" />
                </div>
                <div class="form-group">
                    <button type="submit" class="btn btn-primary">Click</button>
                </div>
            </EditForm>
        </div>
        <div class="col-sm-7">
            <table class="table table-sm table-bordered table-striped ">
                <thead>
                    <tr>
                        <th>ID</th>
                        <th>City</th>
                        <th>State</th>
                        <th>Edit</th>
                    </tr>
                </thead>
                <tbody>
                    @foreach (Location a in Locations)
                    {
                    <tr>
                        <td>@a.Id</td>
                        <td>@a.City</td>
                        <td>@a.State</td>
                        <td>
                            <button class="btn btn-sm btn-warning"
                                    @onclick="@(() => Edit(a))">
                                Edit
                            </button>
                        </td>
                    </tr>
                    }
                </tbody>
            </table>
        </div>
    </div>
</div>

@code {
    [Inject]
    public DataContext Context { get; set; }

    public Location LocationData = new Location();

    public string FormSubmitMessage { get; set; } = "Form Data Not Submitted";

    public void HandleValidSubmit()
    {
        if (Id == 0)
            Context.Add(LocationData);
        Context.SaveChanges();

        UpdateBindings(0, "/ManageLocation", "Form Data Submitted");
        UpdateLocations();
    }

    public void HandleInvalidSubmit() => FormSubmitMessage = "Invalid Data Submitted";

    public List<Location> Locations = new List<Location>();

    protected override void OnInitialized()
    {
        UpdateLocations();
    }

    public void UpdateLocations()
    {
        if (Id != 0)
            LocationData = Context.Location.Where(a => a.Id == Id).FirstOrDefault();
        Locations = Context.Location.ToList();
    }

    [Parameter]
    public int Id { get; set; }

    [Inject]
    public NavigationManager NavManager { get; set; }

    public void UpdateBindings(int idValue, string NavigationValue, string FormSubmitValue)
    {
        Id = idValue;
        NavManager.NavigateTo(NavigationValue);
        FormSubmitMessage = FormSubmitValue;
        LocationData = new Location();
    }

    public void Edit(Location a)
    {
        UpdateBindings(a.Id, "/ManageLocation/" + a.Id, "Form Data Not Submitted");
        UpdateLocations();
    }
}
The Edit button will call the Edit() hander which will update the bindings and fill the variables with Location records.
Notice the code of the HandleValidSubmit handler. It will check if the Id property is 0, in that case it will insert the record, else it will update the record. This is the main reason why the UpdateBindings function also updates the Id property value so that both insertion and updation of the records can be done from the same method.
The below video shows it’s working. Note down the URL change in the browser when the edit button is clicked.
Deletion of Location Records
The final thing to do here is to create the deletion feature. So, add a delete column to the html table and add a new delete button inside it, also handle it’s click event. The necessary code to be added is shown in highlighted way below.
@page "/ManageLocation/{id:int}"
@page "/ManageLocation"

<link href="/validation.css" rel="stylesheet" />

<div class="container">
    <div class="row">
        <div class="col-sm-12">
            <h1 class="bg-info text-white">Manage Location</h1>
        </div>
        <div class="col-sm-5">
            <h2 class="text-success p-2">@FormSubmitMessage</h2>
            <EditForm Model="LocationData" OnValidSubmit="HandleValidSubmit" OnInvalidSubmit="HandleInvalidSubmit">
                <DataAnnotationsValidator />
                <ValidationSummary />

                <div class="form-group">
                    <label>City</label>
                    <ValidationMessage For="@(() => LocationData.City)" />
                    <InputText class="form-control" @bind-Value="LocationData.City" />
                </div>
                <div class="form-group">
                    <label>State</label>
                    <ValidationMessage For="@(() => LocationData.State)" />
                    <InputText class="form-control" @bind-Value="LocationData.State" />
                </div>
                <div class="form-group">
                    <button type="submit" class="btn btn-primary">Click</button>
                </div>
            </EditForm>
        </div>
        <div class="col-sm-7">
            <table class="table table-sm table-bordered table-striped ">
                <thead>
                    <tr>
                        <th>ID</th>
                        <th>City</th>
                        <th>State</th>
                        <th>Edit</th>
                        <th>Delete</th>
                    </tr>
                </thead>
                <tbody>
                    @foreach (Location a in Locations)
                    {
                        <tr>
                            <td>@a.Id</td>
                            <td>@a.City</td>
                            <td>@a.State</td>
                            <td>
                                <button class="btn btn-sm btn-warning"
                                        @onclick="@(() => Edit(a))">
                                    Edit
                                </button>
                            </td>
                            <td>
                                <button class="btn btn-sm btn-danger"
                                        @onclick="@(() => Delete(a))">
                                    Delete
                                </button>
                            </td>
                        </tr>
                    }
                </tbody>
            </table>
        </div>
    </div>
</div>

@code {
    [Inject]
    public DataContext Context { get; set; }

    public Location LocationData = new Location();

    public string FormSubmitMessage { get; set; } = "Form Data Not Submitted";

    public void HandleValidSubmit()
    {
        if (Id == 0)
            Context.Add(LocationData);
        Context.SaveChanges();

        UpdateBindings(0, "/ManageLocation", "Form Data Submitted");
        UpdateLocations();
    }

    public void HandleInvalidSubmit() => FormSubmitMessage = "Invalid Data Submitted";

    public List<Location> Locations = new List<Location>();

    protected override void OnInitialized()
    {
        UpdateLocations();
    }

    public void UpdateLocations()
    {
        if (Id != 0)
            LocationData = Context.Location.Where(a => a.Id == Id).FirstOrDefault();
        Locations = Context.Location.ToList();
    }

    [Parameter]
    public int Id { get; set; }

    [Inject]
    public NavigationManager NavManager { get; set; }

    public void Edit(Location a)
    {
        UpdateBindings(a.Id, "/ManageLocation/" + a.Id, "Form Data Not Submitted");
        UpdateLocations();
    }

    public void Delete(Location a)
    {
        if (a.Id == LocationData.Id)
        {
            UpdateBindings(0, "/ManageLocation", "Form Data Not Submitted");
        }

        Context.Remove(a);
        Context.SaveChanges();
        UpdateLocations();
    }

    public void UpdateBindings(int idValue, string NavigationValue, string FormSubmitValue)
    {
        Id = idValue;
        NavManager.NavigateTo(NavigationValue);
        FormSubmitMessage = FormSubmitValue;
        LocationData = new Location();
    }
}
The deletion of a record is done by the 2 code lines:
Context.Remove(a);
Context.SaveChanges();
The delete handler gets the record info in it’s parameter “a” and uses it to update the bindings and locations. See it’s working in the below video.
You can download the source codes:
In this tutorial you learned how to work with Blazor Form Components and perform Form Validations by creating a full feature from the very beginning. This is an important topic which you should understand fully. In the next tutorial we will create CRUD operations for the Student entity.





 Welcome to YogiHosting - A Programming Tutorial Website. It is used by millions of people around the world to learn and explore about ASP.NET Core, Blazor, jQuery, JavaScript, Docker, Kubernetes and other topics.
Hi, when I try to enter the command
“dotnet ef migrations add Migration1”
I get the error
“dotnet : Could not execute because the specified command or file was not found.
At line:1 char:1
+ dotnet ef migrations add Migration1
+ ~~~~~~~~~~~~~~~~~~~~~~~~~~~~~~~~~~~
+ CategoryInfo : NotSpecified: (Could not execu… was not found.:String) [], RemoteException
+ FullyQualifiedErrorId : NativeCommandError
”
I have installed all the EF packages and do not know what else may be causing this
Hello Don,
Make sure to update it to latest version by running the command
dotnet tool update --global dotnet-ef. Also note that you need to run migrations from the same directory where your Startup.cs class lives. Refer my tutorial on Migrations – Migrations in Entity Framework Core.Thank you